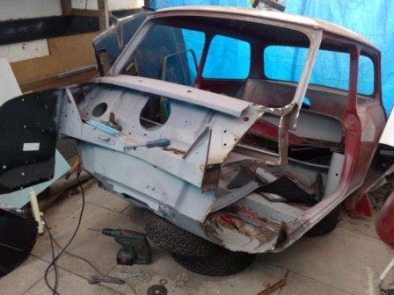
So, it’s time for the left front corner to receive the same treatment as the right.
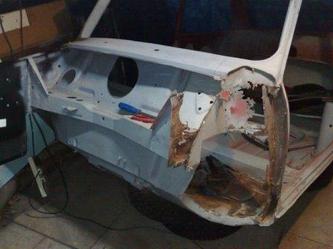
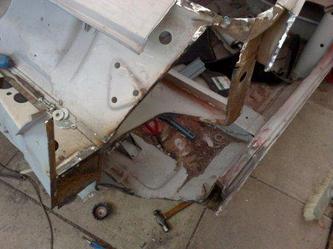
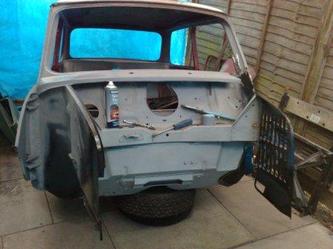
First up is the big strip back, as before I have carefully removed all the rotten metal, back to the panels that that remain solid, I’ve been careful with the grinder not to damage the return elements of these panels, so I can weld the new ones in, using the same joints as would have been there when the car was new.
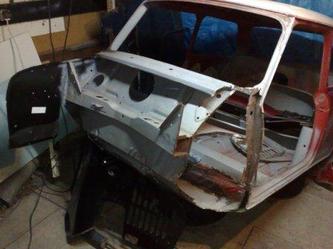
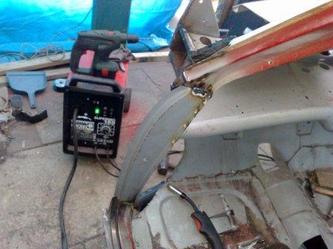
In this third picture and the ones below you can see the extent of the strip back on this side, with virtually the whole “A” pillar being removed.
It might look extreme but even with all this structure taken out the remaining parts are not really flexible at all. This is another advantage of tackling this type of work in bite size chunks. It leaves as much of the car as possible supporting the area that’s receiving the attention. If much more had needed to come out, I would have either needed to split this area into a smaller section (replacing the inner wing before tackling the door shut for example), or I would have needed to brace the opening to ensure it would not distort during the whole process.
Then it’s time to start adding the new panels. The door shut is the first part to go in, although its location was quite obvious, I did carry out an over check by offering the door into position before, during and after welding it into place.
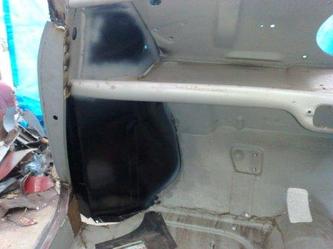
Once this is in place it’s time for the inner wing. I use the same “puddle” welding technique as described in my previous post. And repeating the process from the other side, I have bolted the inner wing securely in place at the suspension bracket fixing points, which in this case is nearly enough to position the entire panel. Just a couple of grips keep the rest tight to the car along all the other joints. Here we are – it’s tip of the day time! Always check the position and tightness of the joints during the welding process, the heat can distort the panels (both new and old) so it’s important to keep an eye on what’s happening so you can react to it before everything is too solid.
Once this is in place it’s time for the inner wing. I use the same “puddle” welding technique as described in my previous post. And repeating the process from the other side, I have bolted the inner wing securely in place at the suspension bracket fixing points, which in this case is nearly enough to position the entire panel. Just a couple of grips keep the rest tight to the car along all the other joints. Here we are – it’s tip of the day time! Always check the position and tightness of the joints during the welding process, the heat can distort the panels (both new and old) so it’s important to keep an eye on what’s happening so you can react to it before everything is too solid.
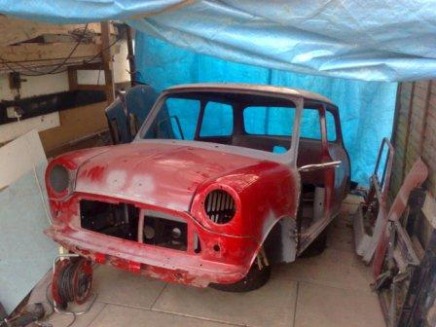
The inner and outer “A” panels are then added along with the scuttle repair panel, and there is a little "in-fill" plate that sit's under the end's of the scuttle panel (which incidentally wasn't evident on this side in the mess that was removed, perhaps a reason for the rot having got a little further here than on the right side?). And that’s it! The left side is now up to the same standard as the right.
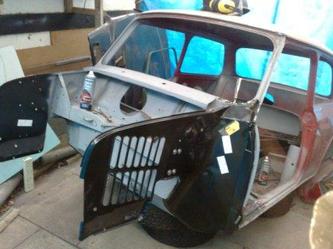
The last thing I have managed is a quick alignment of the whole front end. I have bolted the front sub frame into place, and am using that as the jig for the location of the front panel, I can then offer the wings into position and hold them in place with grips, finally the bonnet is rested in place to make sure the shut lines will be true, and there you have it, a front end again (although not that solid just yet!)
Before welding there is a little bit more dressing back of the joints to be done, to remove the last of the old panesl and the holes for the puddle (or spot) welding need to be drilled. I will also seal the seams that are difficult to reach once the outer panels are back in place. But that will have to wait for another day.

 RSS Feed
