It's been a busy few days! This update will take you through the gearbox rebuild, and the re-assembly of the engine (head block and gearbox). After this I have another exciting update to take you through as I've had the excitement of getting the shell back from the shot blasters. So I can show you a few interesting bits and pieces that will definitely need some attention!
But first things first, "The Gearbox".
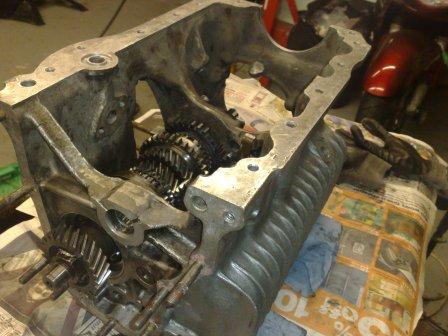
Having split it from the bottom of the engine before reconditioning the block and bottom end, the first job was to completely strip all the components and assess them for wear.
Although I found a missing thrust washer on the crank for the primary gear, which explains some of the whining noise, I still need to make sure there are no other maladies deeper inside the box itself.
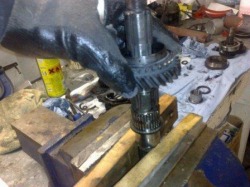
The first of those maladies became evident very early on, the outer input shaft (1st motion shaft) bearing was starting to disintegrate, that is the plastic carrier for the rollers was in pieces, luckily the rollers were still in place and there was no sign of damage to the shaft, so a new bearing, complete with the race that sits in the clutch housing was sourced.
But first things first, "The Gearbox".
Having split it from the bottom of the engine before reconditioning the block and bottom end, the first job was to completely strip all the components and assess them for wear.
Although I found a missing thrust washer on the crank for the primary gear, which explains some of the whining noise, I still need to make sure there are no other maladies deeper inside the box itself.
The first of those maladies became evident very early on, the outer input shaft (1st motion shaft) bearing was starting to disintegrate, that is the plastic carrier for the rollers was in pieces, luckily the rollers were still in place and there was no sign of damage to the shaft, so a new bearing, complete with the race that sits in the clutch housing was sourced.
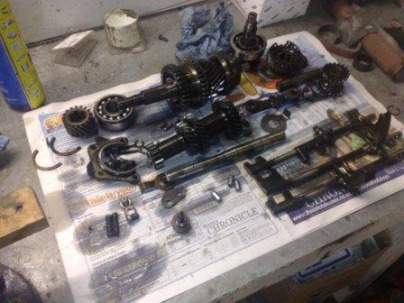
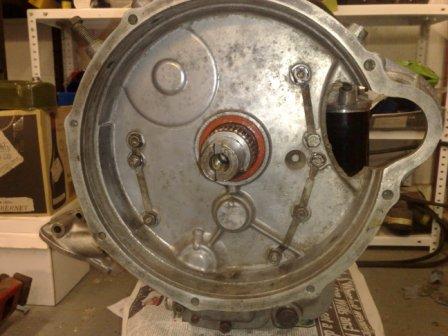
Gearbox Internals Ready for Cleaning and Inspection
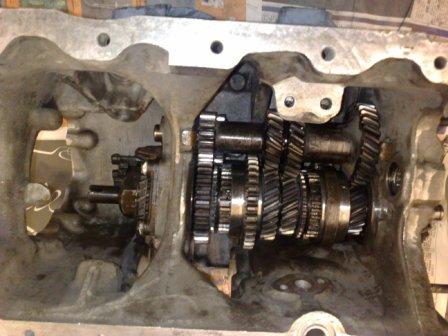
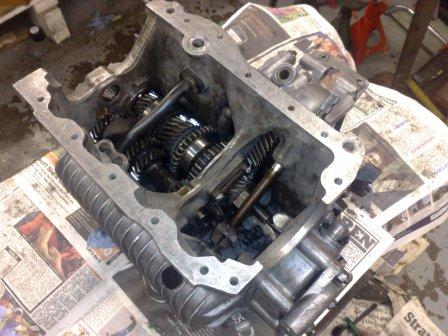
Once all the parts were removed (see pic) the inspection continued. The baulk rings all appear fine, very little wear (confirmed by the fact that there were no gear selection issues when driving the car). The other bearings were also all ok, until I got to the ones inside the lay-shaft (2nd motion shaft), they were showing quite a bit of pitting and I know they are a Mini weak link, so I've replace both of those too. Otherwise, all the gears are fine, the shafts don't have any wear either. the selectors, detent springs and detent balls just needed to be dug out of the sludge in the bottom of the casing (here’s an obvious tip, make sure you have all the exits covered when you put an airline into the hole to help move the stuck detent balls! if not the best that will happen is you will be showered in oily sludge but that will seem minor if you get shot by a ball that you have missed!)
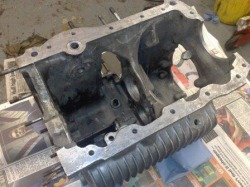
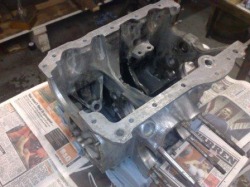
Once apart everything was cleaned thoroughly (good old Nitro Morse to the rescue once again), the empty casing also had a jet wash before being thoroughly dried.
Once apart everything was cleaned thoroughly (good old Nitro Morse to the rescue once again), the empty casing also had a jet wash before being thoroughly dried.
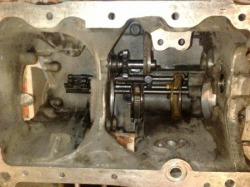
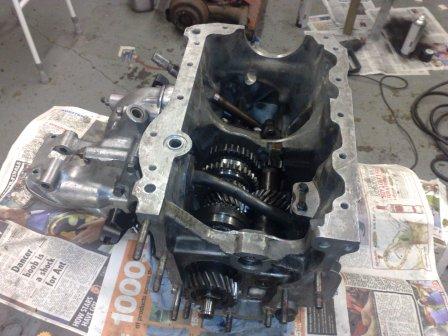
Re-assembly started with the selectors, just a little grease on all the moving surfaces is enough, after all everything will be submerged in oil down here in the bottom of the sump well before the engine is started.
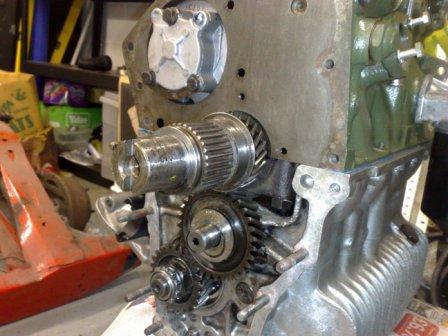
Then the output (or 3rd motion) shaft is re-assembled. It's worth knowing that unless you're changing the big primary shaft bearings the Mini gearbox can be re-build without the need for a press. This is becaues the gears and syncro hubs are retained by an ingenious spring and plunger arrangement in the base of the shaft splines, it's a bit of a fiddle to assemble, but it works really well. I guess it's a system that's too expensive in today's manufacturing world (it requires a drilling in the shaft, a spring, ball, plunger and special washer, as opposed to a press fit) but it certainly makes re-conditioning a doddle.
Then the output (or 3rd motion) shaft is re-assembled. It's worth knowing that unless you're changing the big primary shaft bearings the Mini gearbox can be re-build without the need for a press. This is becaues the gears and syncro hubs are retained by an ingenious spring and plunger arrangement in the base of the shaft splines, it's a bit of a fiddle to assemble, but it works really well. I guess it's a system that's too expensive in today's manufacturing world (it requires a drilling in the shaft, a spring, ball, plunger and special washer, as opposed to a press fit) but it certainly makes re-conditioning a doddle.
Selectors reassembled
1st gear going onto the output shaft
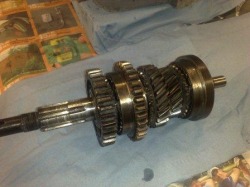
The complete output shaft (gears and syncro hubs)
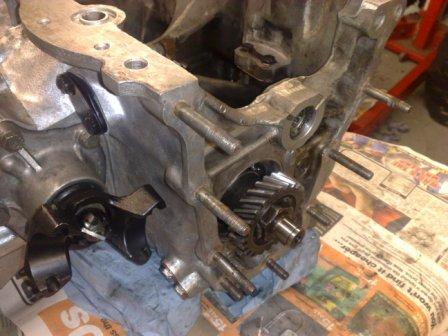
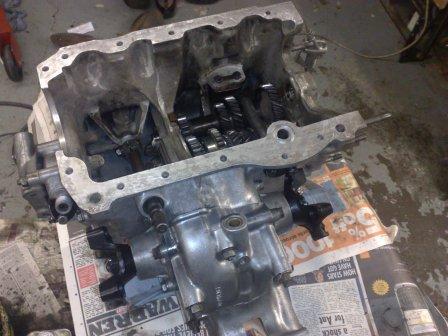
So once the shaft is back together, it's time for the major re-assembly to begin, making sure to trap the oil pick up strainer into the casing before the lay shaft is fitted (it's a big job to fit if you forget it and find it on the bench at the end!)
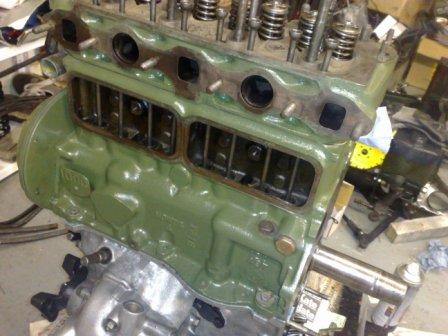
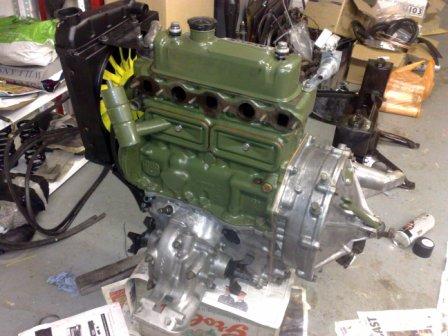
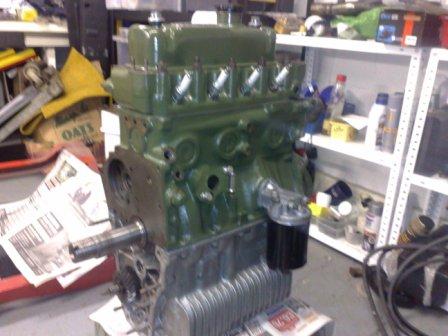
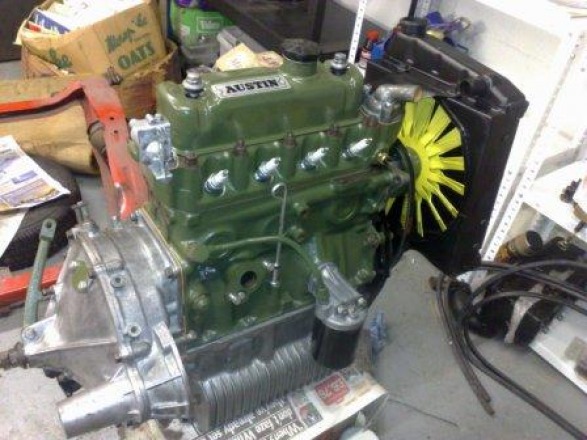
Once it's all back together it's ready for re-assembly to the block then the whole assembly gets turned back up the right way and the head can go on!
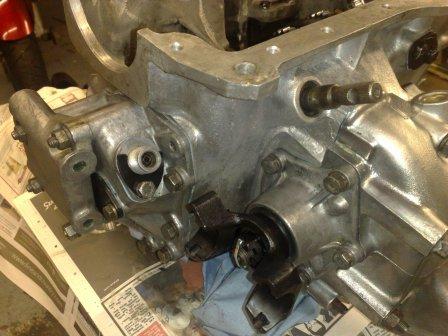
With nice clean aluminum clutch casing and gearbox married to the shiny green block and head, it's all starting to look rather special! (even if I say so myself!)
Once it's all back together it's ready for re-assembly to the block then the whole assembly gets turned back up the right way and the head can go on!
With nice clean aluminum clutch casing and gearbox married to the shiny green block and head, it's all starting to look rather special! (even if I say so myself!)


 RSS Feed
