Now the body shell is back from the paint shop I'm getting excited about the prospect of starting the re-assembly process, however before I can get carriend away there is some more restoration required.
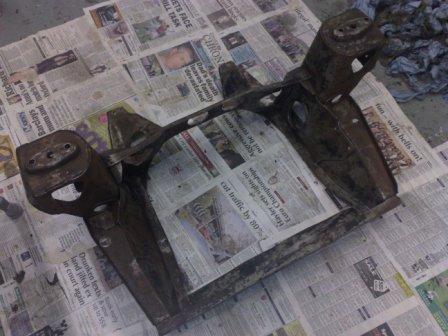
First up is the Front Subframe. Fortunately this is in remarkably good condition and will only need stripping, rust protecting and painting, here are some pictures of it all stripped down.
First up is the Front Subframe. Fortunately this is in remarkably good condition and will only need stripping, rust protecting and painting, here are some pictures of it all stripped down.


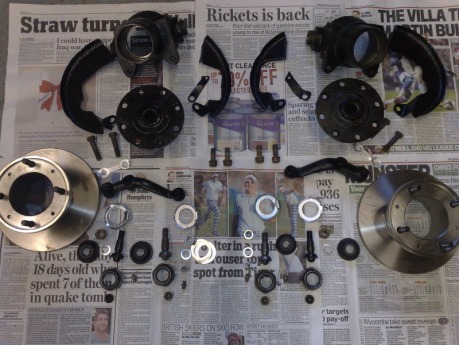
All the other components receive much the same treatment, and where necessary I have replaced parts with new components. In this layout picture you can see I have new ball joints and brake discs, I'll also fit new wheel bearings and rubber bushes as a mater of course. The hubs, drive flanges and back plates (once stripped and re-painted with tough engine enamel paint), are ready to be used again, hopefully they will last another 41 years!
Here's something that you might not know. It's fairly common knowledge that the early Mini Coopers and Cooper S cars were fitted with front discs, in place of the standard cars front drum brakes. What you might not know is that on the Mk1 and Mk1 two cars the Cooper discs were 7" diameter while those on the Cooper S were 7 1/2" parts.
From Mk3 all the Coopers (whether S or not) used the 7 1/2" set up. This means that the 7" parts are getting quite difficult to find and it's not just the discs that are unique, the calipers, brake pads and drive flanges are all matched to the 7" specification.
Once all the parts are ready I can fit the suspension and brake lines back into the subframe. I have left the hubs off for the moment because it's mich easier to handle the subframe assembly without them, so they will be fitted after the subframe is in the car.

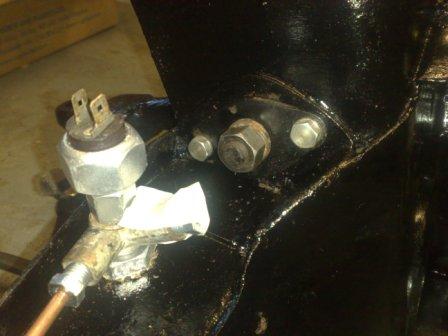

Next for attention is the steering rack, I follow much the same process as the subframe, but on the rack there are some measurements to make to ensure the right shims are fitted, and the running clearance is to specification once it's re-assembled.
Below are the "before" pictures, unfortunately the "during" and "after" pictures have been corrupted, so you'll have to wait to see just how nice and shiny I have managed to make it!
The next job I’m really looking forward to.... a chance to start fitting parts to the fresh body shell.
Below are the "before" pictures, unfortunately the "during" and "after" pictures have been corrupted, so you'll have to wait to see just how nice and shiny I have managed to make it!
The next job I’m really looking forward to.... a chance to start fitting parts to the fresh body shell.


 RSS Feed
