• Home
  • About Us
  • Projects
    • Grey Mini Project
    • Peugeot 205 GTI Restoration
    • 1969 Mini Cooper Project Description >
      • Blog for Mini Cooper Restoration
      • 1969 Mini Cooper Before Pictures
      • 1969 Mini Cooper During Pictures
      • 1969 Mini Cooper Finished Pictures
    • 1975 Mini Pick Up
  • News Blog
  • Contact
Born Again Cars

Finishing Touches!

2/6/2014

0 Comments

 
Hi Thanks, for checking out my blog that's covering the "Bulkhead Forwards" restoration of my Peugeot 205 1.9 GTI.
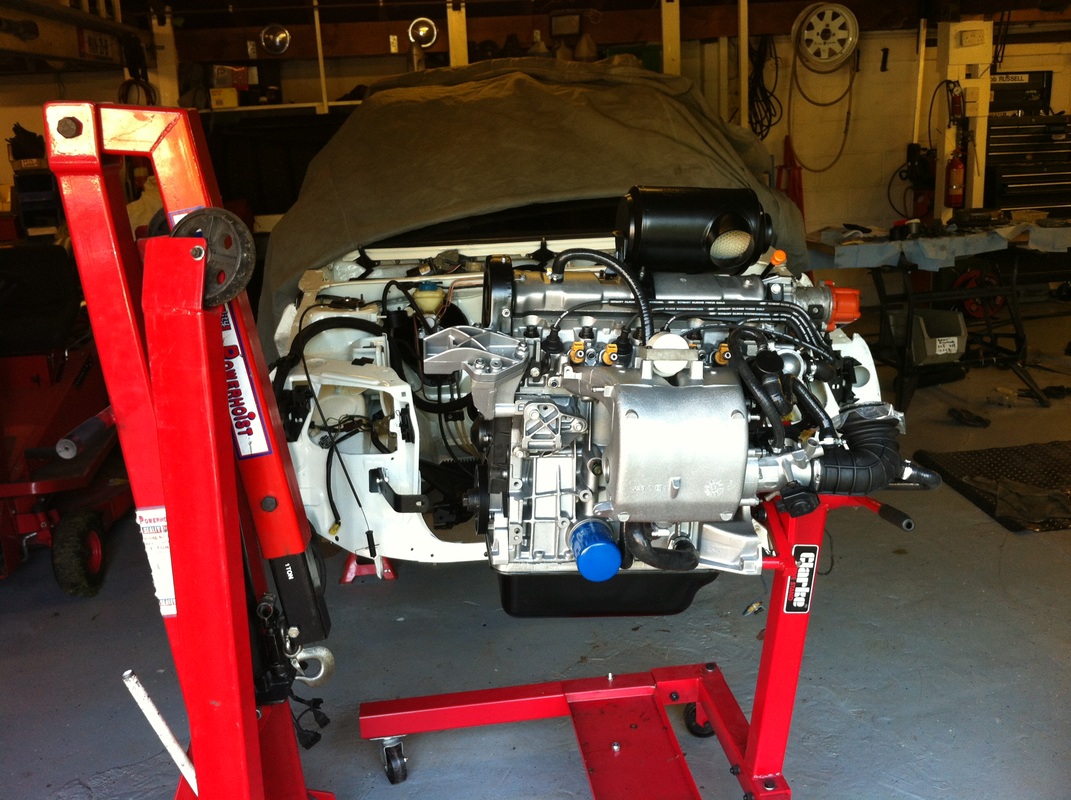
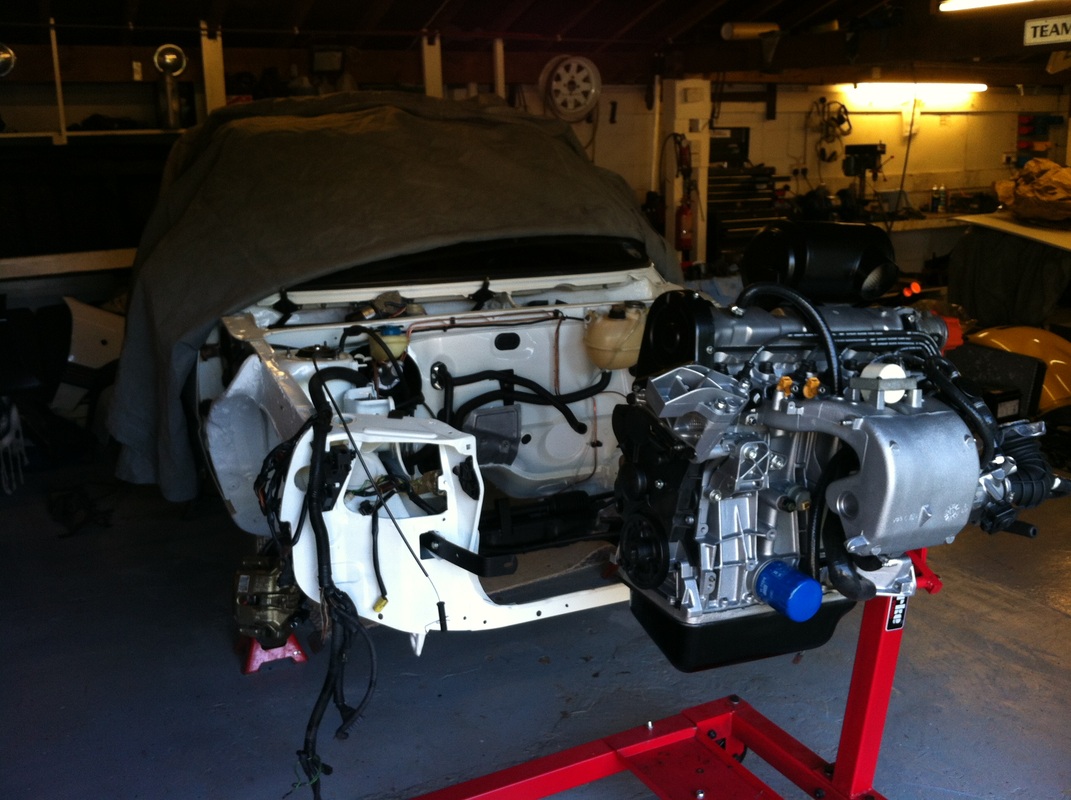
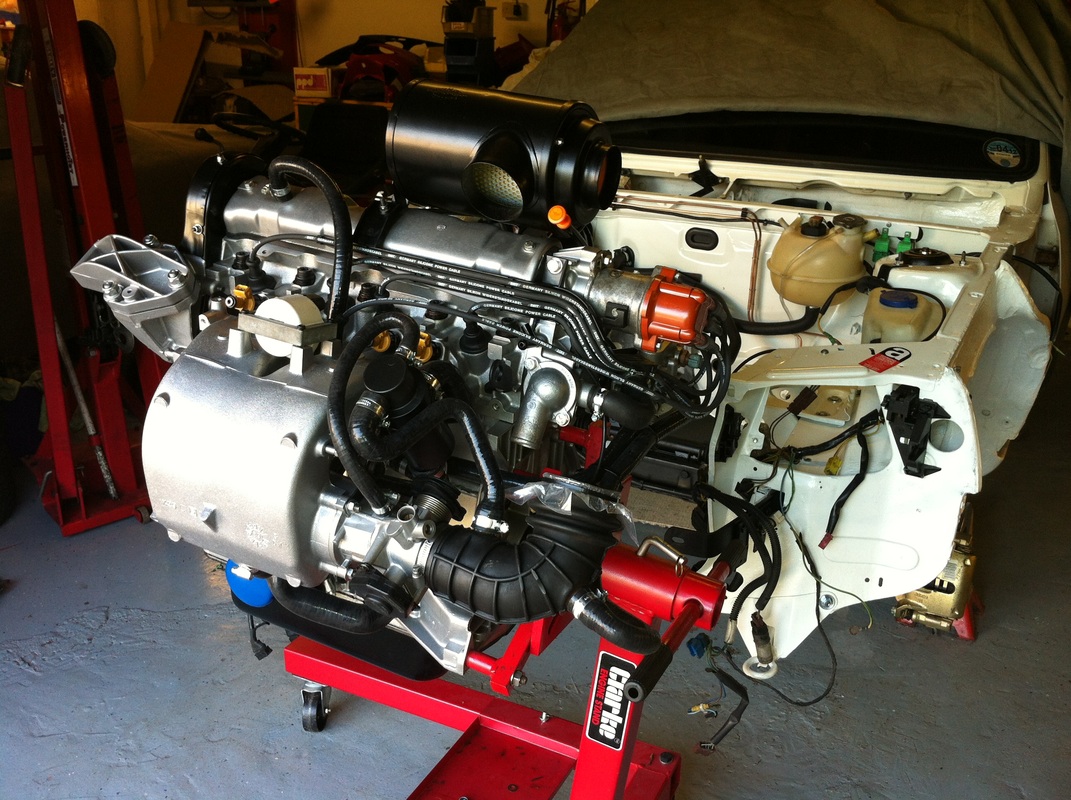
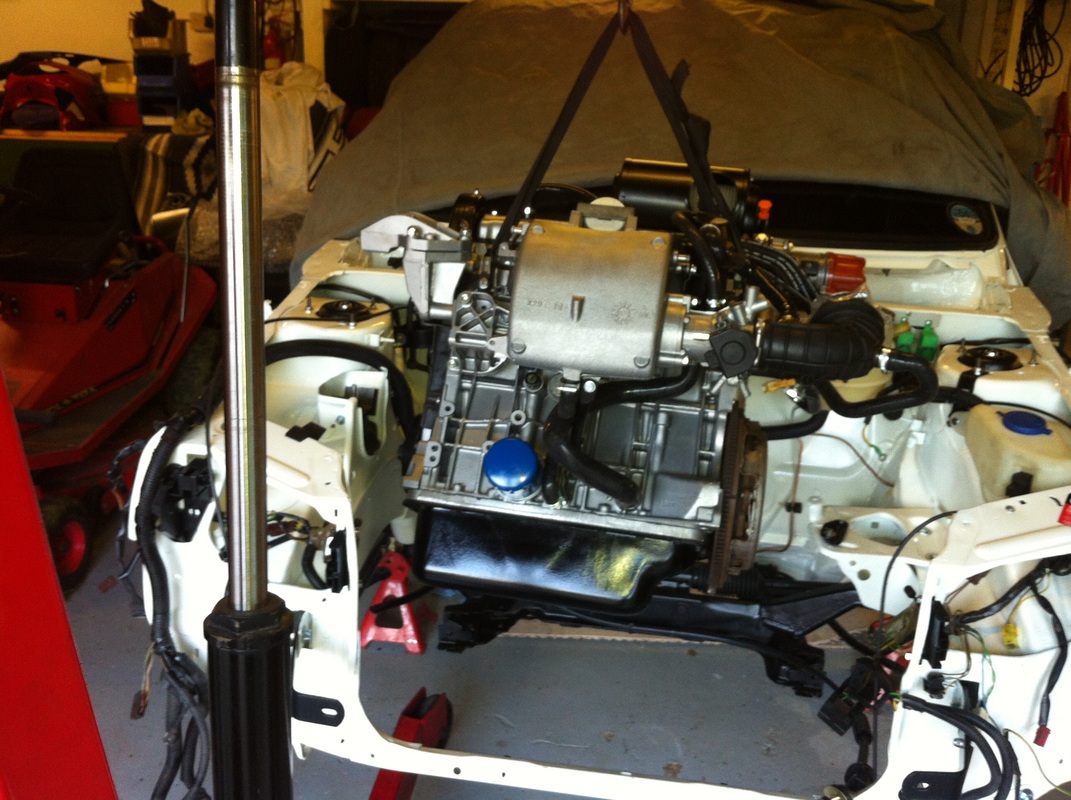
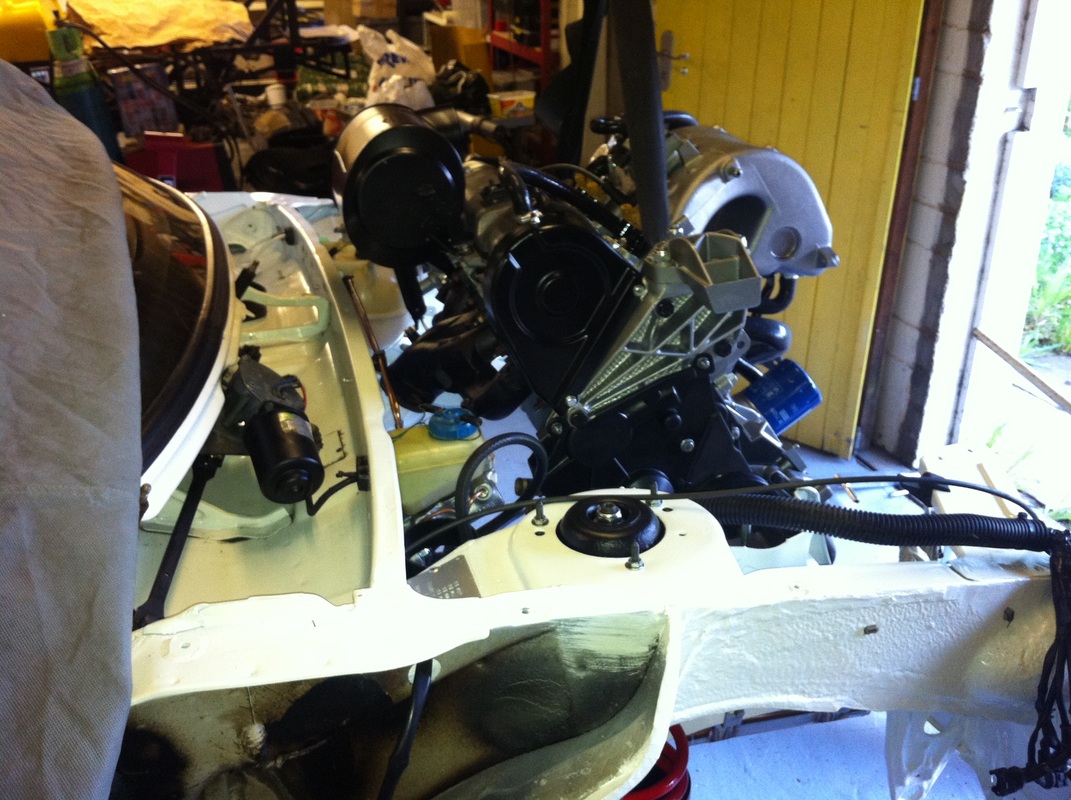
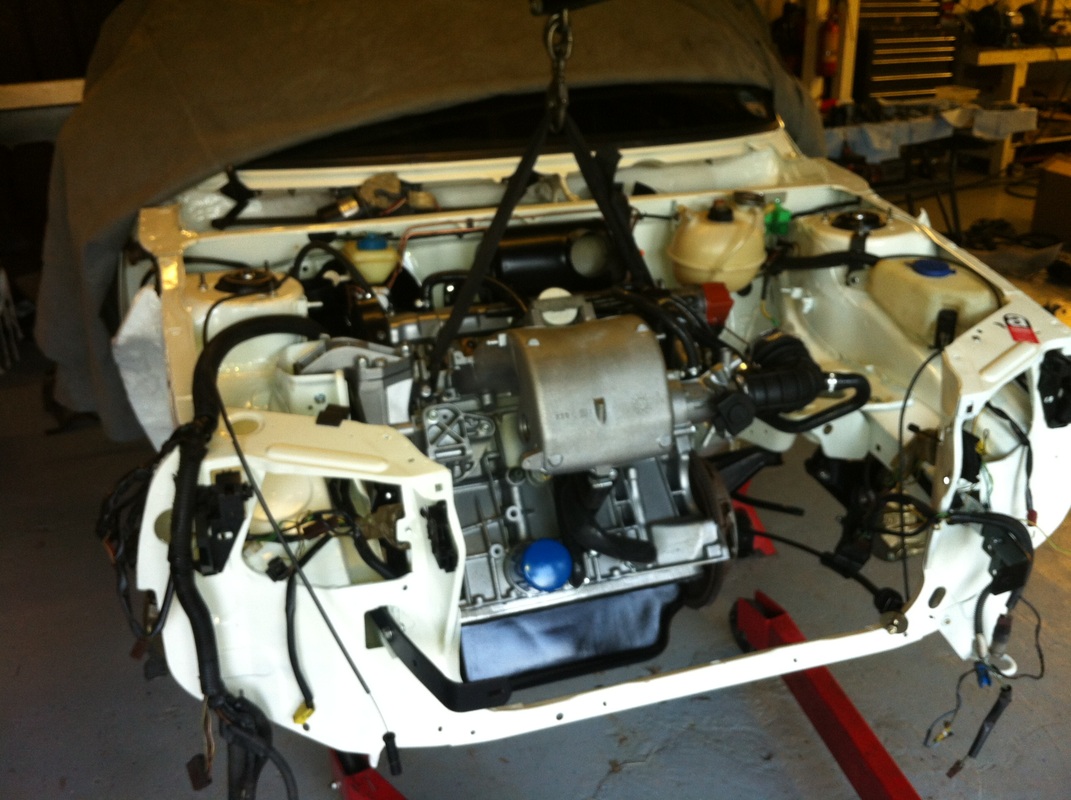
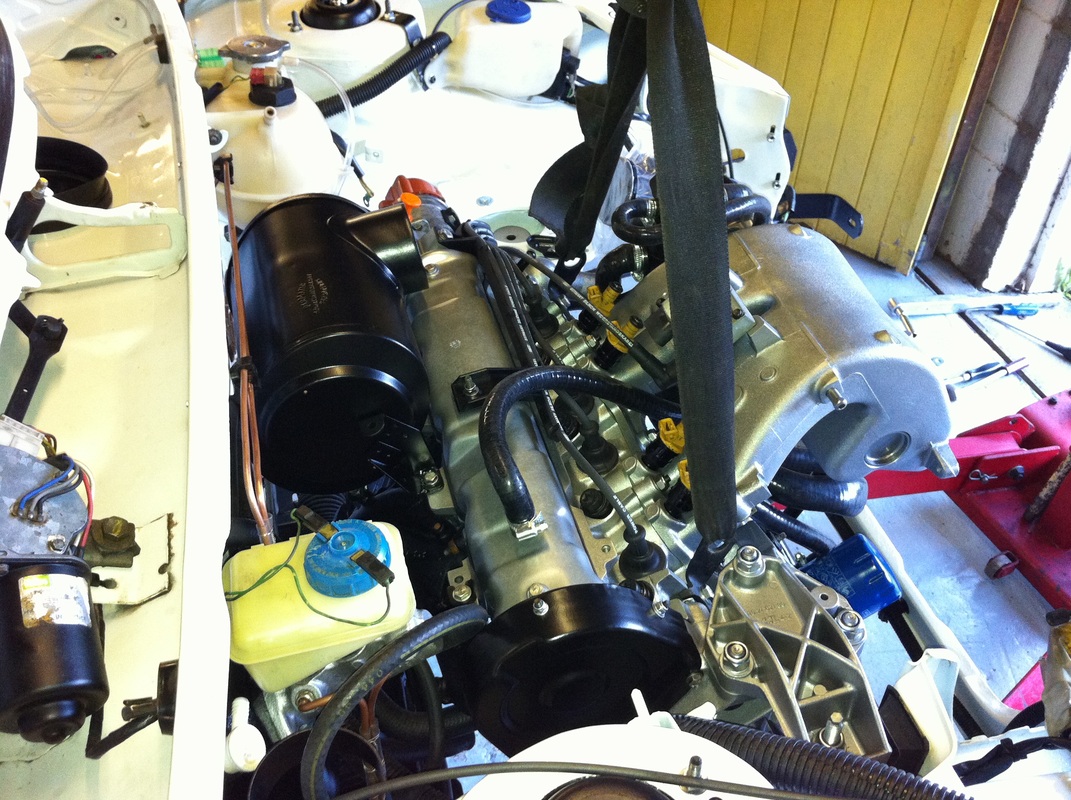
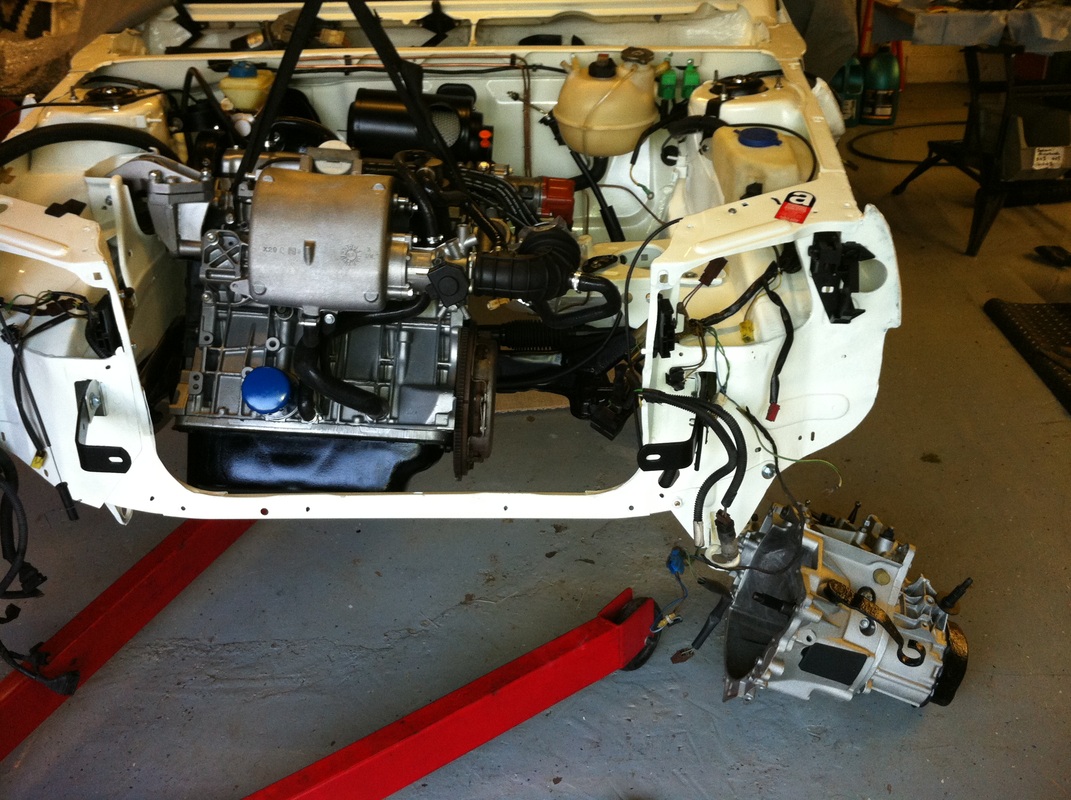
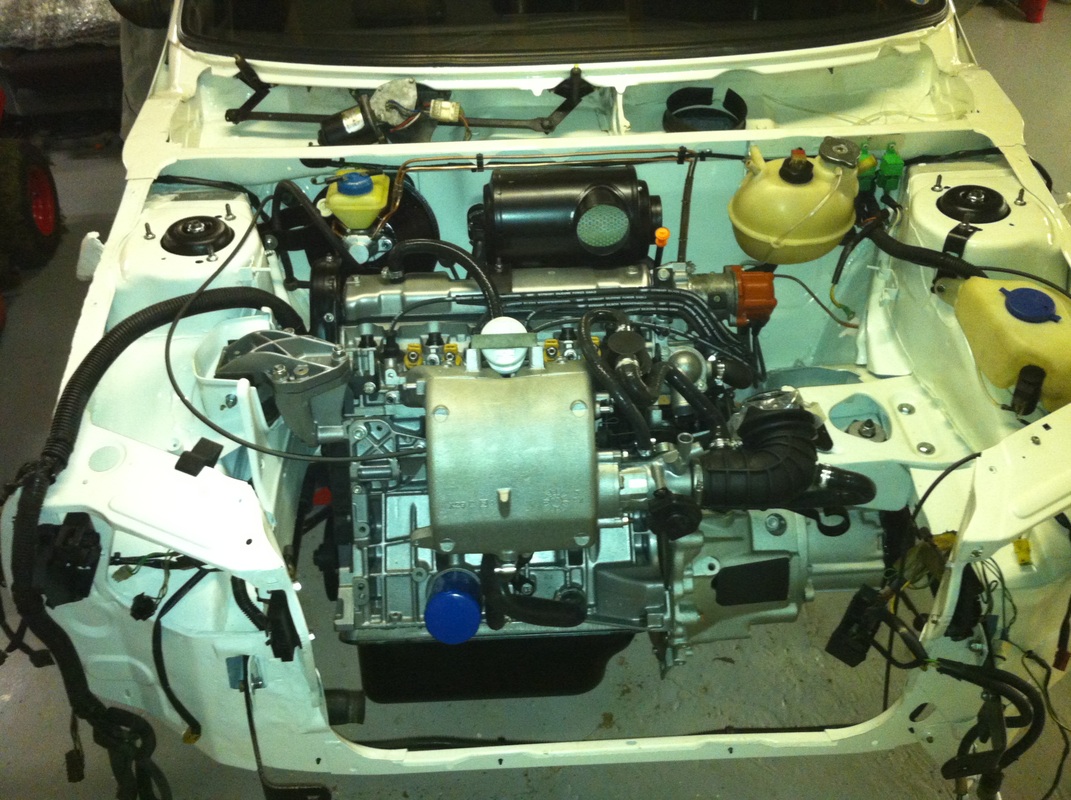
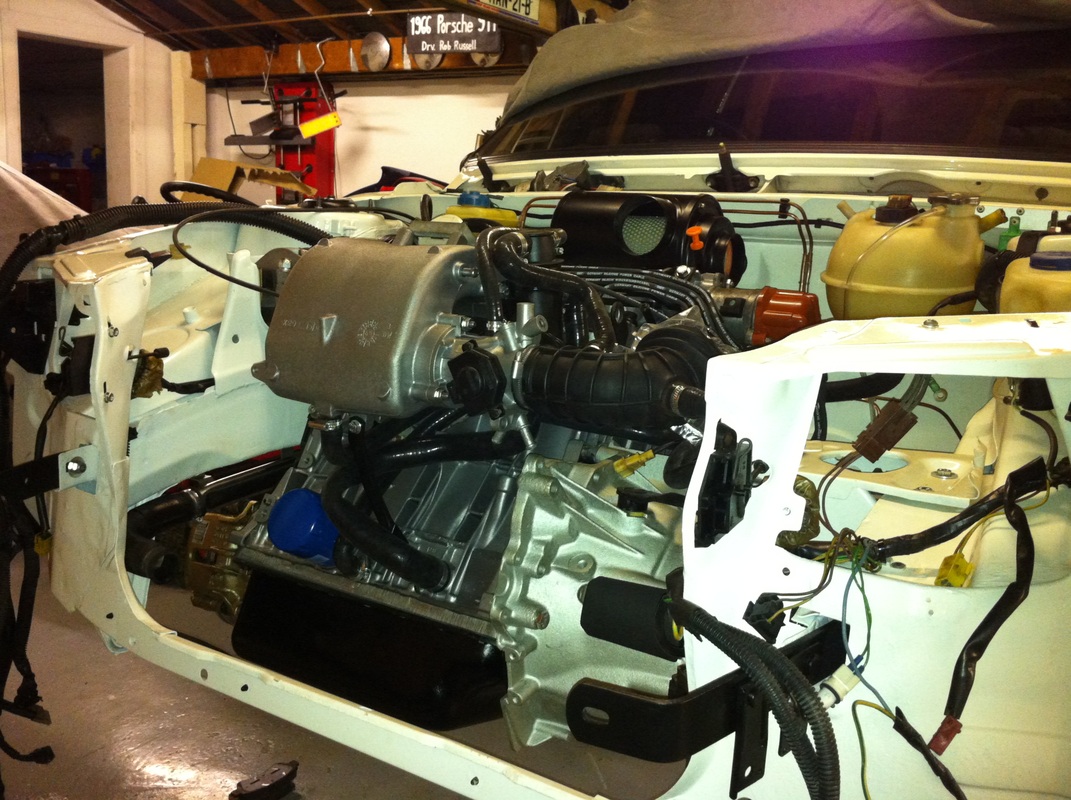
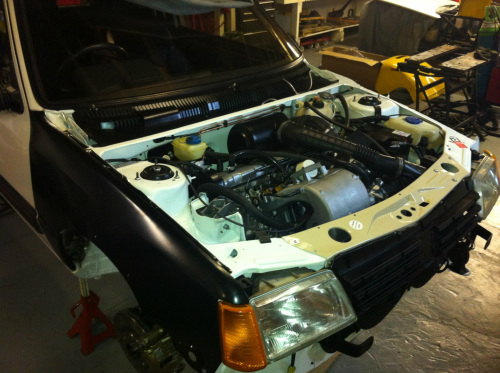
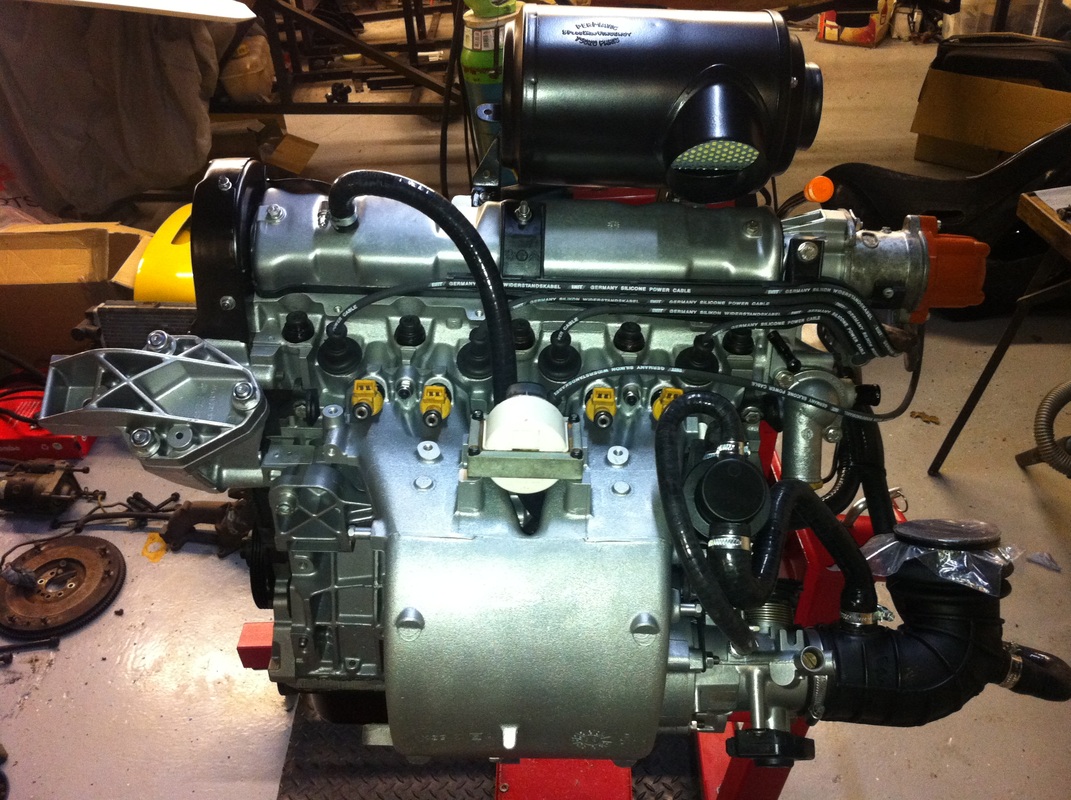
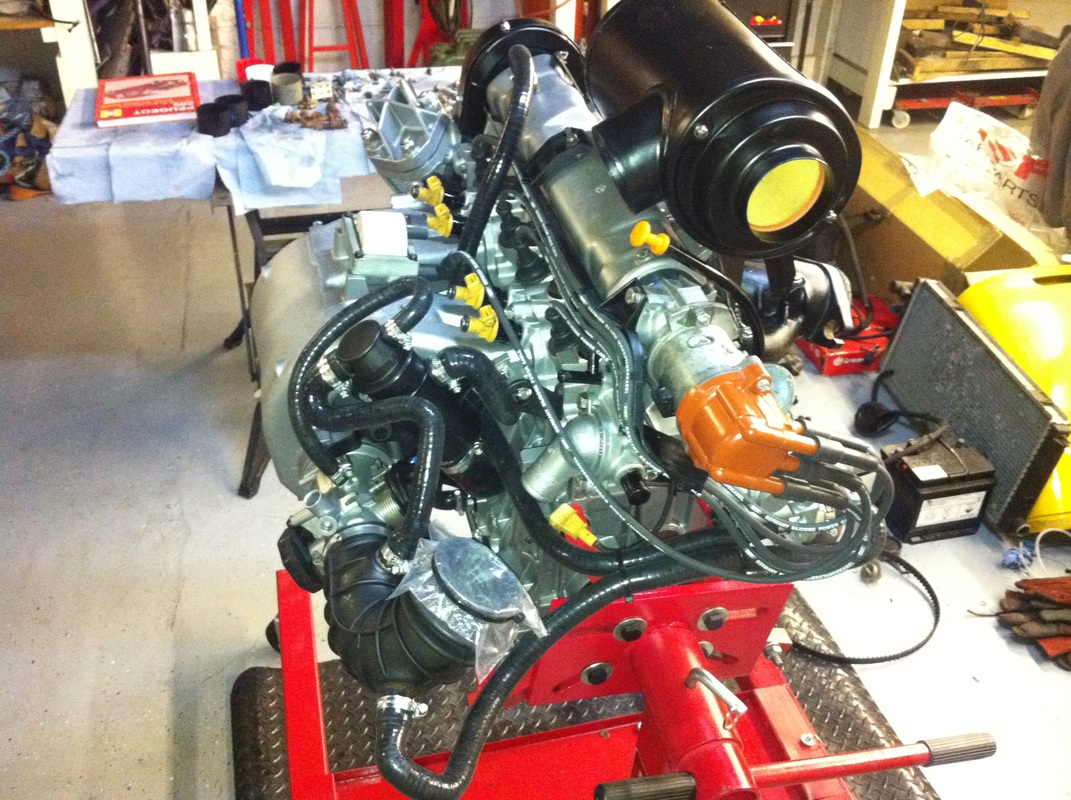
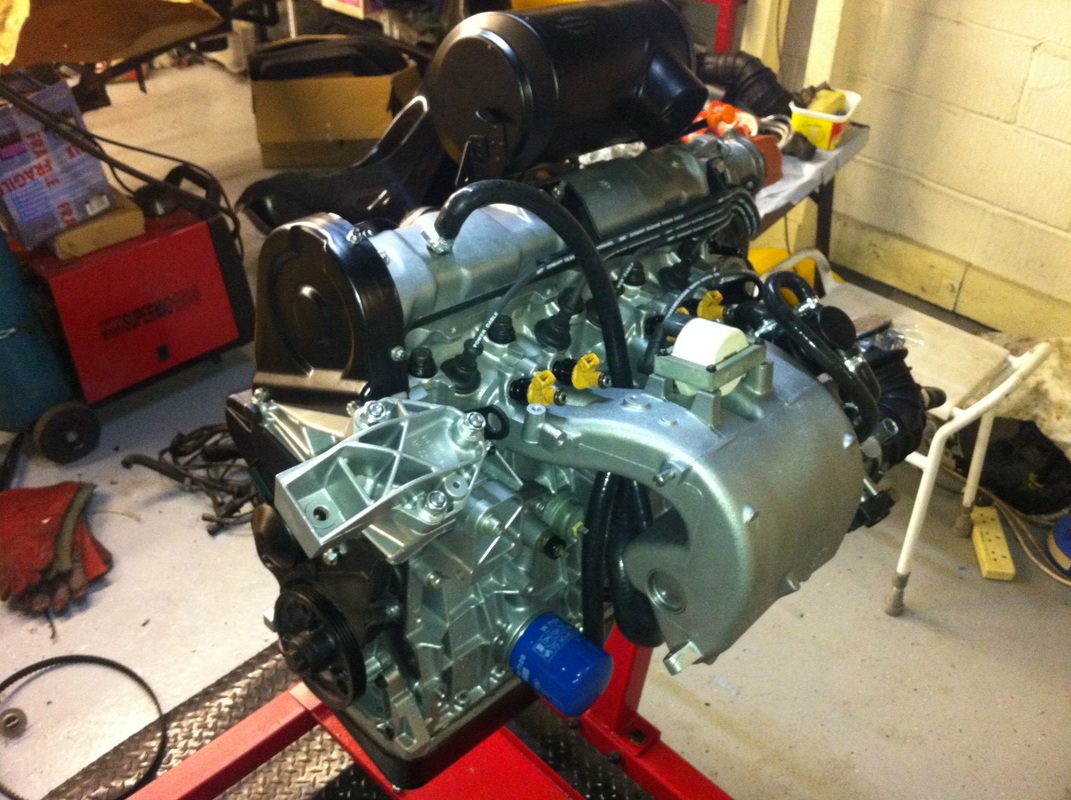
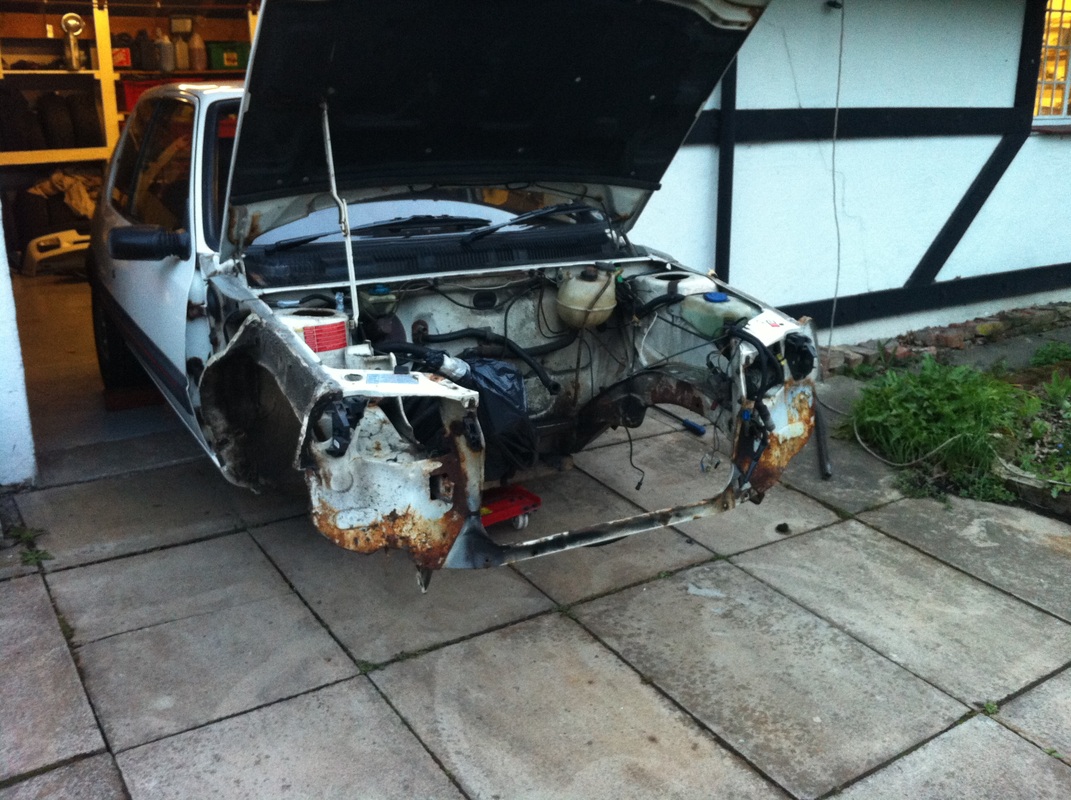
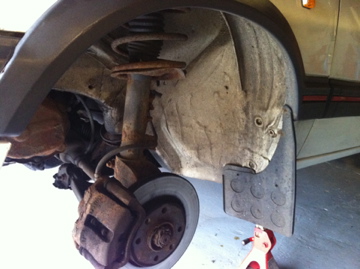
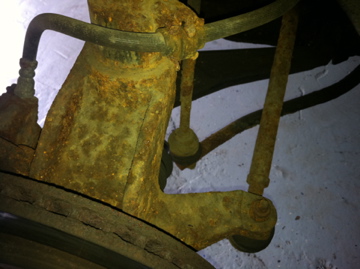
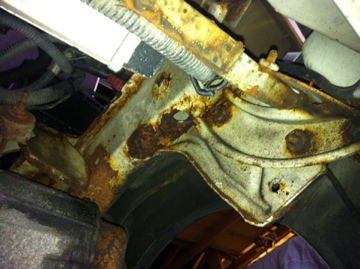
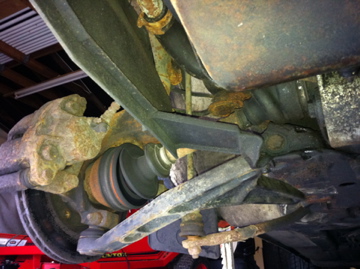
In my last update I had the engine installed and running and had just completed a first run, all-be-it about 30 yards out and back into the garage, with no bonnet, wings or bumper!
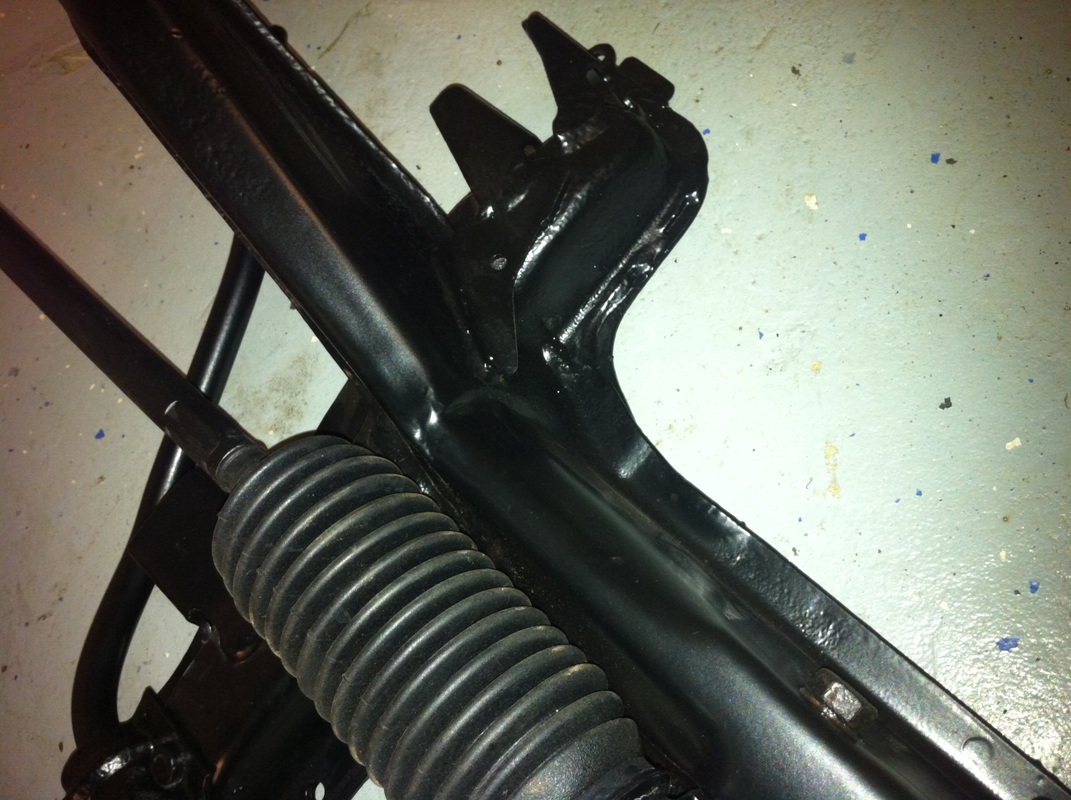
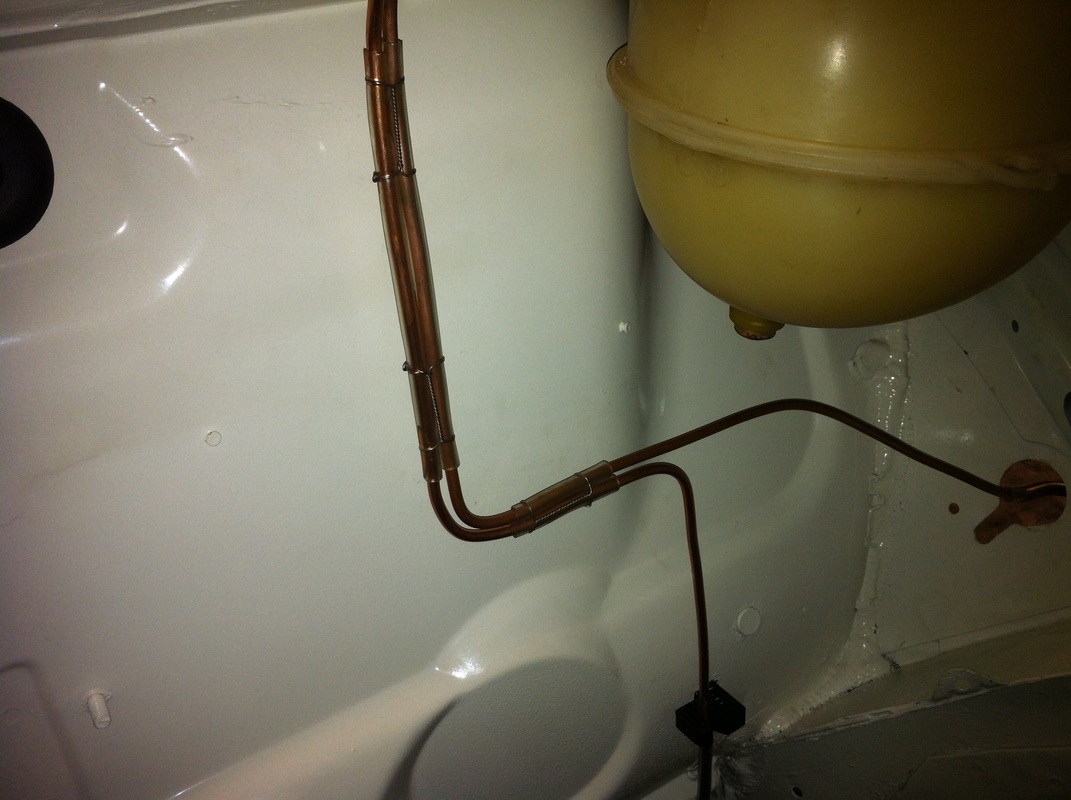
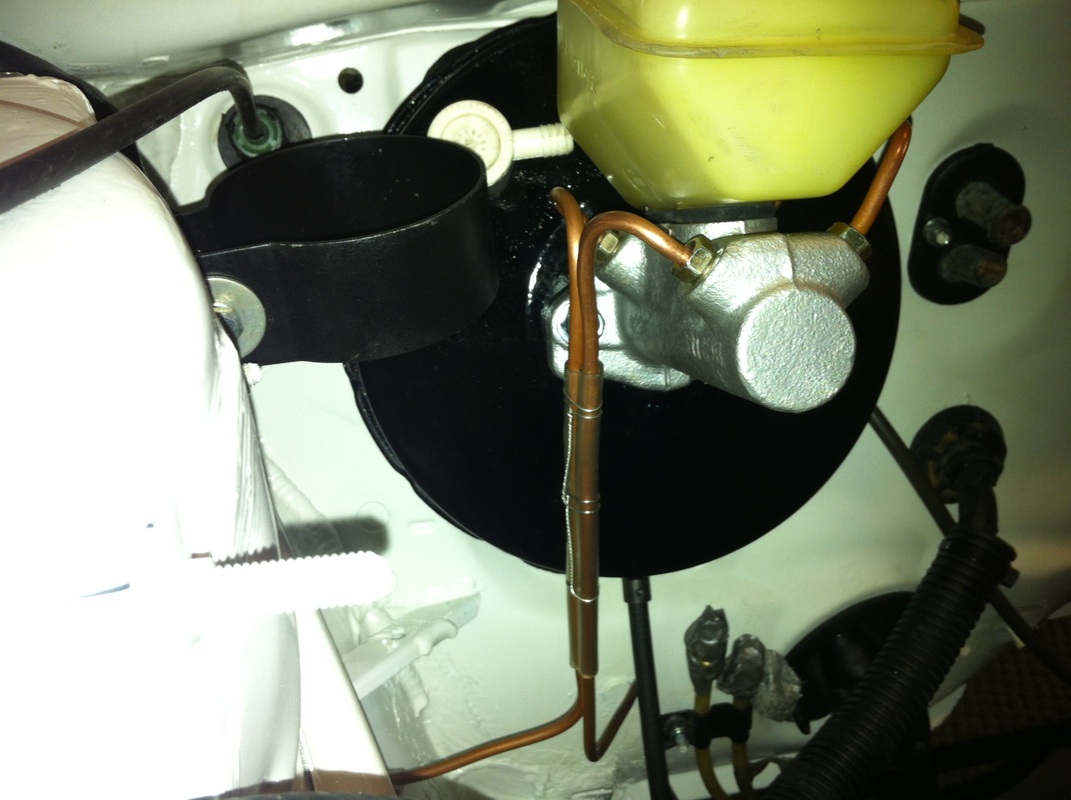
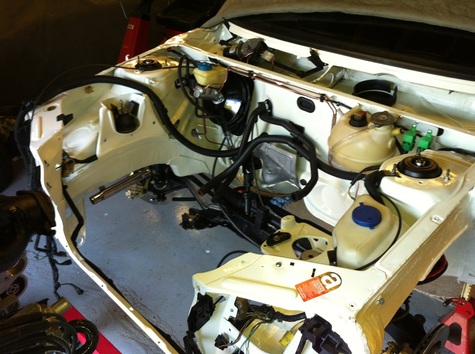
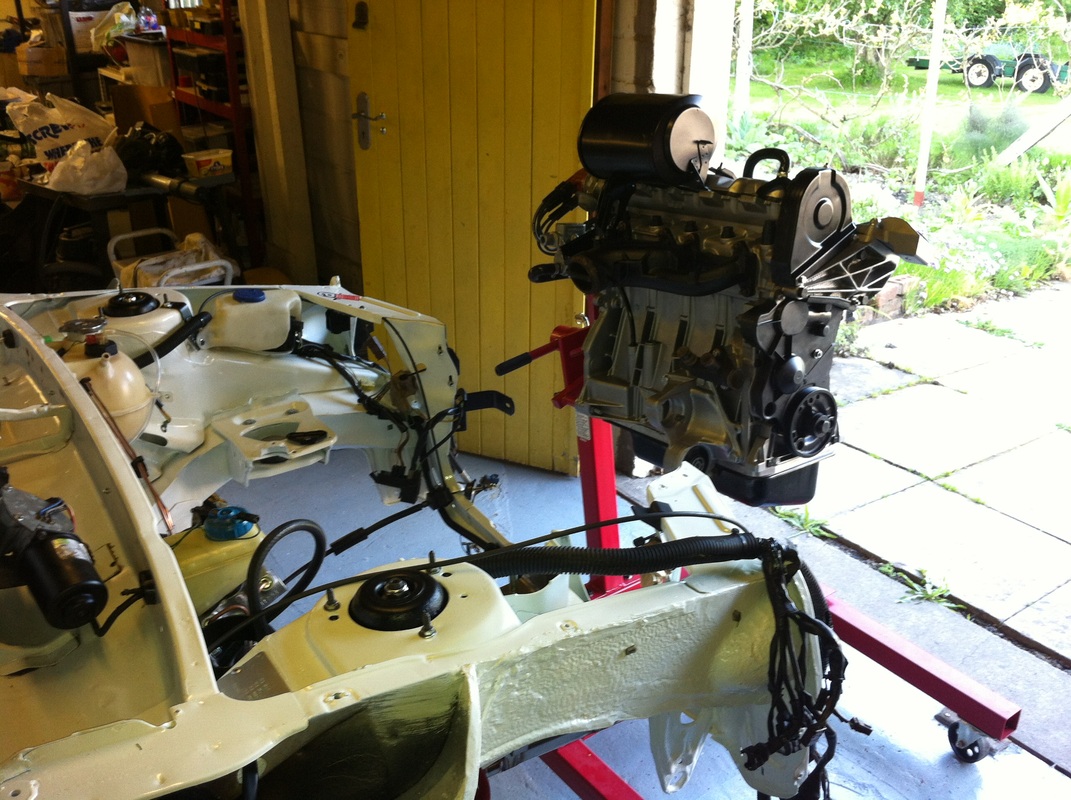
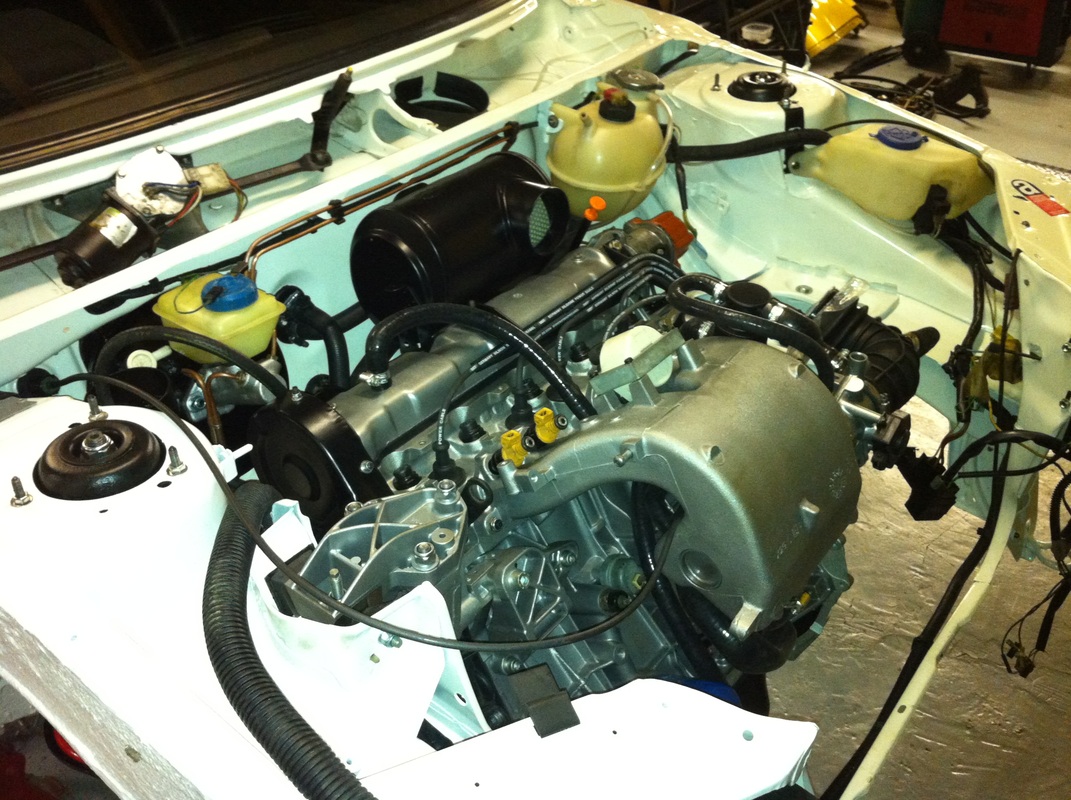
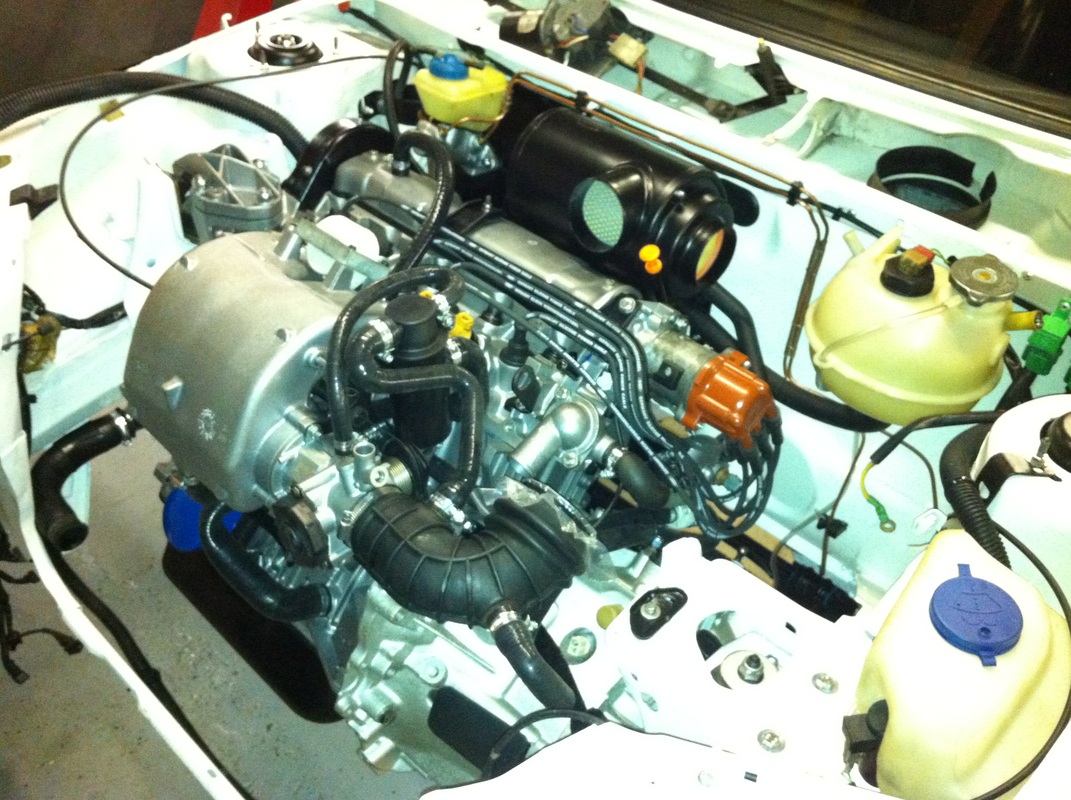
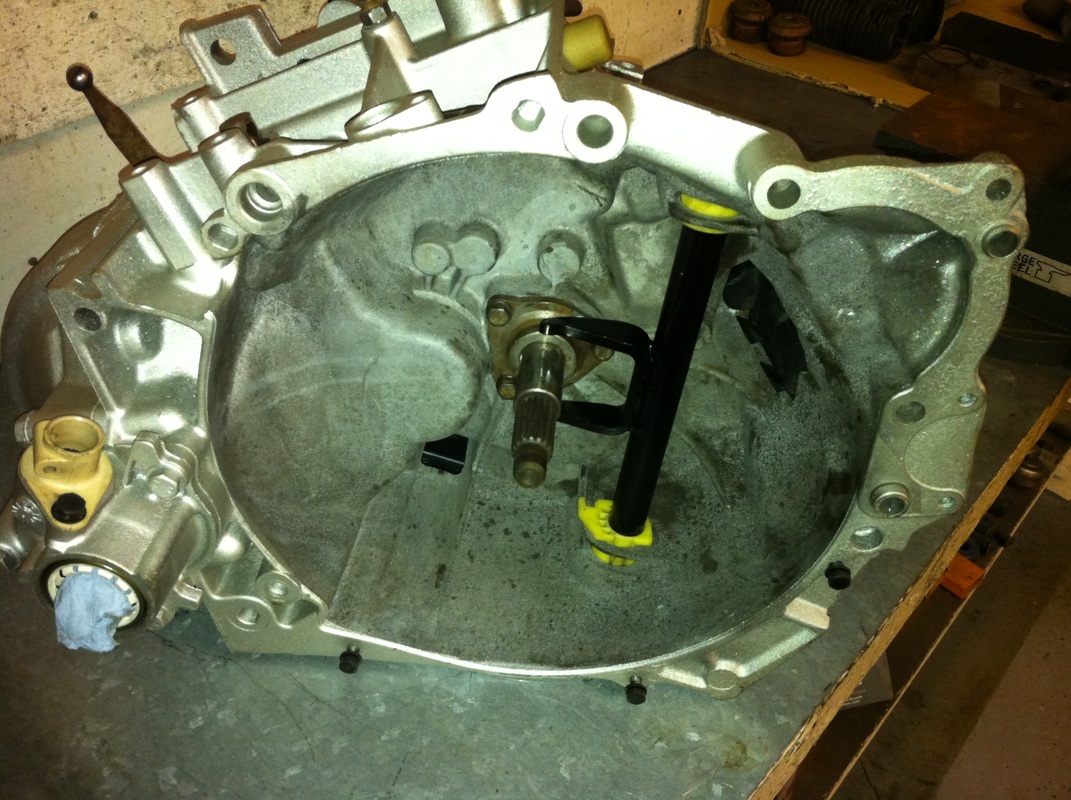
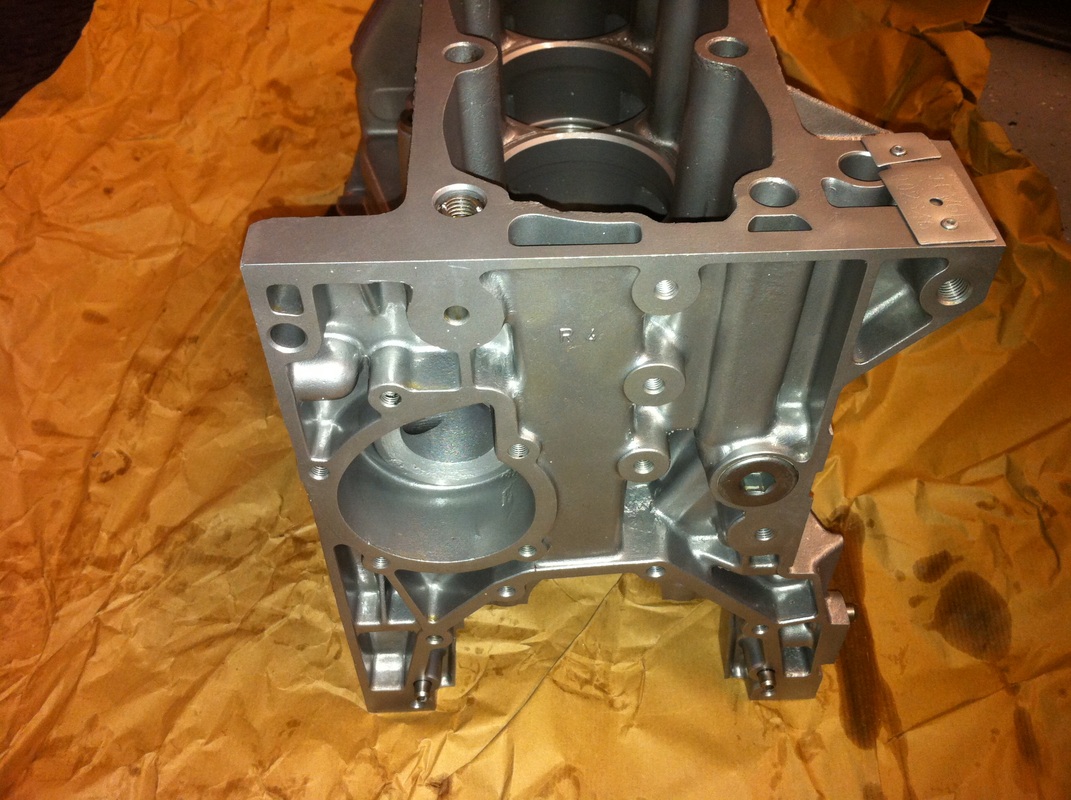
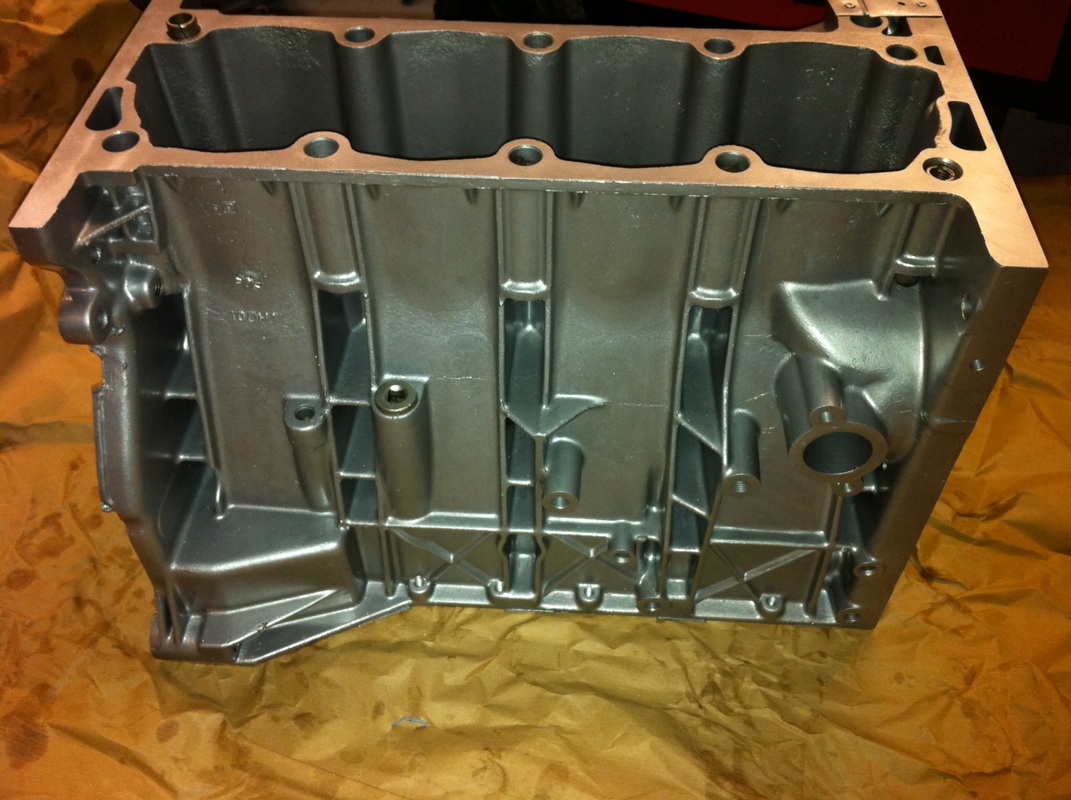
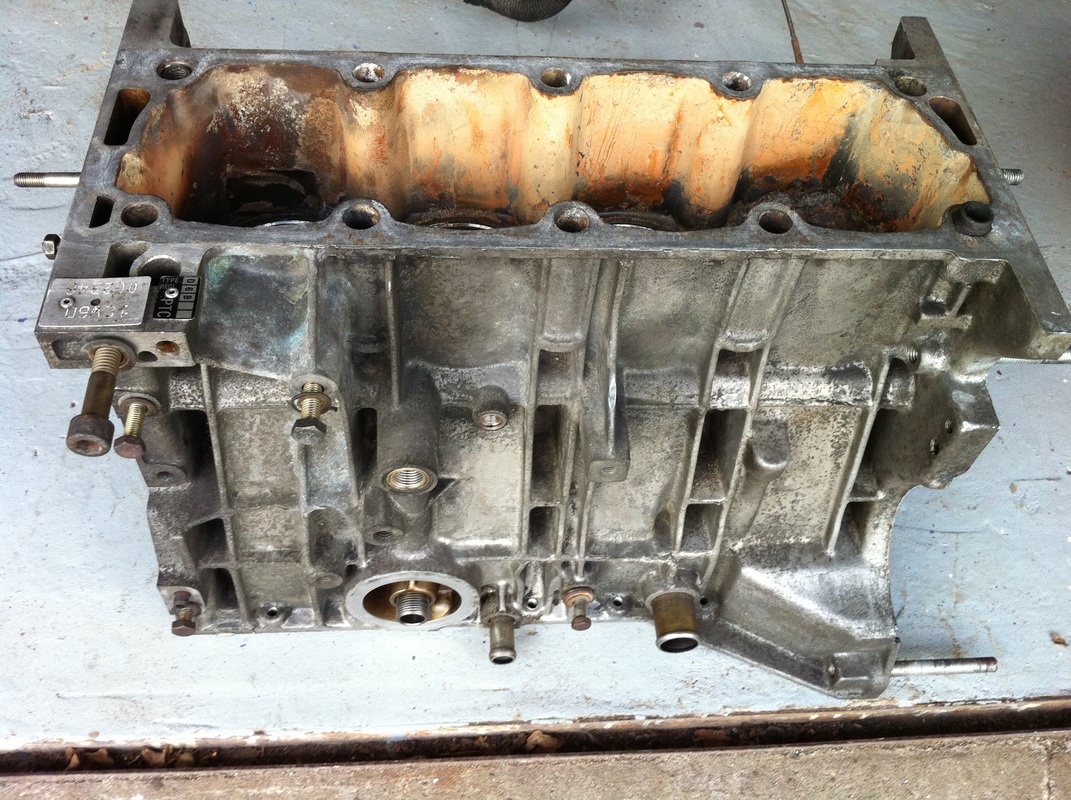
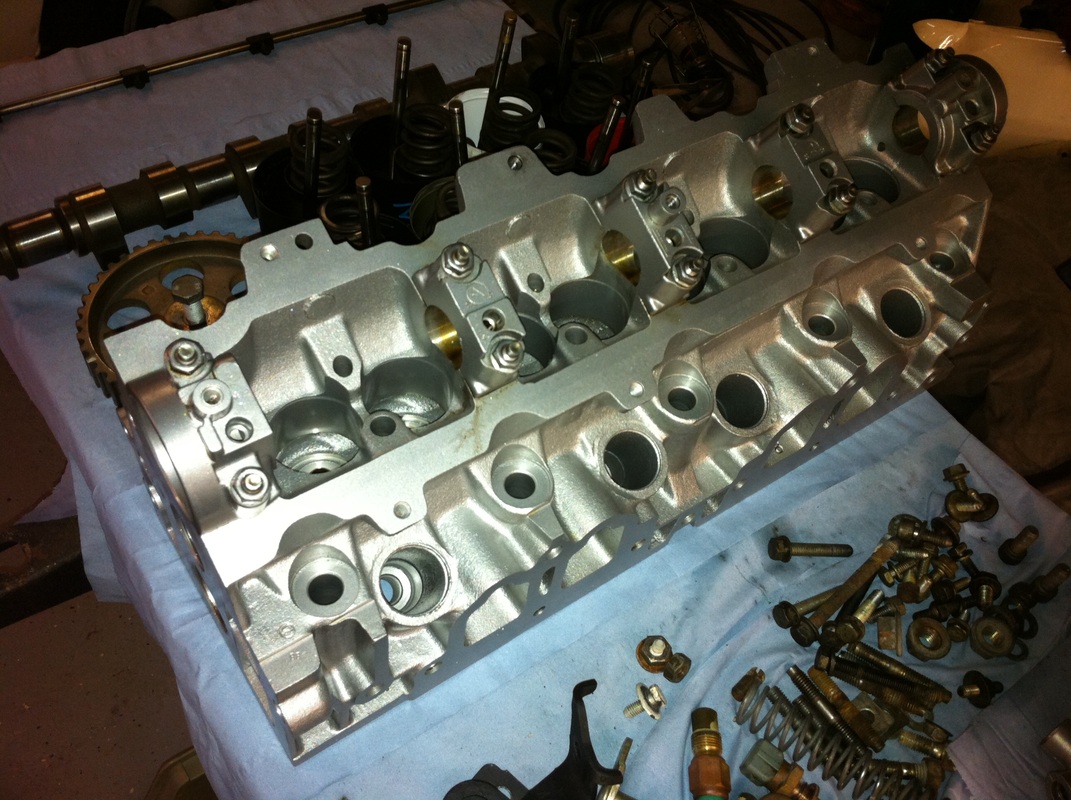
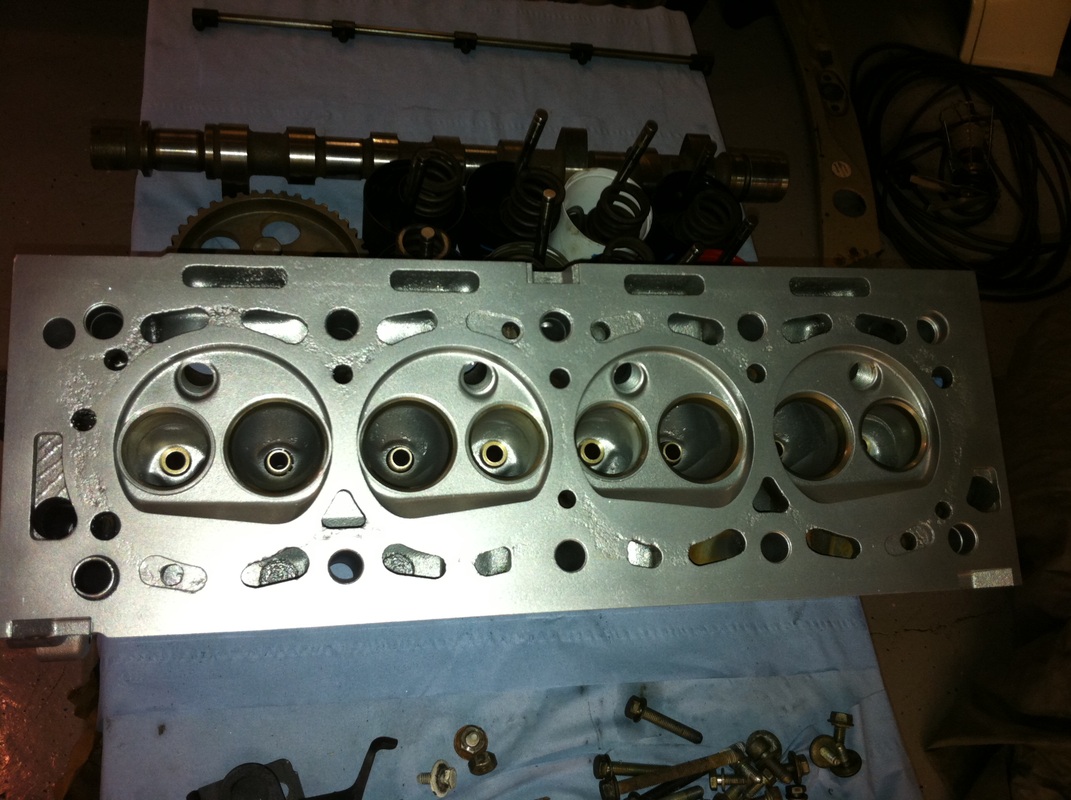
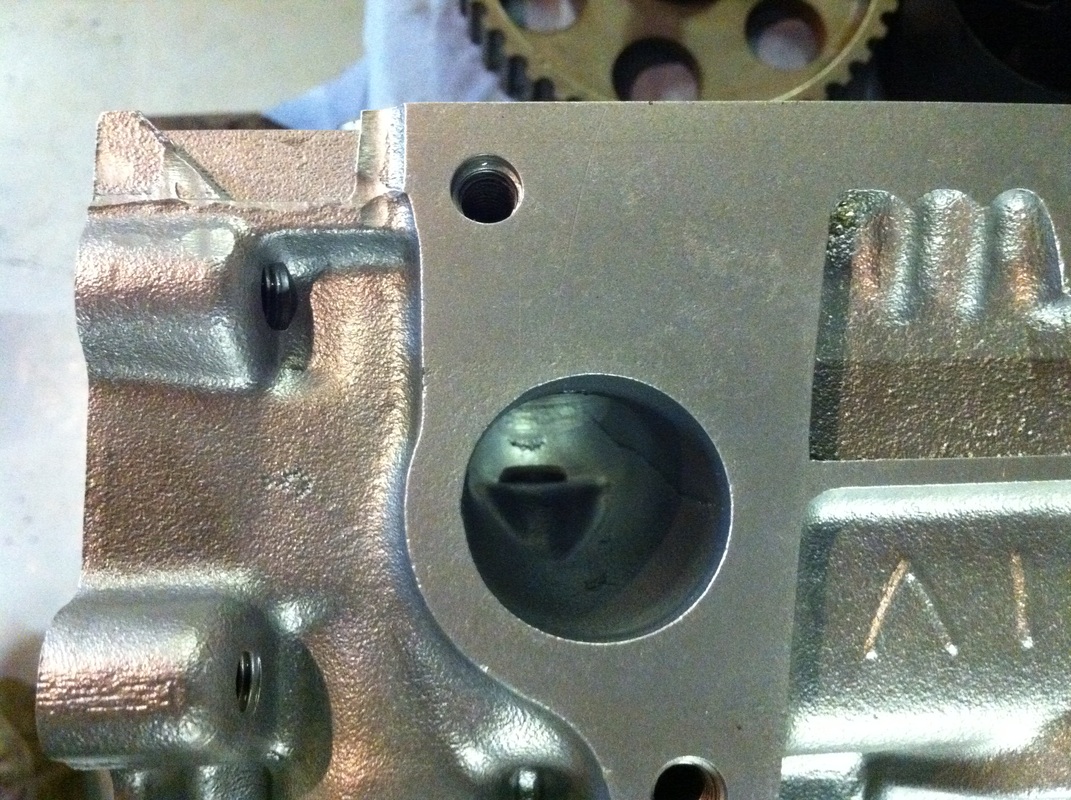
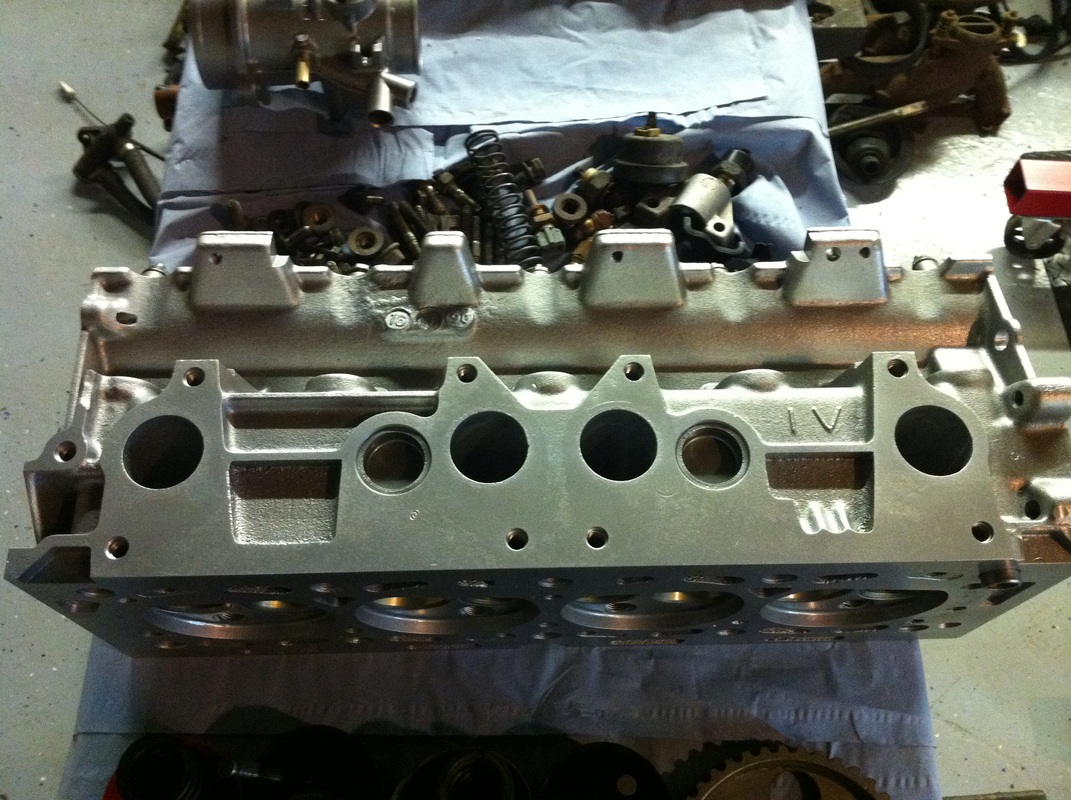
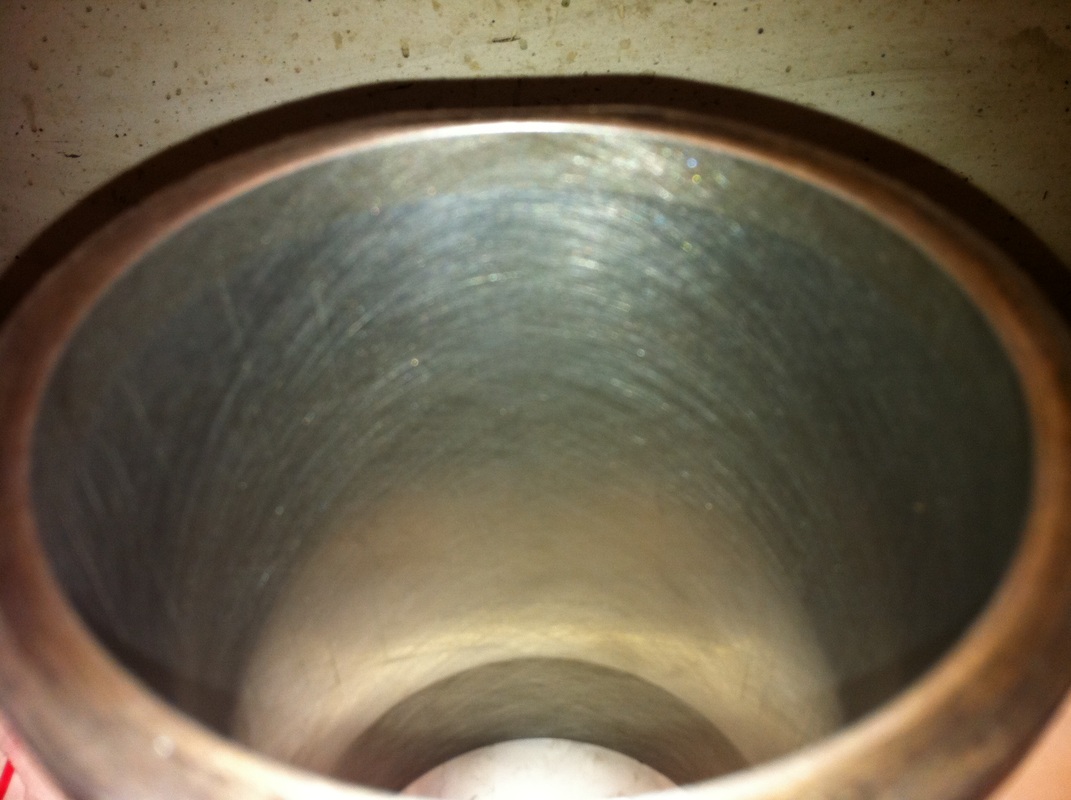
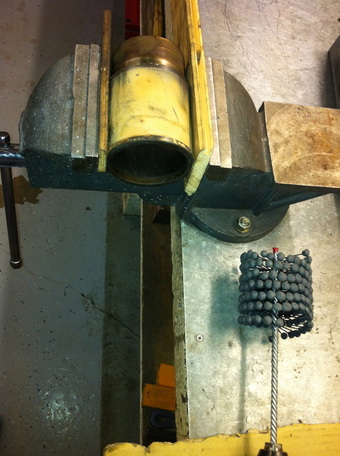
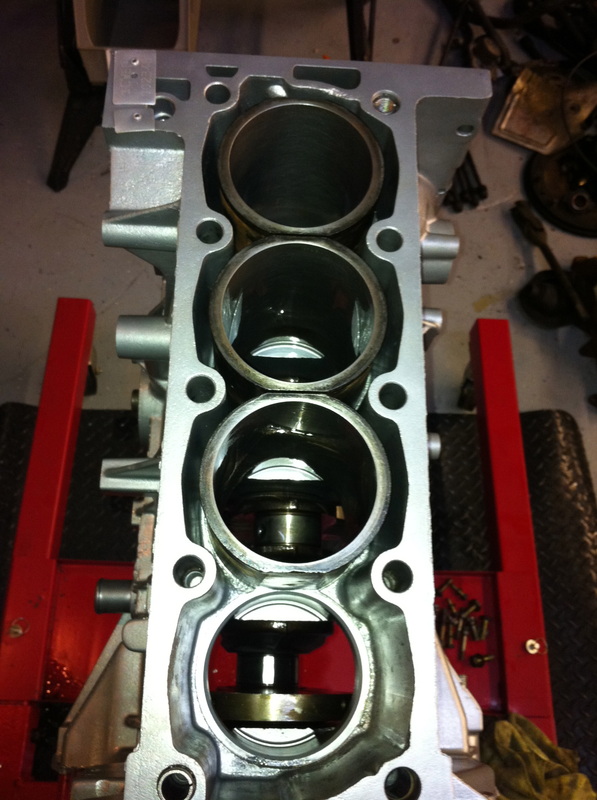
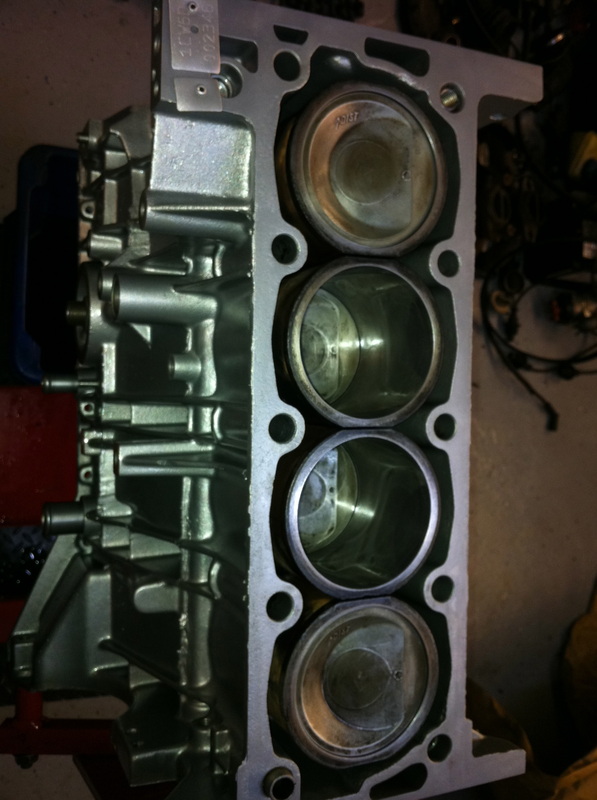
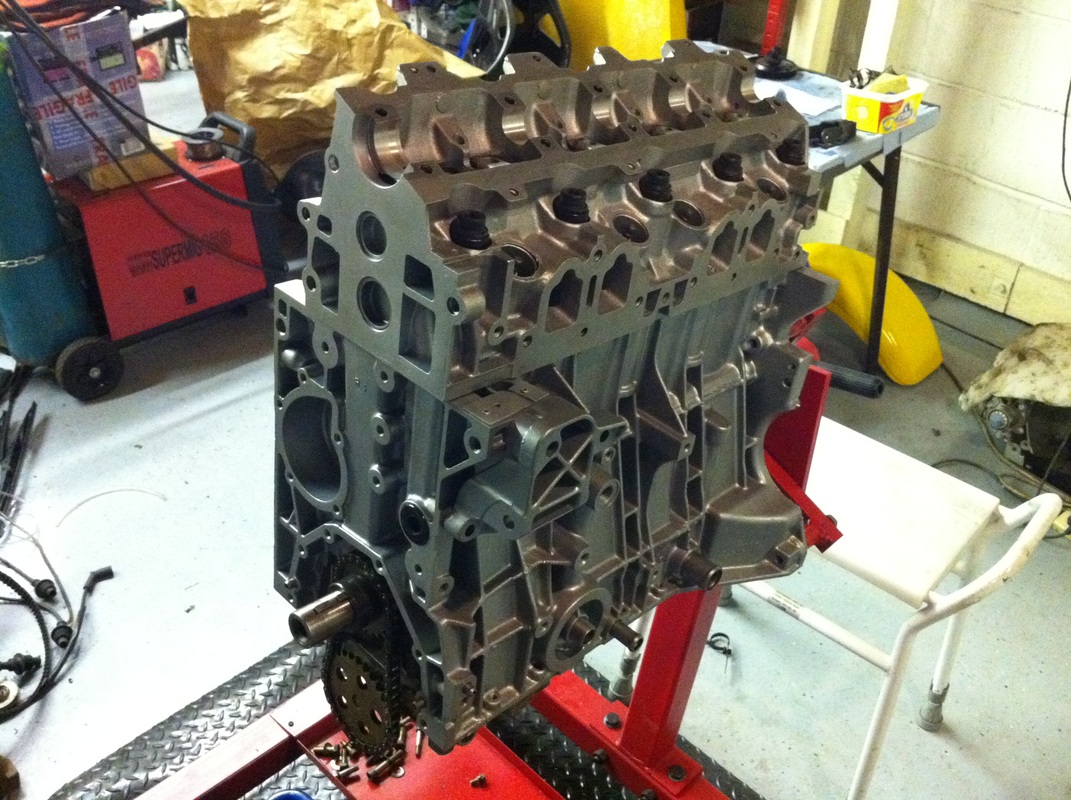
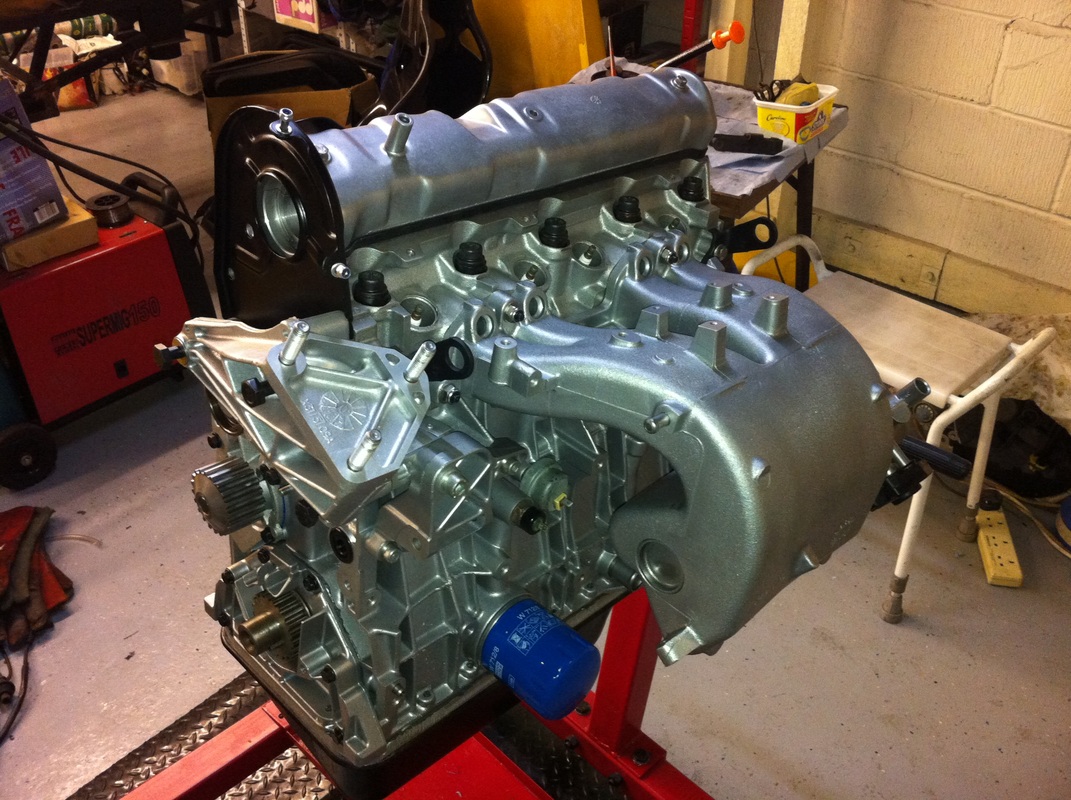
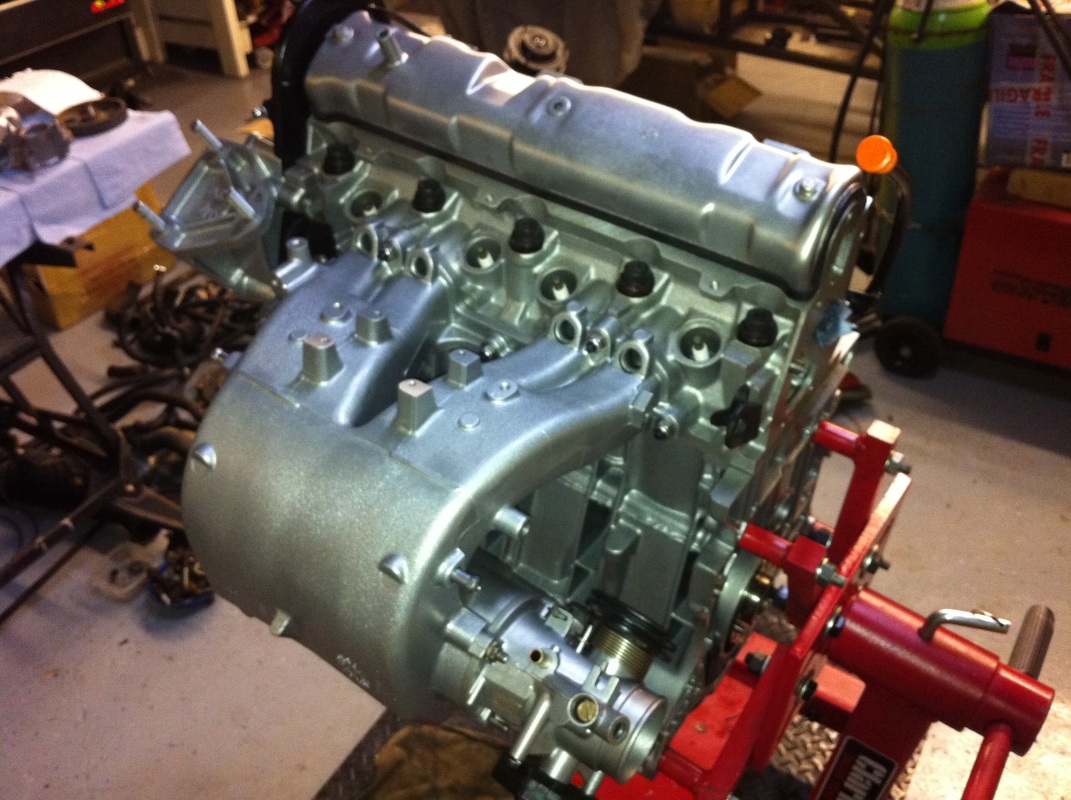
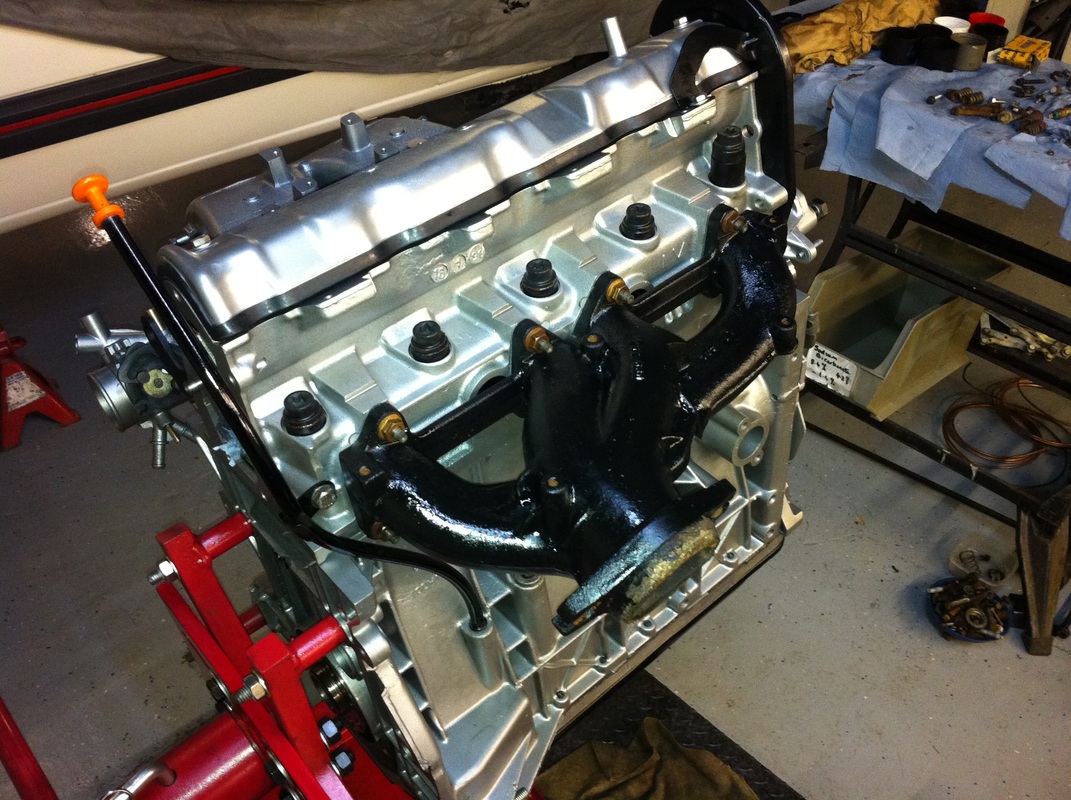
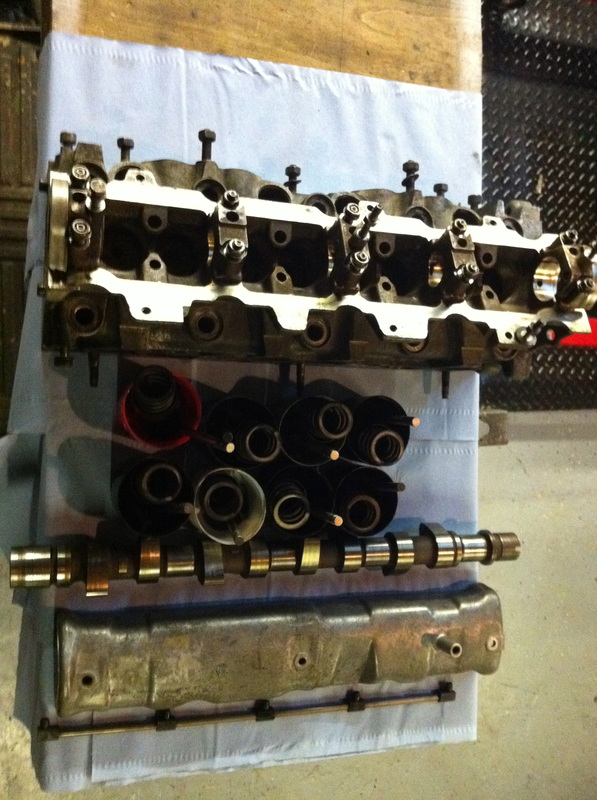
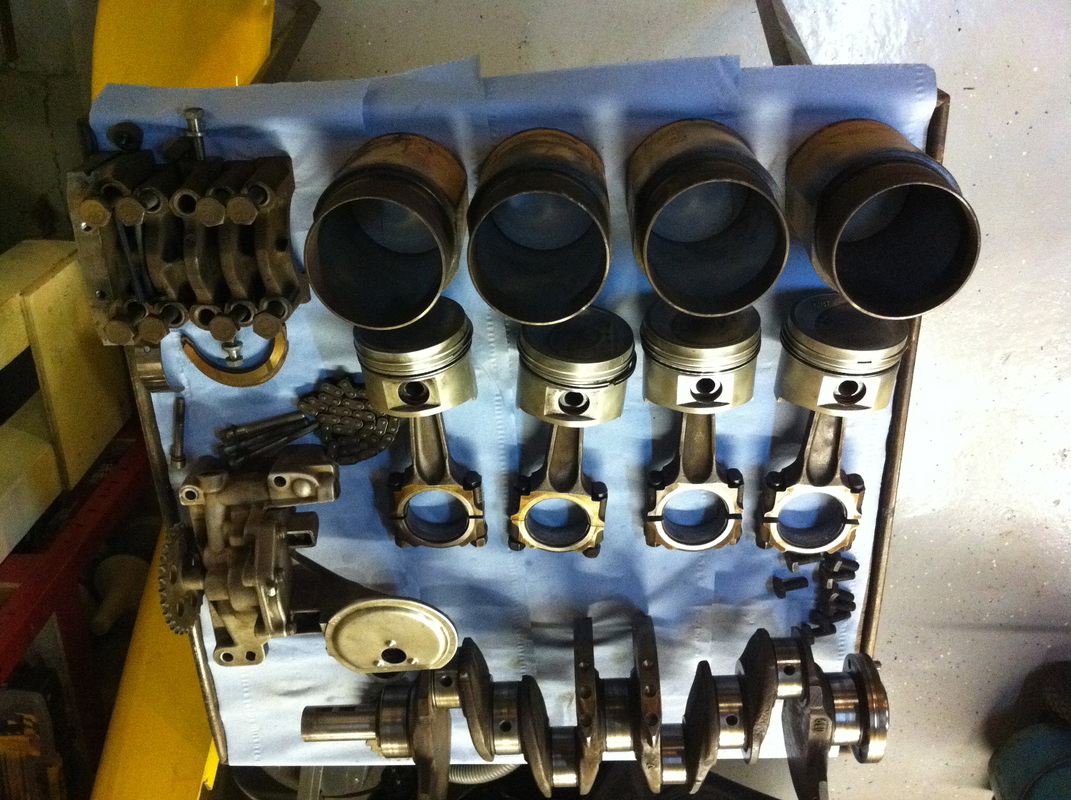
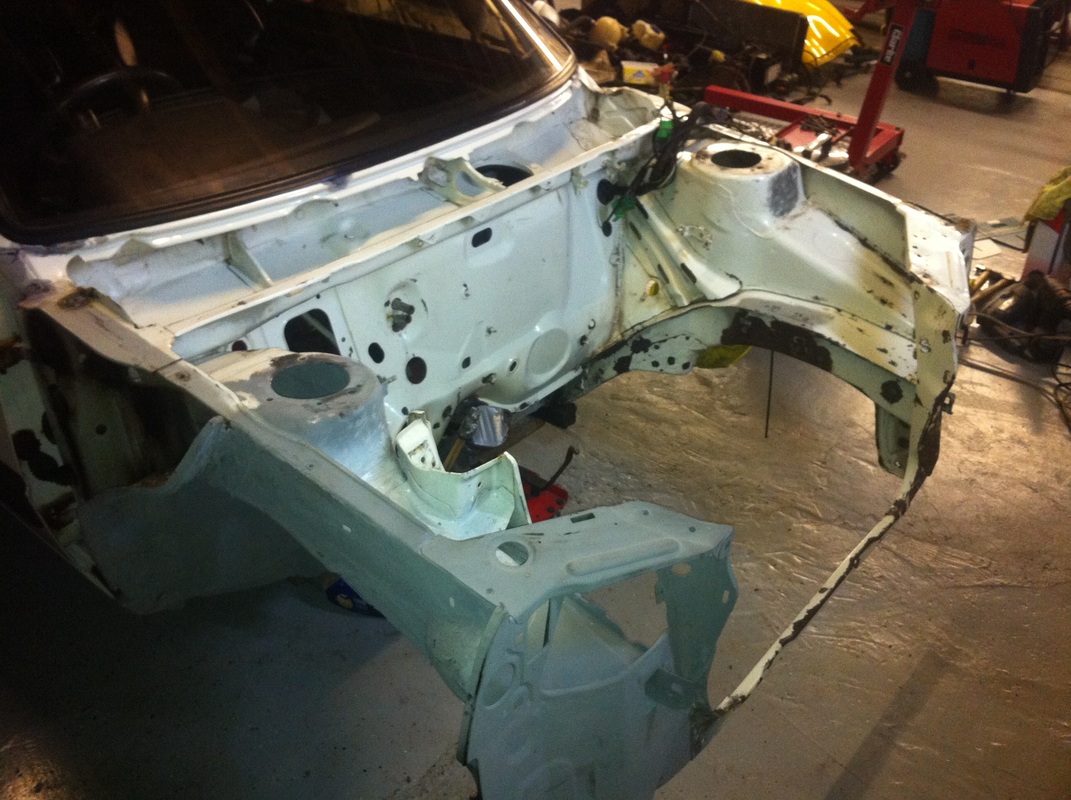
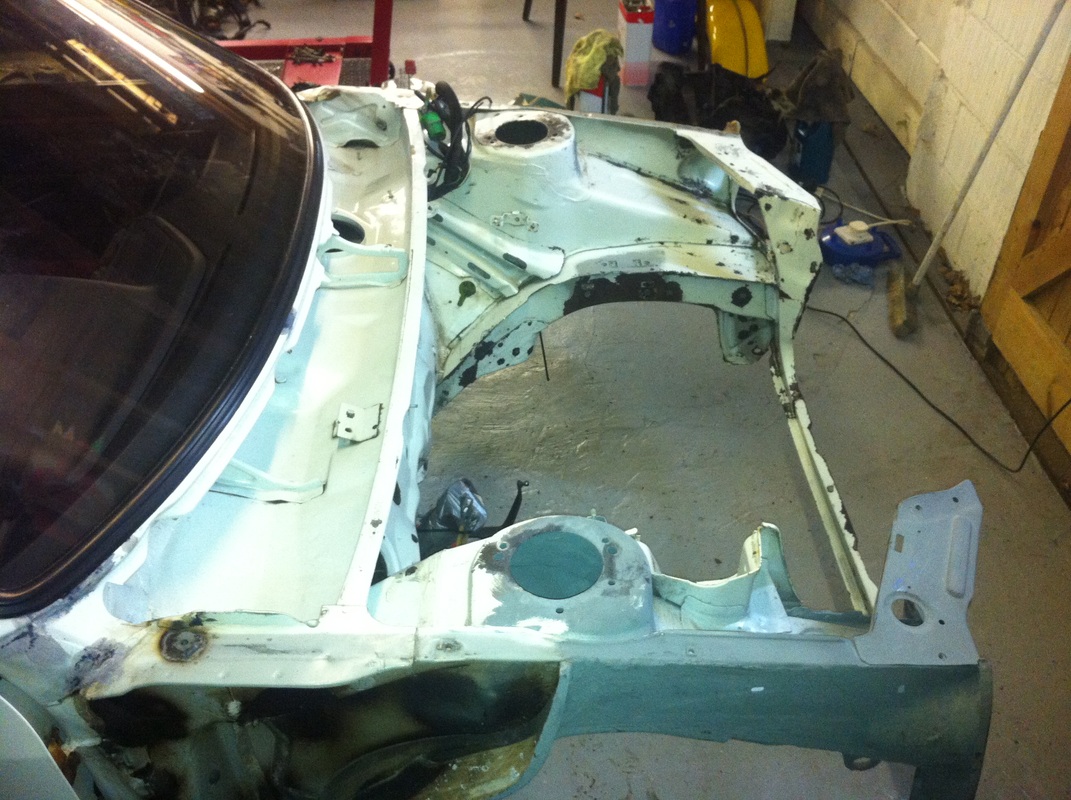
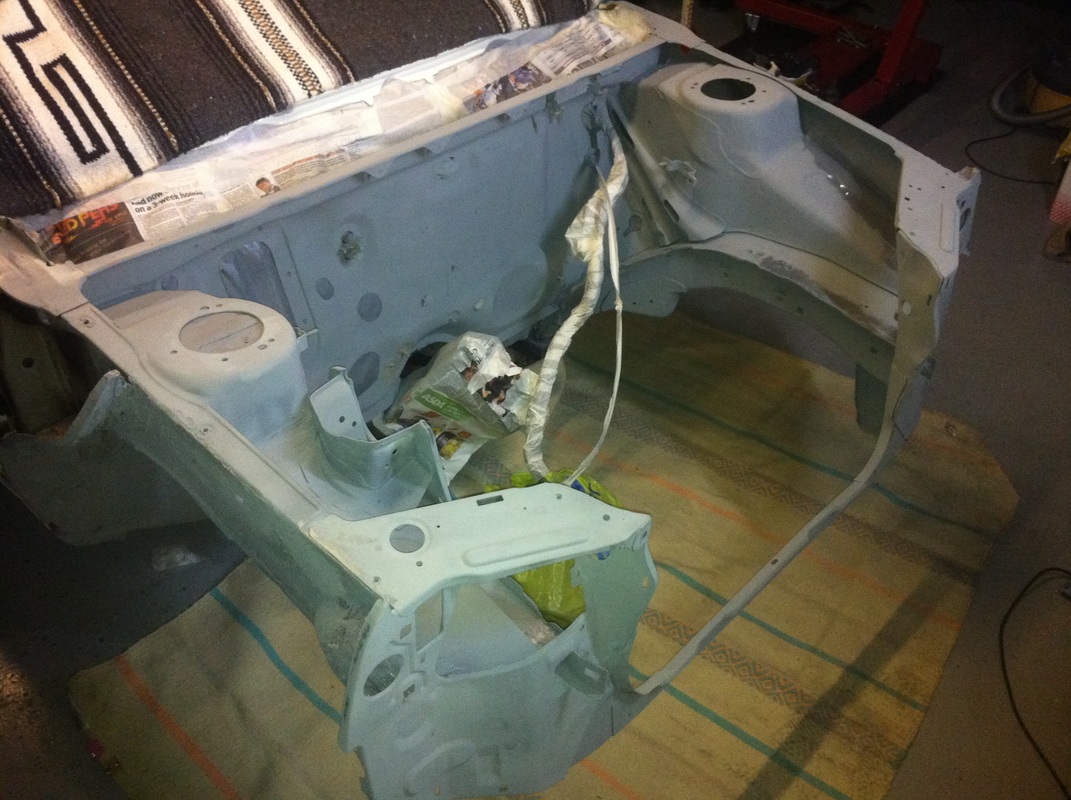
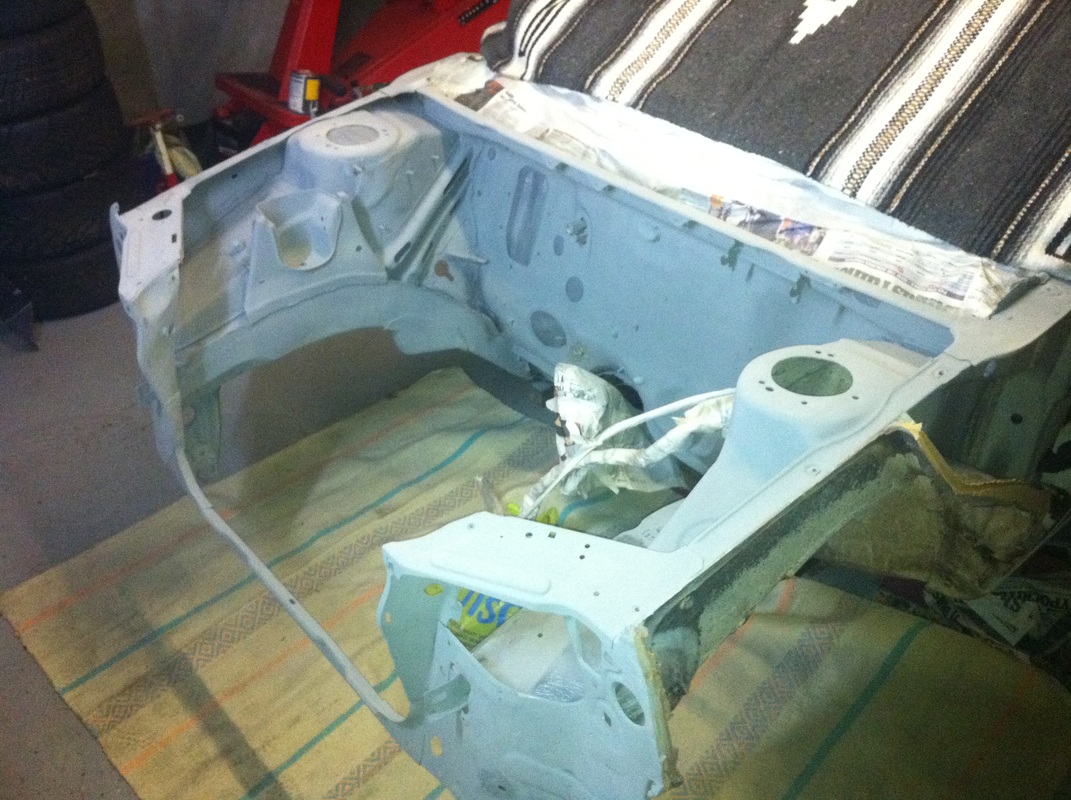
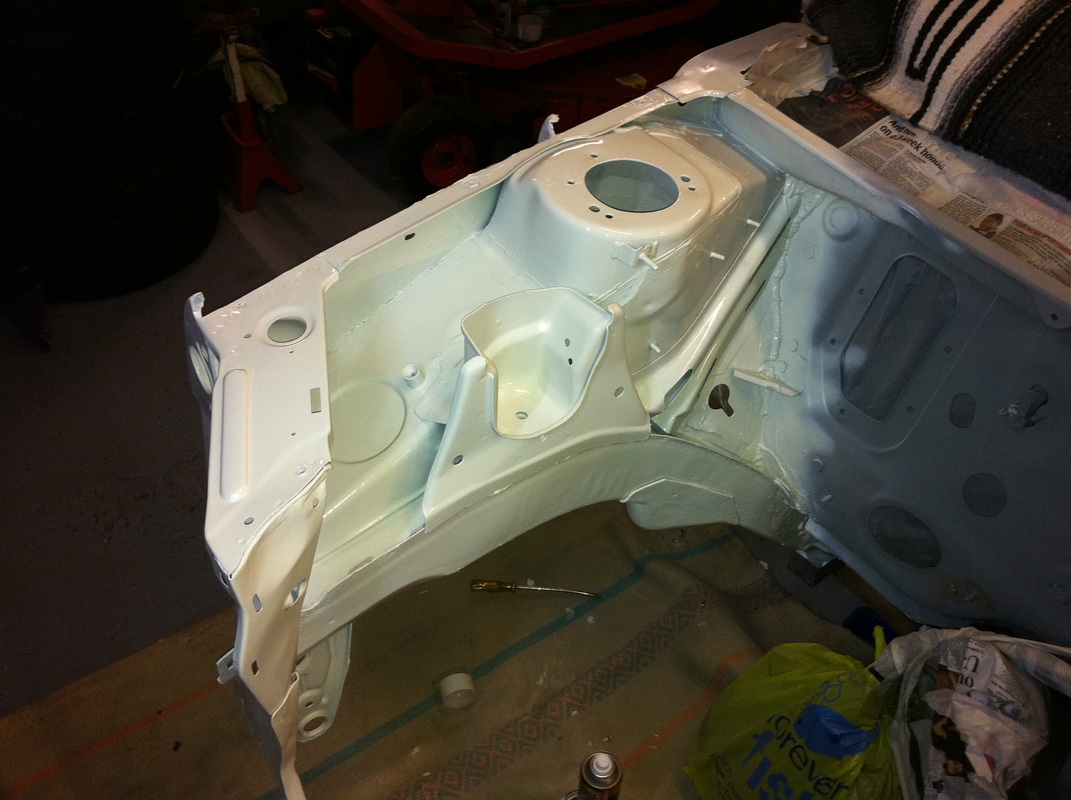
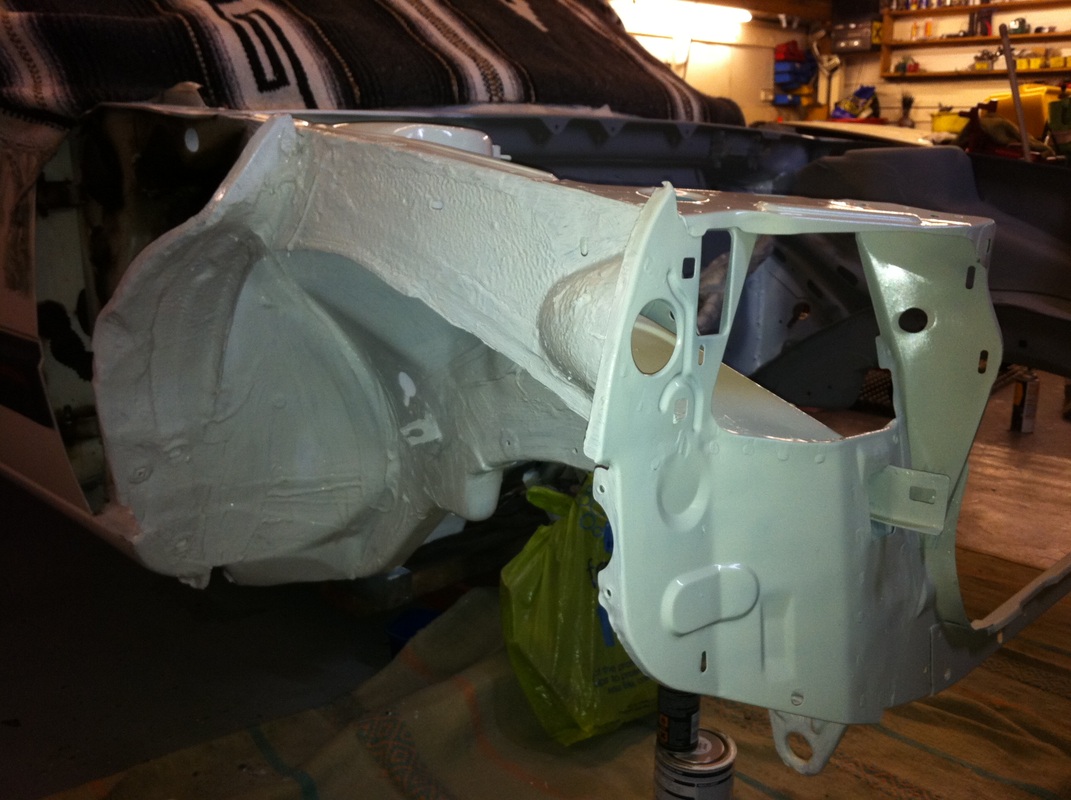
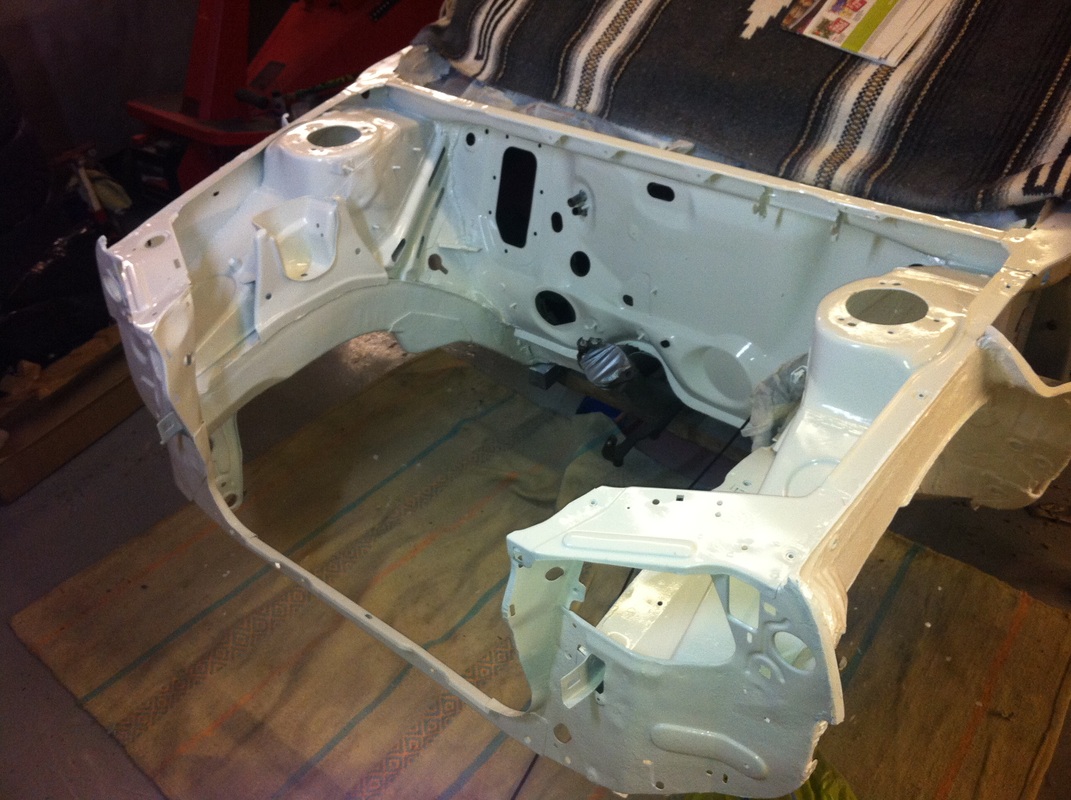
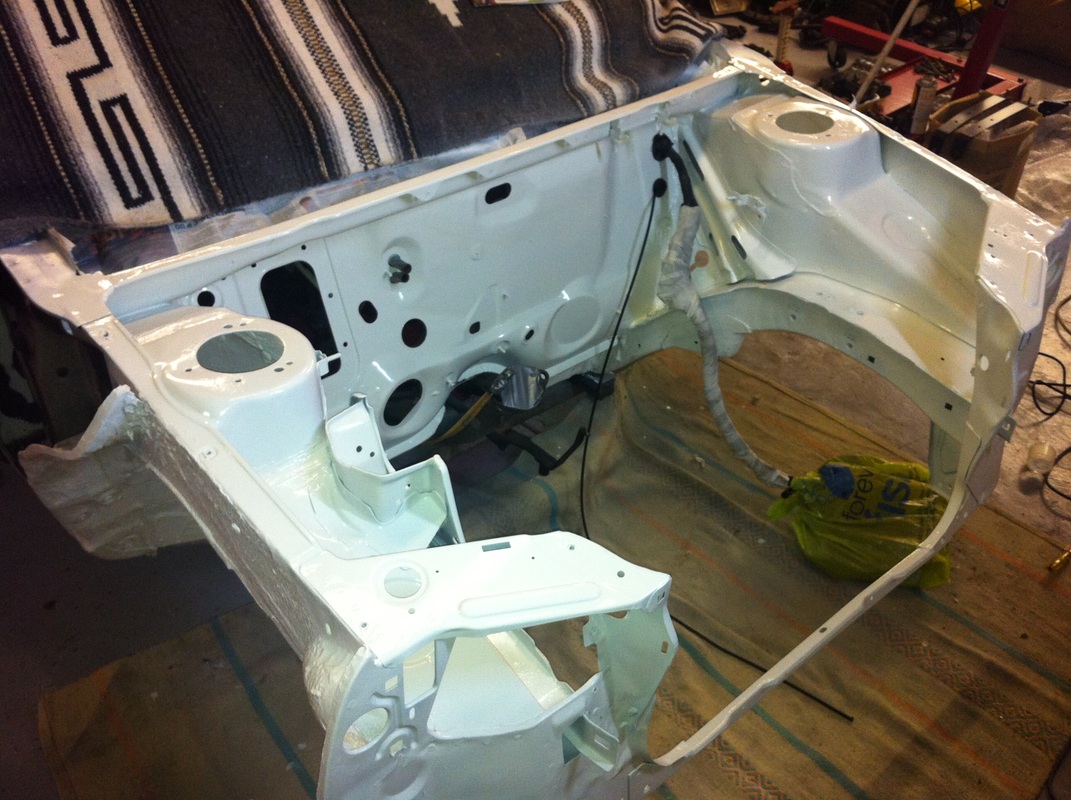
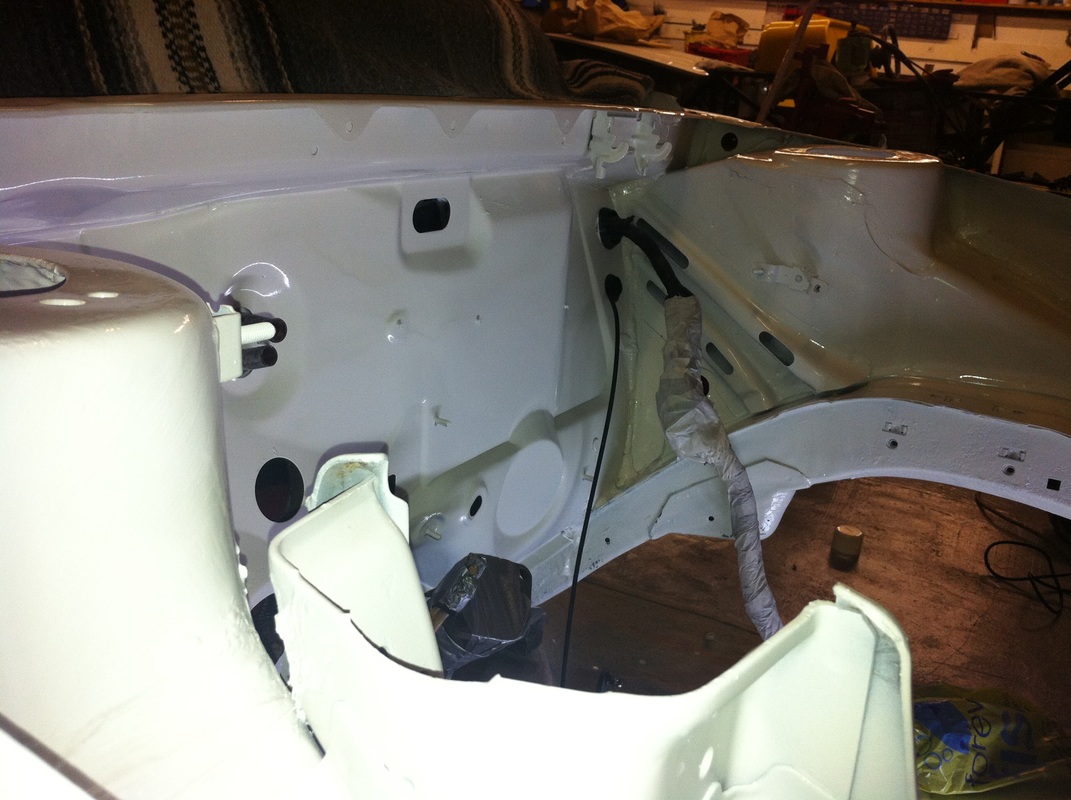
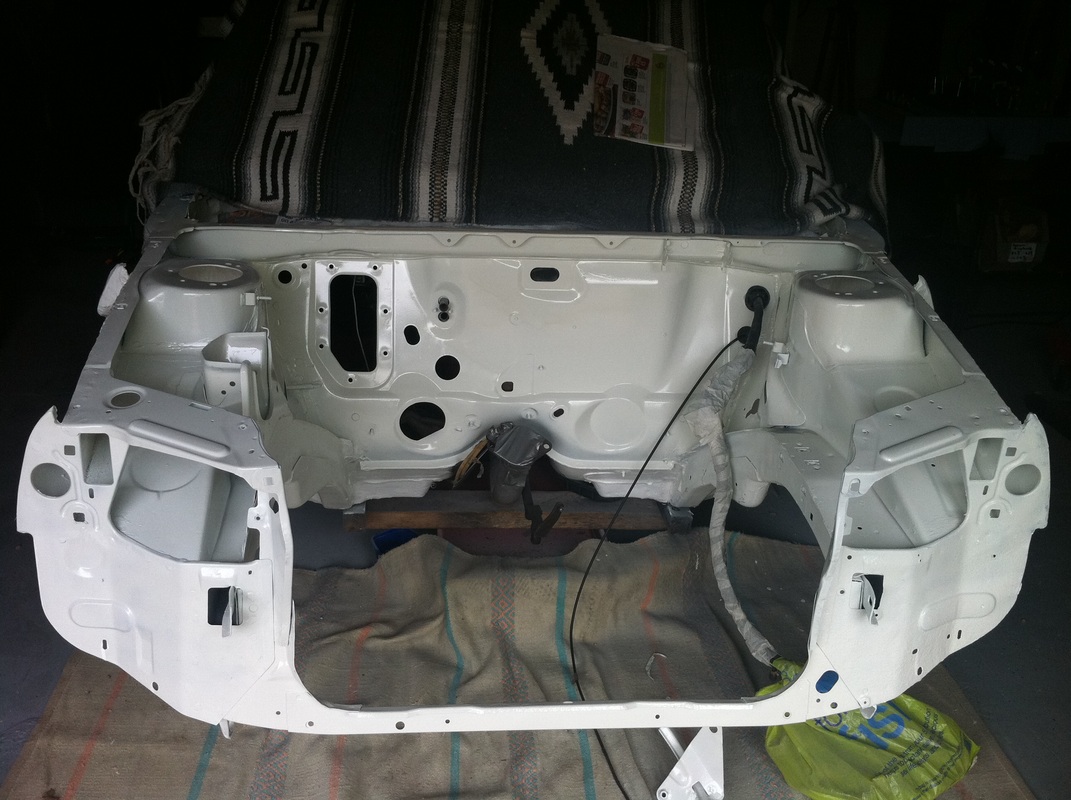
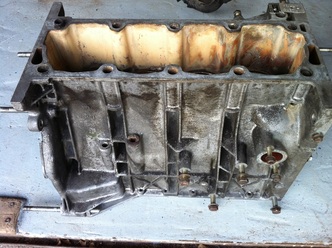
For details of the engine build and to see the extent of the work I have carried out, just scroll down and you'll be taken through the blog history.
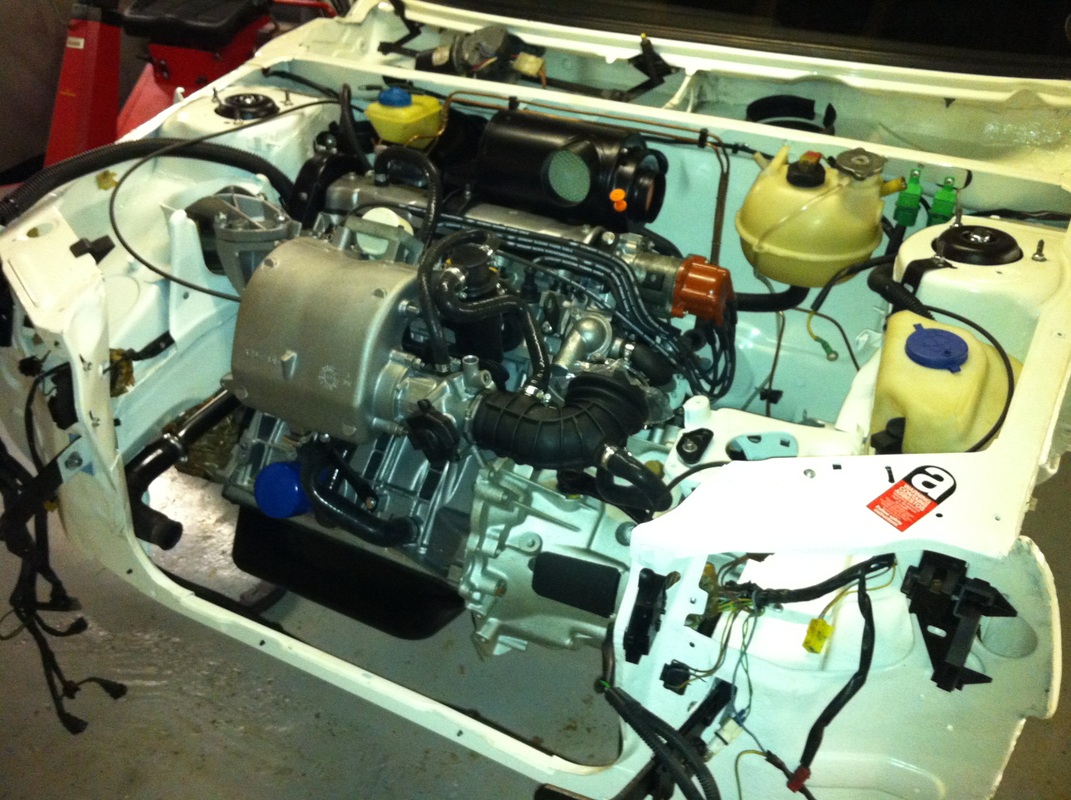
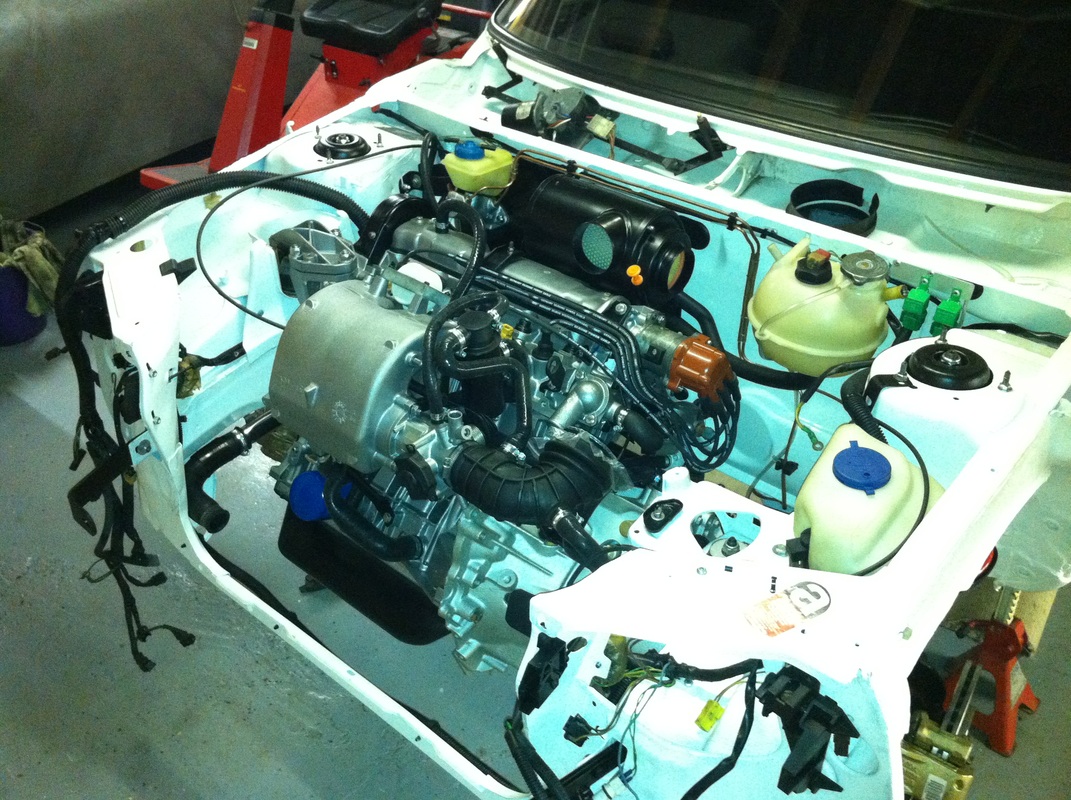
Picture
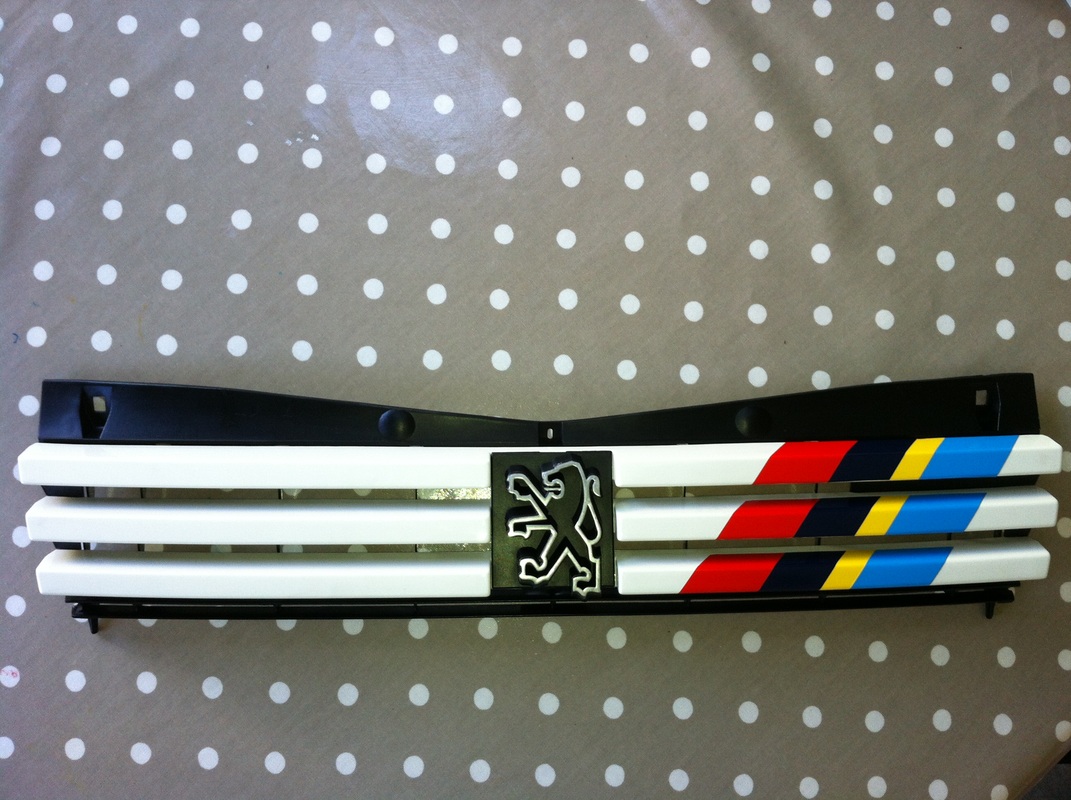
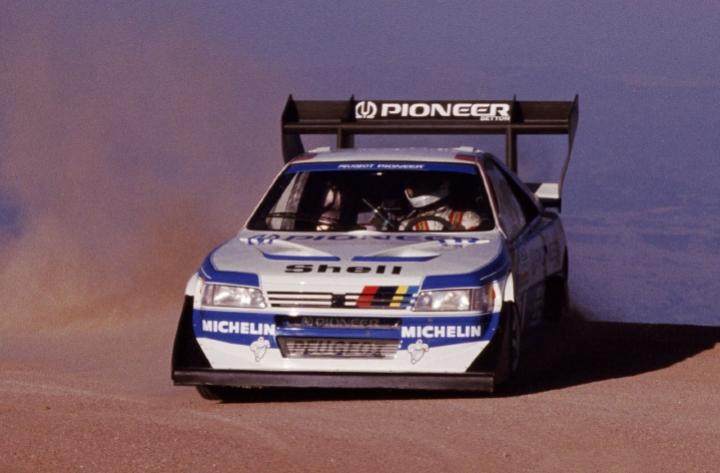
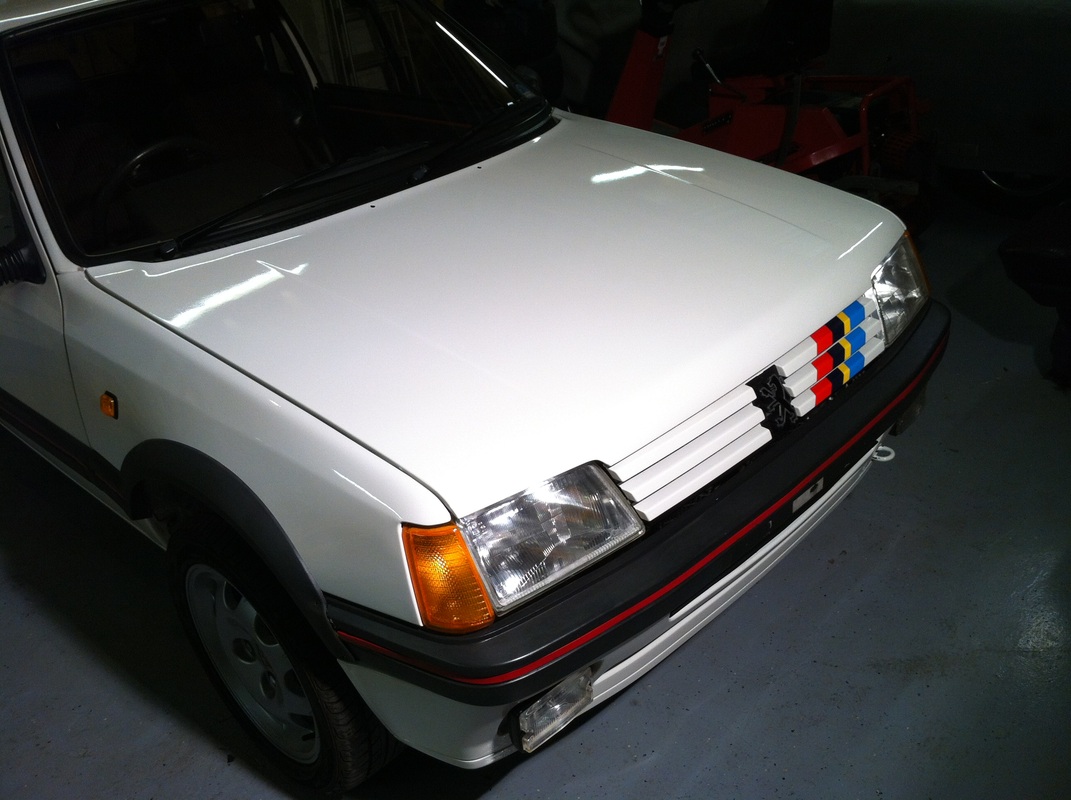
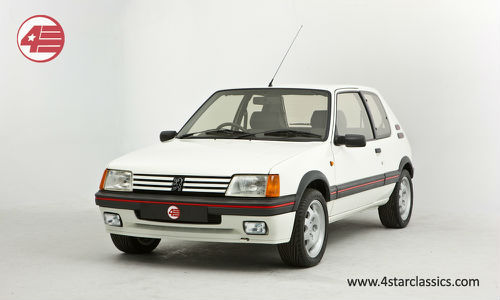
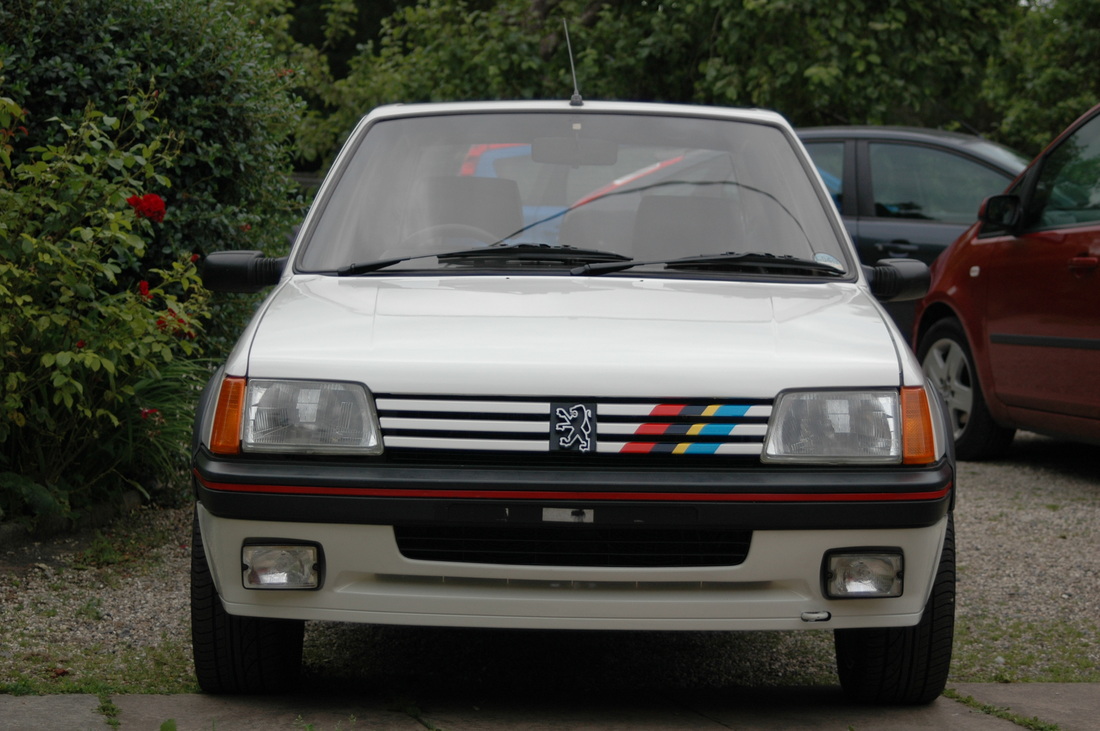
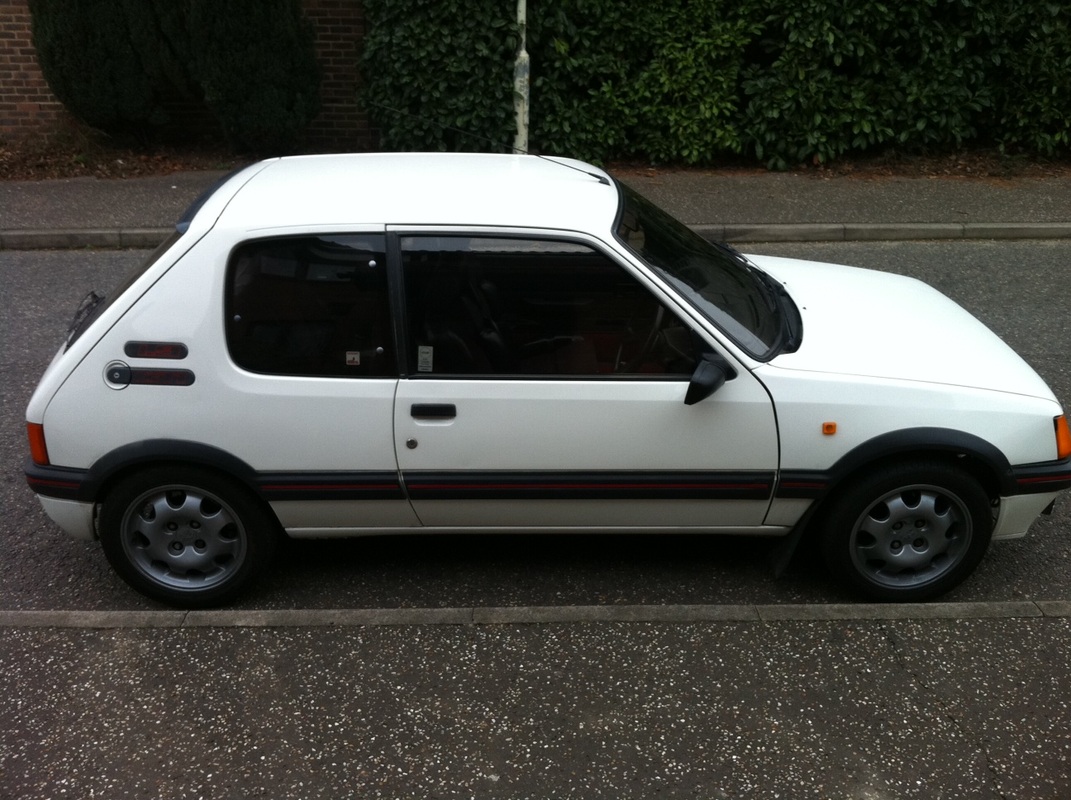
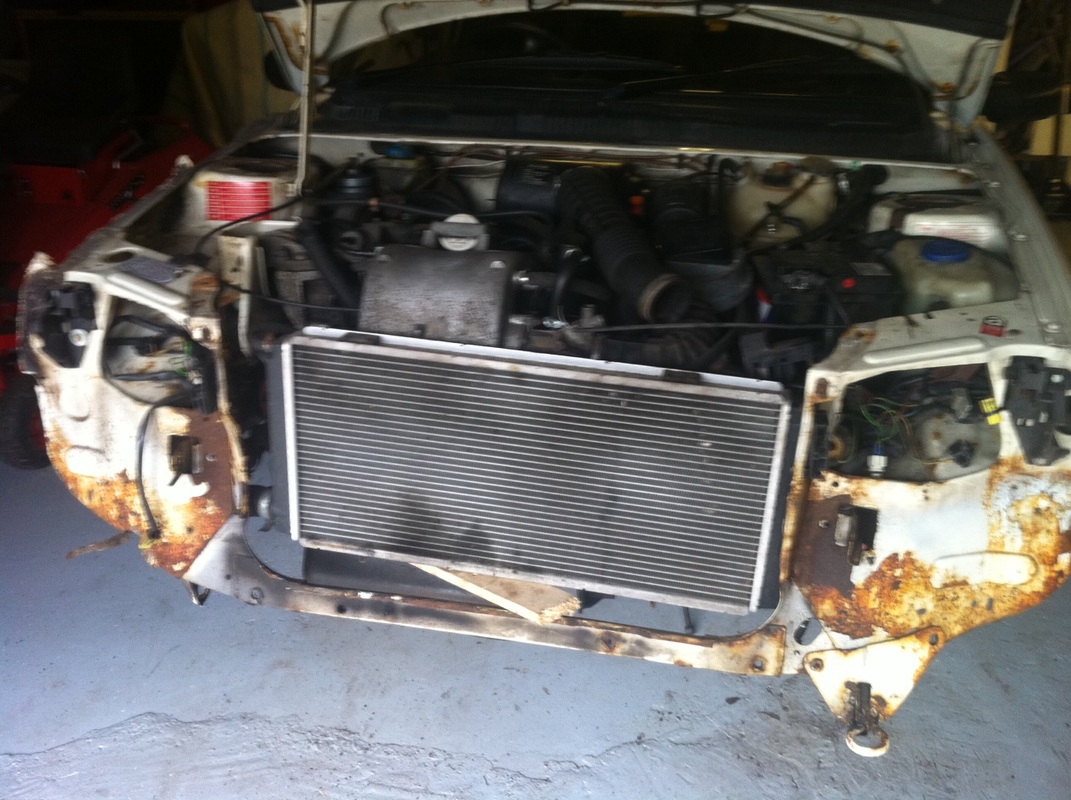
After a little wait, the bonnet, wings, bumper and grill are ready for collection. I decided to add some Peugeot Talbot Sport stripes to the grill, in a little ode to my rally hero Ari Vatanen who wore simila stripes on his Pikes Peak conquering 405 T16!
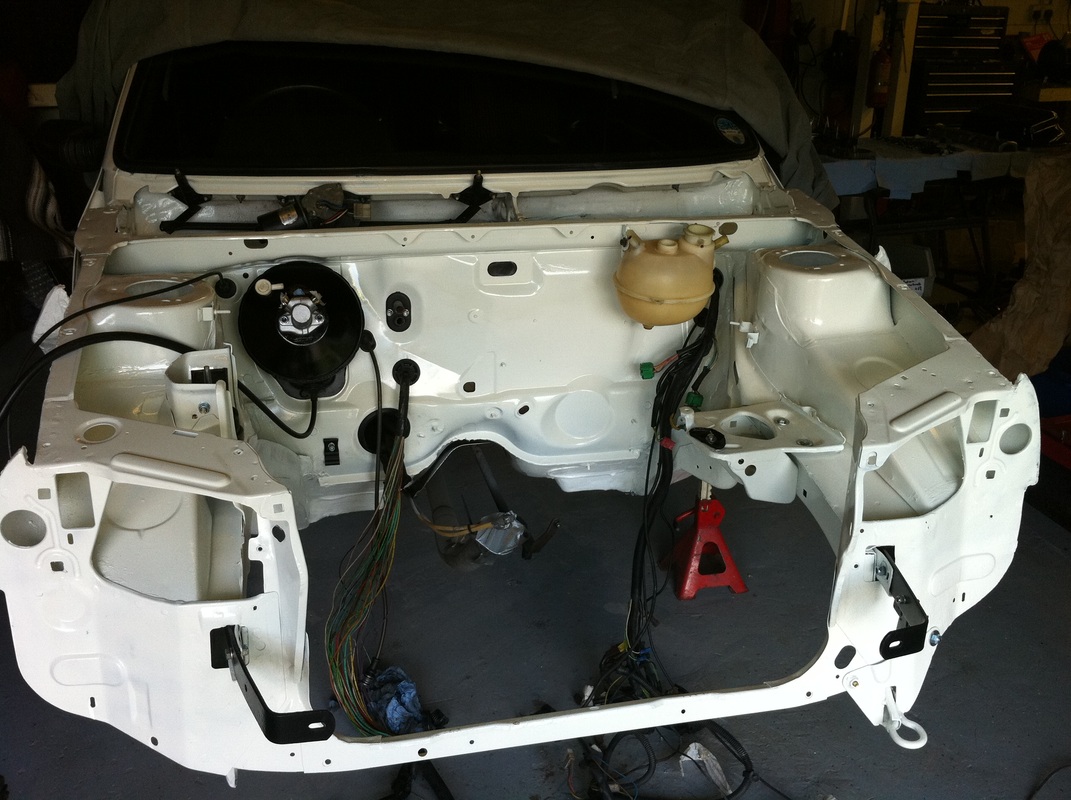
So obviously the next job was to fit all the lovely shiny white bits to the car, taking care to position them with the best possible panel gaps.
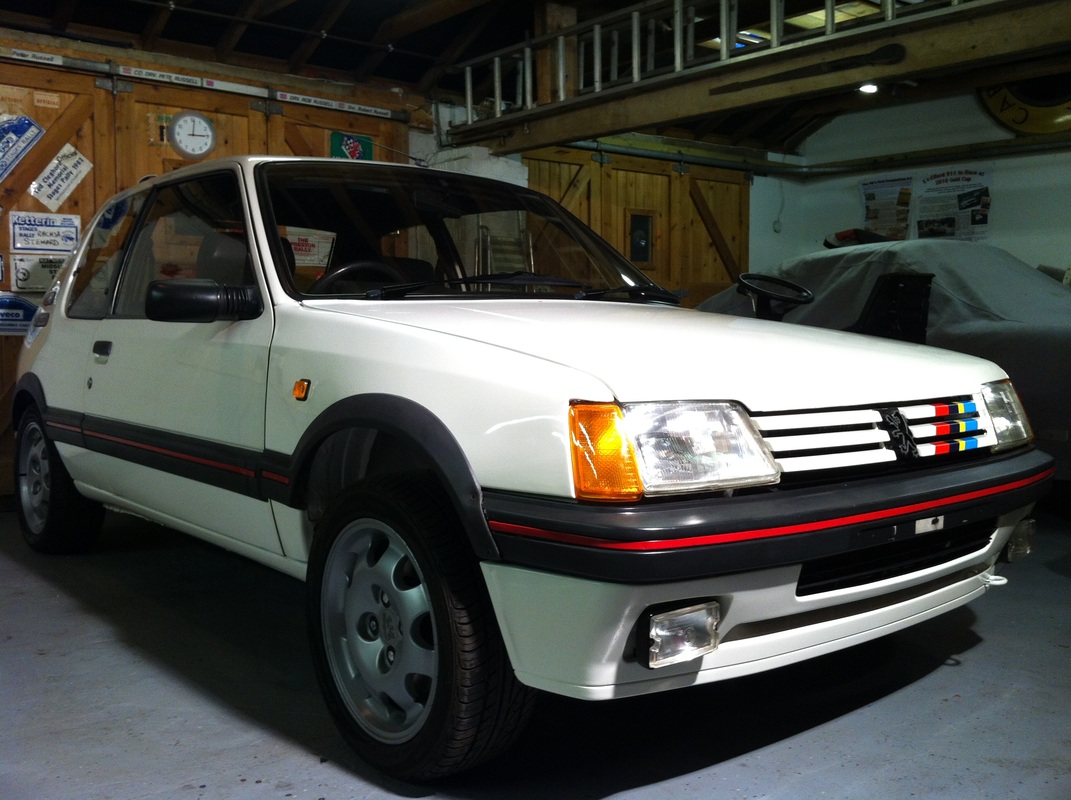
And there it is - all back together. I'm particularly happy with the paint match. The colour is "Alpine White", but both the paint shop and I weren’t happy with the look of either the "new" or "aged" paint cards, so they had a section of the original paint "electro-optically" scanned, which defined the exact mix and like I say, I'm happy to report has given a perfect match - time will tell how the two paints age from here.
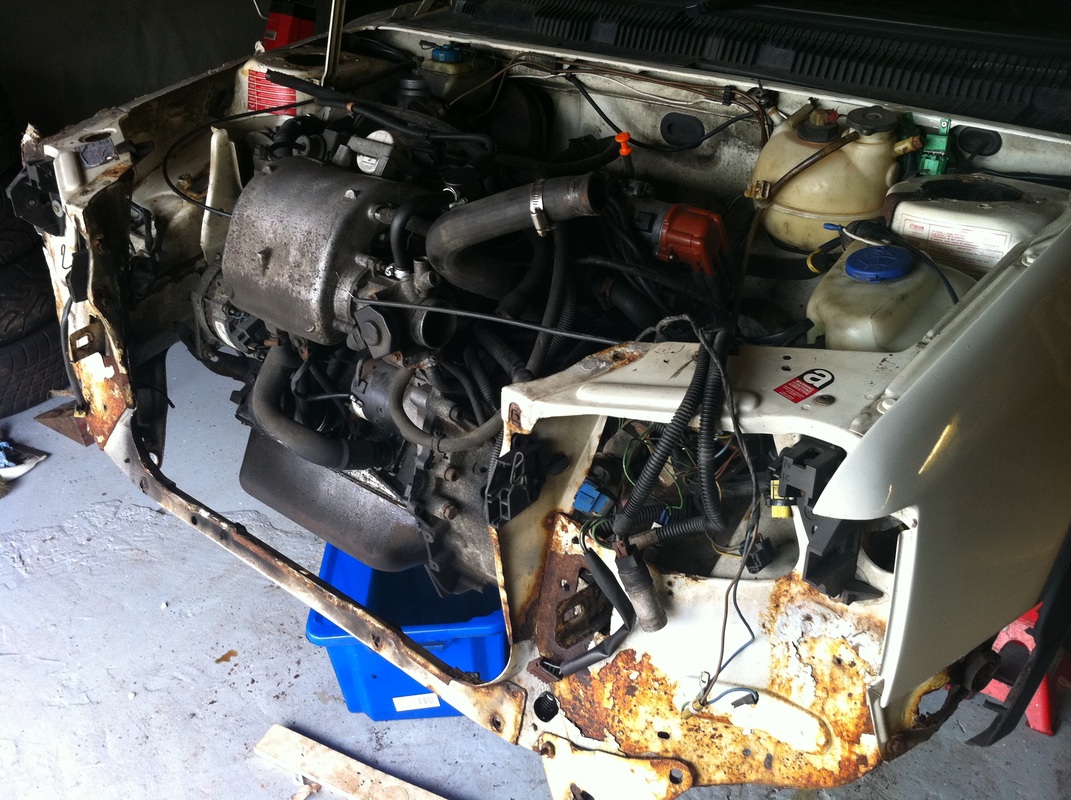
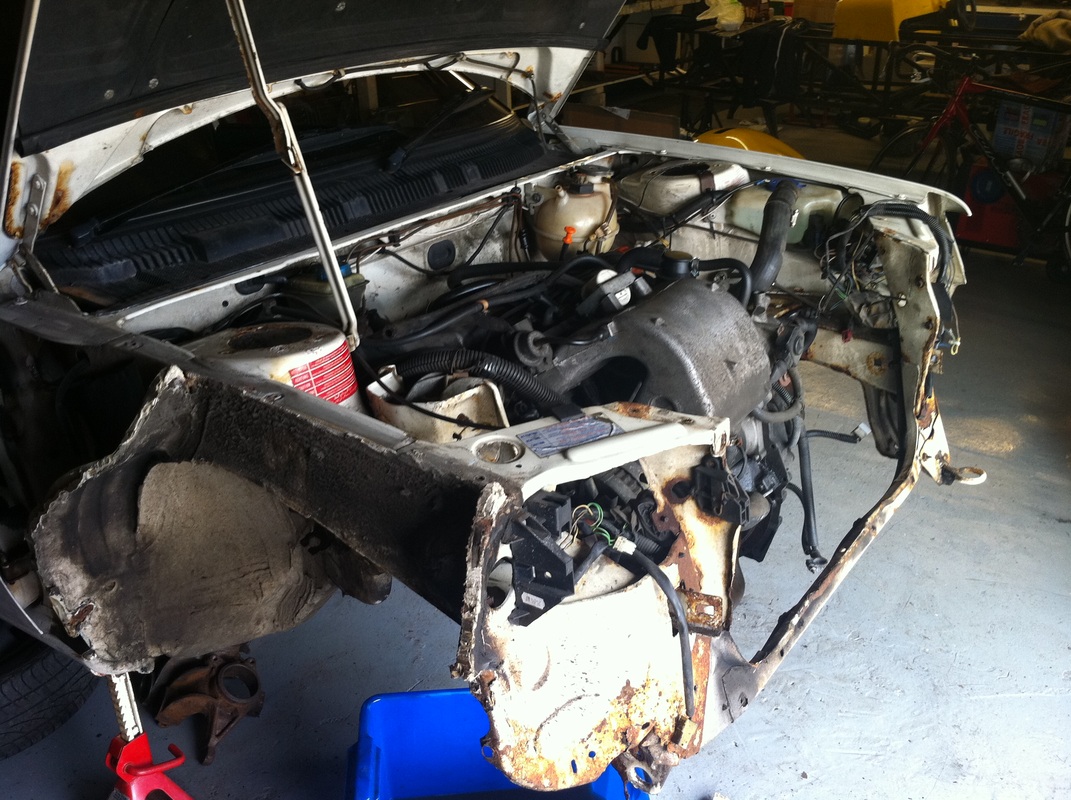
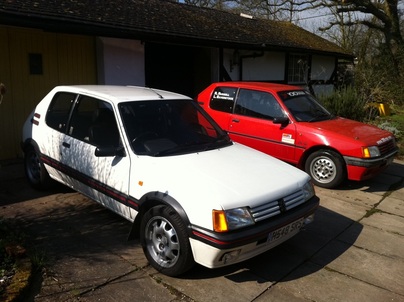
So it's time to look back and do a little "Before and After" comparison. 
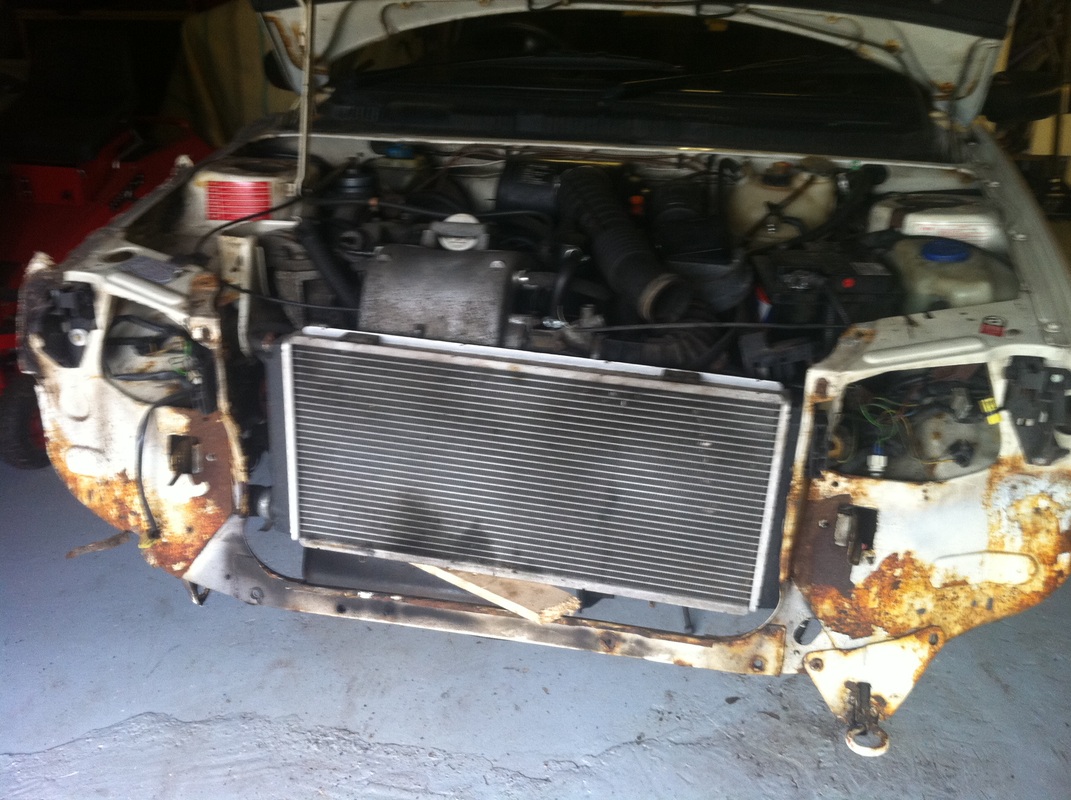
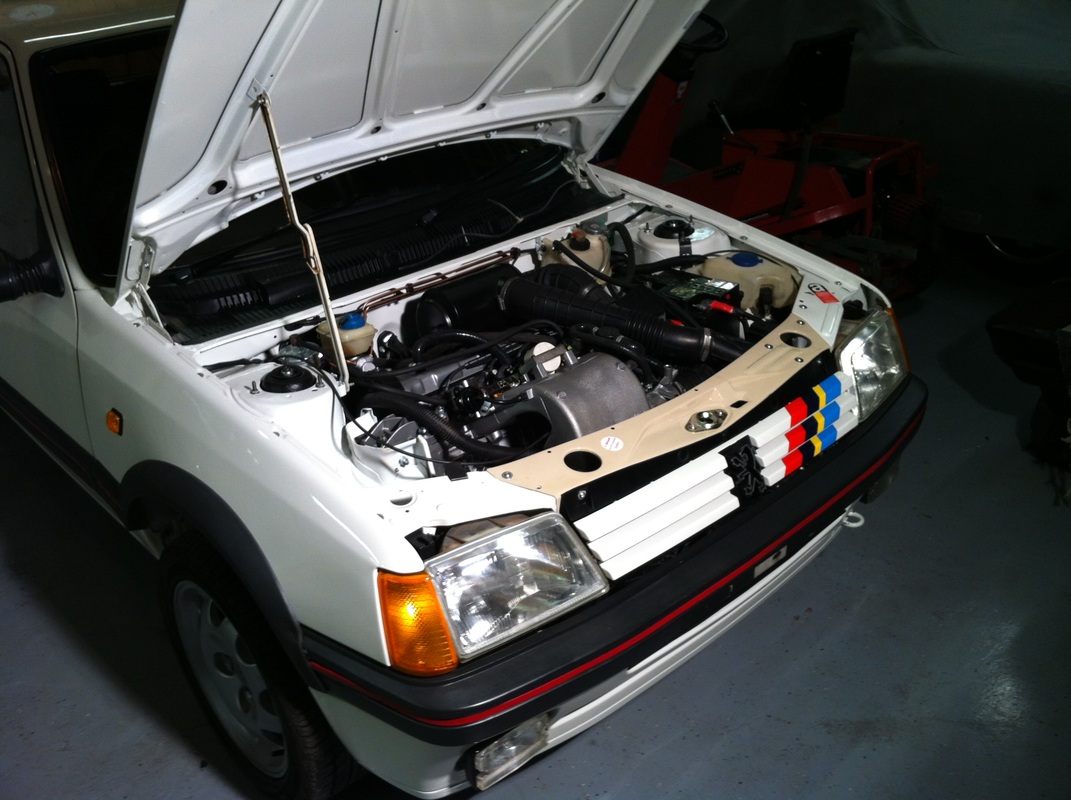
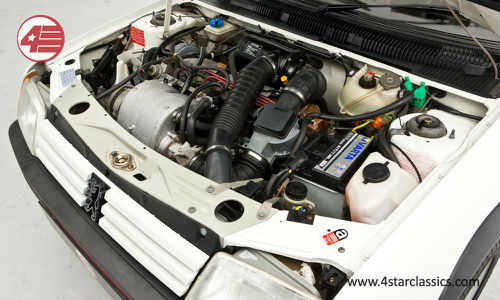
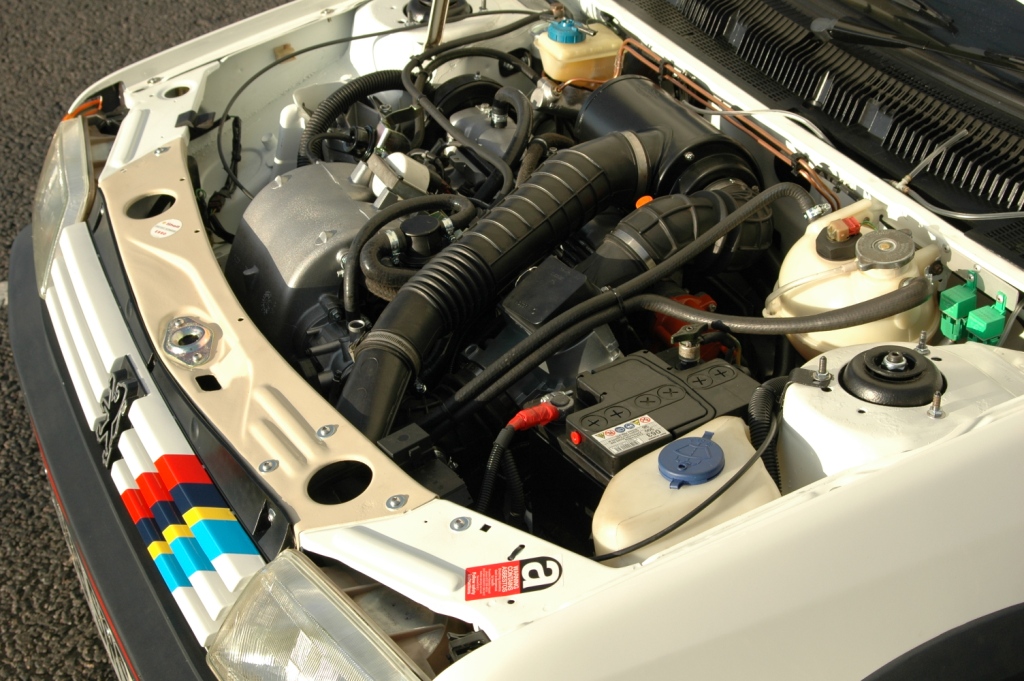
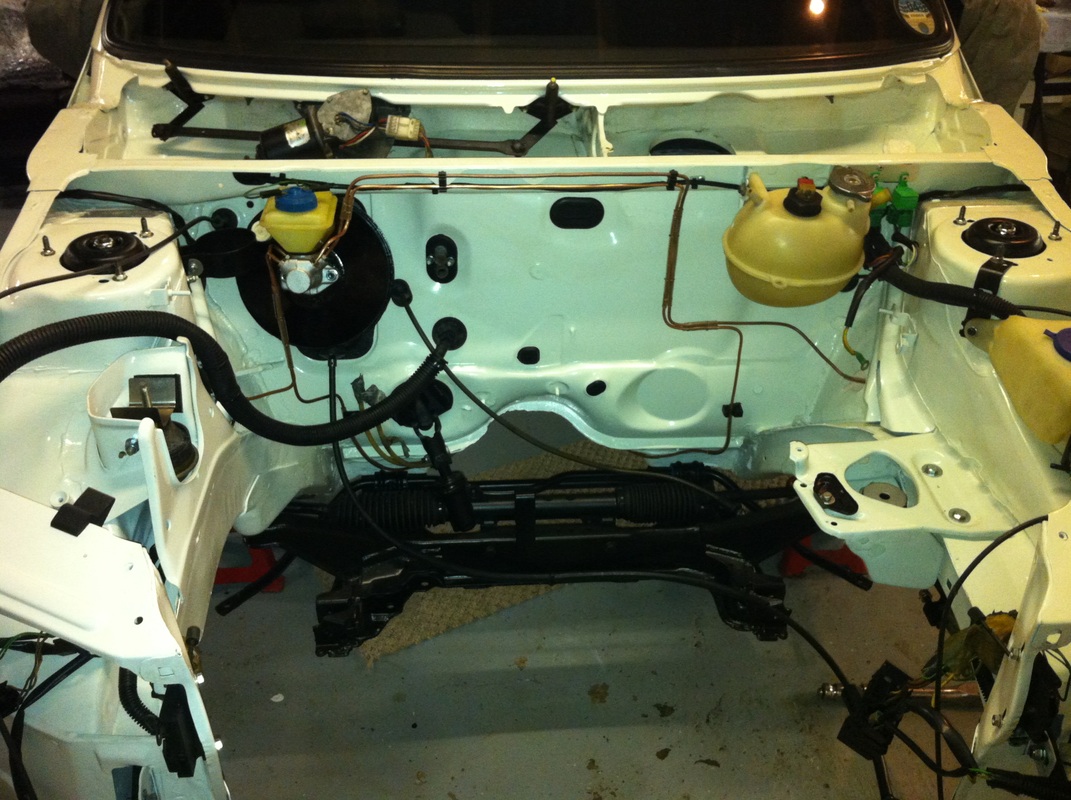
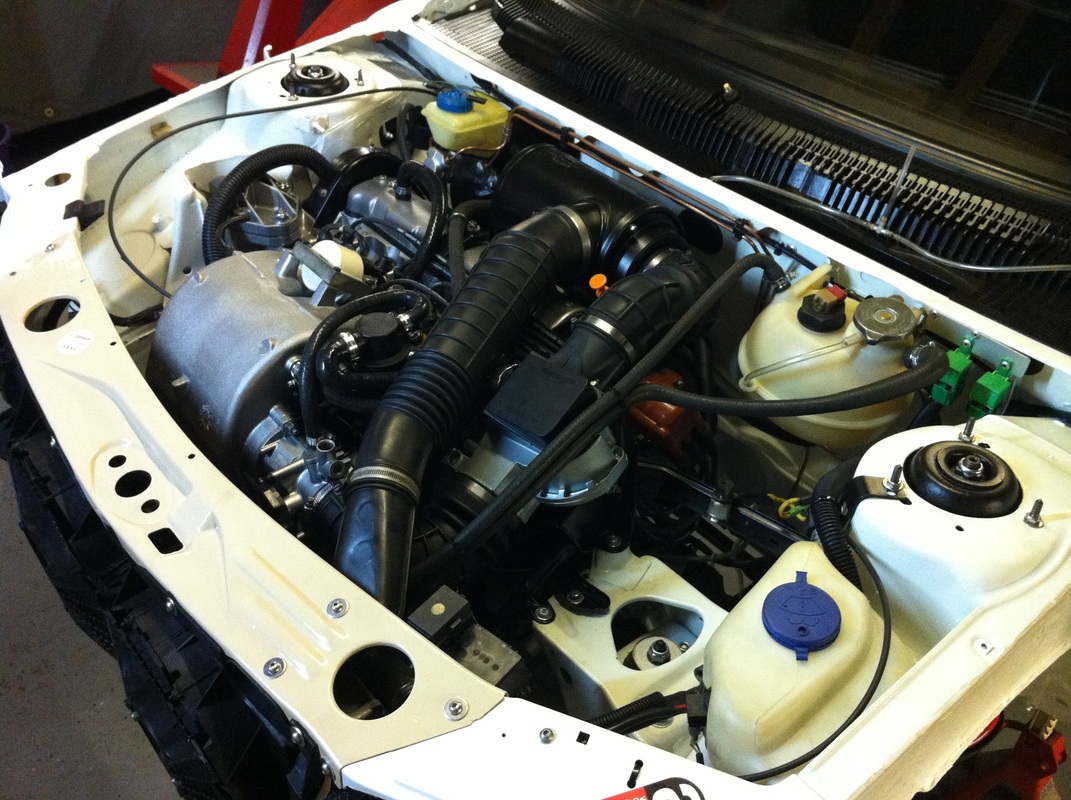
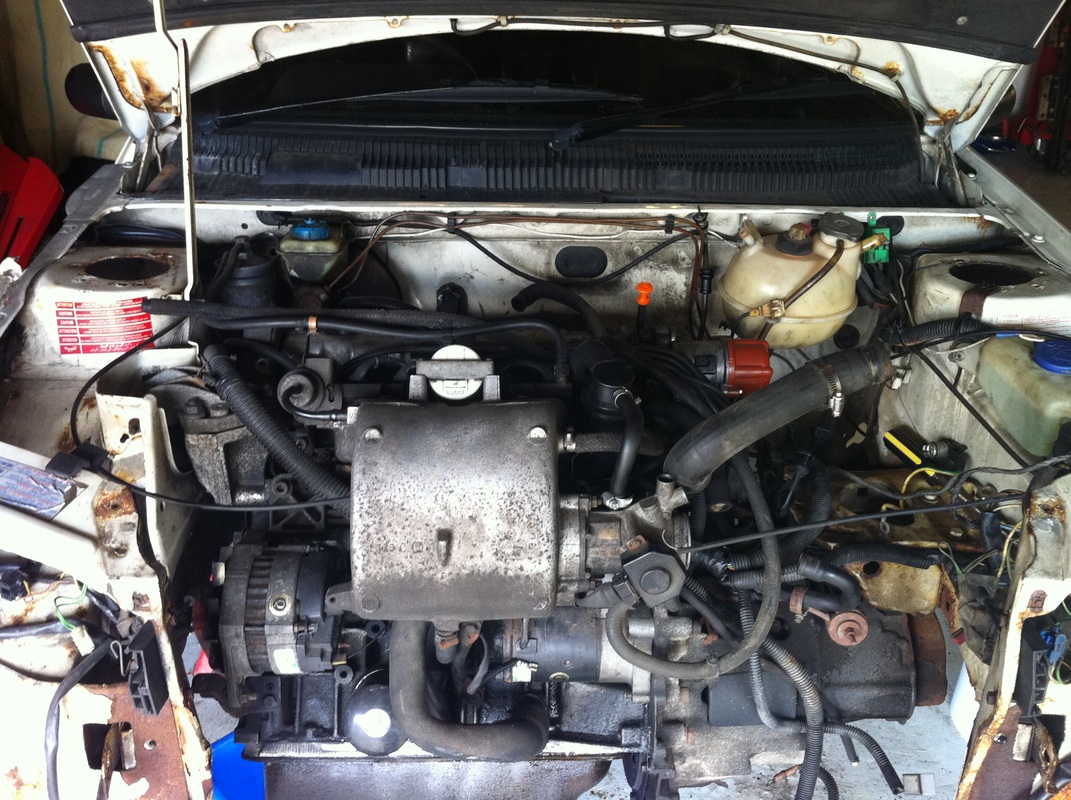
Here's another comparison that I'm particularly proud of, on the left is the engine bay of a 25,000 mile mint 205 GTI recently sold by 4 Star Classics, they have a great knack of finding some of the very best examples of some fantastic classic cars. On the right is my version!
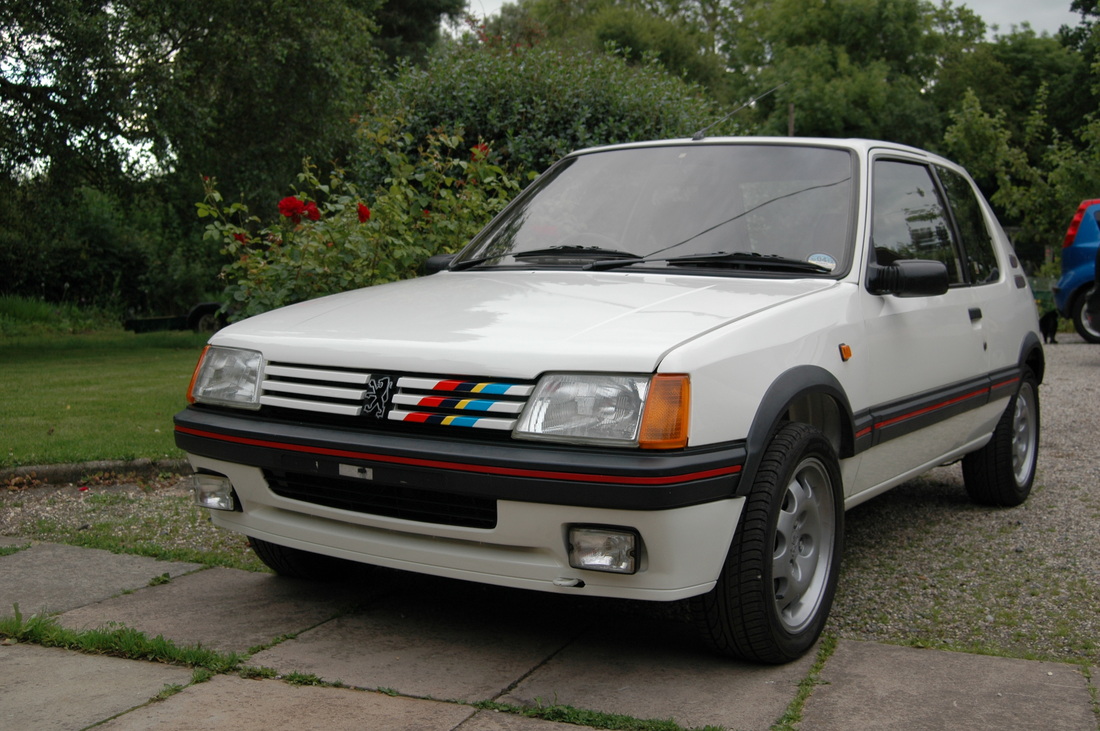
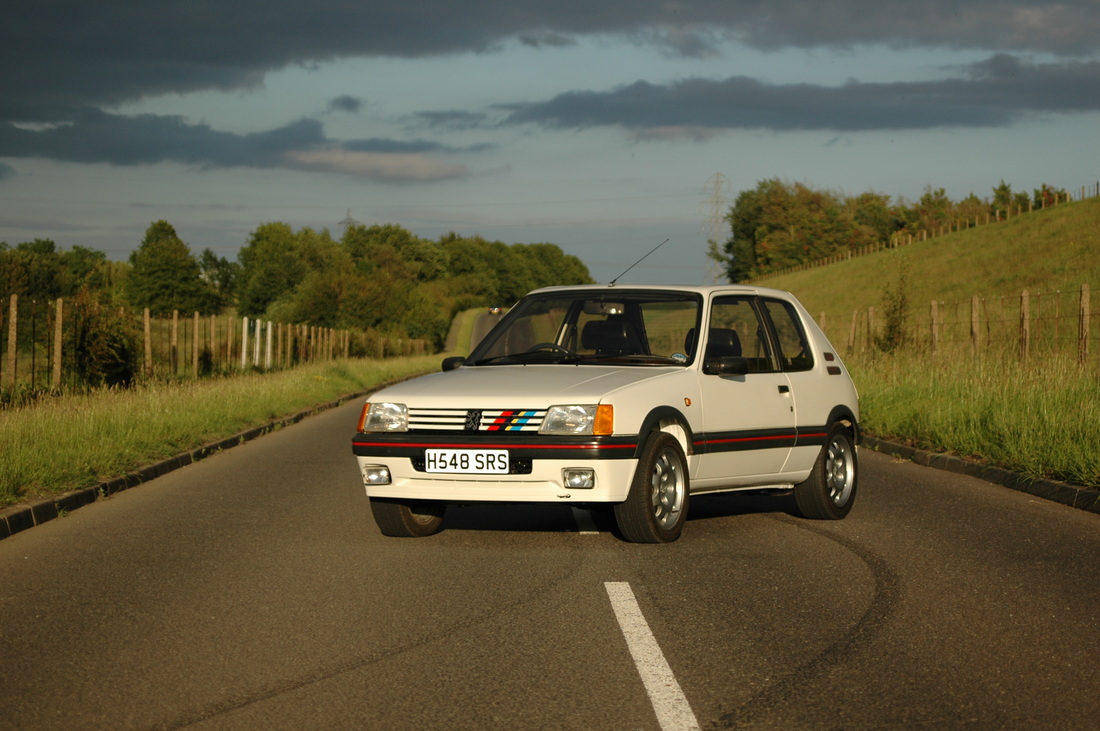
Finally here are a few shots taken during one of the first outings by my good friend and good photographer Nick Bilsborrow. (No I'm afraid I can't take the credit for the "road markings!") 
Picture
Picture
There we are! Another project ticked off! I have to say it's been a really pleasurable one to work on.
Thanks for your time interest.
Rob.
0 Comments

Peugeot 205 GTI Restoration Continues

1/31/2014

1 Comment

 
Well once again it's been way too long since my last update and for that I must apologise. However I'm still determined to share the progress that I have made on the 205 GTI restoration. There have been a few interesting additional projects that I have been working on as well, but I will come to those once this story is told!

In the last entry, the engine work was completed and I had just started fitting out the nice shiny new engine bay.
One of the bigger sub-assemblies to receive the shot blasting and powder coating treatment was the subframe, this mounts the lower suspension arms, the steering rack and also holds the "bell crank" of the gear linkage. Fortunately the oily dirt and grime had done a great job of preventing any serious structural corrosion, but it was certainly in need of a little TLC!
Picture
 
The Steering Rack I ended up replacing with a newly reconditioned part.
Once I stripped the original one down it was clear there was some fairly serious wear. There was a lot of play in the bushes, as well as the inner tie-rod joints and both gaiters were split. I looked into the price of replacement parts, to do my own job of reconditioning, but in the end the most economical solution was simply to buy an already reconditioned unit from GSF (German Swedish and French) and return the old unit as an exchange.
Below are a few "before" and "after" pictures of the subframe work.

(Click on the images to enlarge and read some more comments)
With the subframe restored, the under hood fitting out can continue.
I have made up new brake lines, they follow the original routing but I have chosen to use copper pipe, instead of the original electroplated steel "Bundy Tube", this is partly because the copper is easier to work with, but also because it doesn't corrode, so will be a "fit and forget" solution.
Picture
So here we are, ready for the Engine installation!
(note the just about original Asbestos warning sticker)

I chose to fit the engine first from above, and then the gearbox from below, it is possible to fit both together from below without the subframe in place, which is probably how it was done in the factory, but I chose my method to give me the maximum amount of manoeuvring room, and thus the best chance of ftting without damaging the new shiny paint!

With the engine in place, the wiring can be routed around it, this is not completely straightforward as the main bulk of the loom runs under the intake manifold, through the gap left by it's scroll shape, but with careful handling it can be fiddled through and connected up. Then the rest of the engine bay can be fitted out. The big bits being the cooling pack and then the remaining air intake hoses. I have also fitted the front struts, so the newly refurbished drive shafts can be assembled.
I have bought new Bosch dampers and Eibach springs, choosing a virtually original specification described as a "road rally" set up - the original springs and dampers are as far as I am aware no longer available. I wanted to avoid cheap pattern replacement parts, so I hope this will be a good compromise between originality, durability and comfortable on road body control - we'll see, I'm very much looking forward to finding out! 
The keen eyed among you might also have noticed that the front breaks aren't quite standard. I was lucky enough to have a pair of brand new 206 front callipers "in stock" from a previous rally car project, so I have chosen to fit those. They will still fit perfectly inside the 15" standard Speedline wheels, although they are slightly larger than the standard brakes. Plus it means I avoid the job of refurbishing the original calipers (but the original parts will be kept just in case there is a need to return the car to completely standard in the future). 
Picture
The next job is a dry fit of the new front wings, just to make sure they are correct, before sending them away for paint. (They are the second set to arrive as the first were damaged in the post - very frustrating but such is life!)

Then, with breath held and fingers crossed it's time to fill the engine with fluids and turn the key!

I'm delighted to report that after carefully spinning over with no plugs fitted to raise the oil pressure and following a final check for any forgotten parts, the

engine jumped into life straight away and settled to a wonderful smooth idle - phew!
I then left it to warm up while checking for leaks until the thermostat opened - and there it was - a running car once more!
This is a picture after its first run, down and up the drive.
Picture
So now I'm waiting for the wings, bonnet, bumper and grille to return from the paint shop and then I'm definitely into the final straight before it's ready for MOT and the open road!

Thank-you, as always for your time and interest!
1 Comment

205 GTI Gearbox and Pedal Box get a Makeover

1/29/2013

6 Comments

 
Picture
Ok, so here is another instalment of the Peugeot 205 GTI "Bulkhead Forwards" restoration that I'm carrying out.

Having taken the decision to carry out a thorough restoration job on the front suspension, front bodywork, engine bay and engine I have been busy with the strip down, body repair and a major engine restoration. (Which are all covered in the last few blog entries). Now it's time to get on with cleaning and restoring some more components. 

First up is the Gearbox, as you can see in this picture and the ones below cosmetically it's in quite a state. However when I drove the car about 250 miles home after buying it, there were no untoward signs of any major issues. It was quite and all the gears selected easily without any baulking etc. It clearly has a few oil weeps, but the majority of the oily grime has come from the various failed breather hoses and a failed rear crank seal on the engine, which have all been addressed by fitting new parts during the engine work.

So I took the decision not to carry out a major gearbox overhaul, instead I limited myself to giving it a thorough clean and paint, and some new seals, namely the input shaft seal, the two driveshaft seals and the gear selector seals, all of which could be carried out without splitting the casing.

After cleaning I stripped off the 5th Gear end cover and the mounting plates for blasting and painting. 

I gave the outer surface of the casing a coat of Eastwoods "Aluma Blast" paint, which I have to say was very easy to apply evenly and gave a real "As Cast" finish. I will report on it's durability once the car has done some miles. But on a different project I did use it on a friends differential casing. He then found the fill plug was completely seized so applied heat to the painted casing around the plug using a blow-torch. The plug was freed and to my amazement the paint didn't blemish at all! So it's already passed the heat test.

Here's the finished Gearbox, if you click on the pictures to enlarge them, you will be able to compare the painted outer surface with the unpainted surface on the inside of the clutch housing.
Picture
I also restored the drive shafts with new gaiters and grease, and a new link-shaft bearing (which was very tired, to the extent that I'm surprised it wasn't making a noise).

My next port of call was to start working to restore the other components within the engine compartment. one of those being the pedal box, brake master cylinder and servo assembly. I'm afraid my camera has corrupted the 'before' pictures, so I can only show you the end result, before and after re-assembly. 

Other than cleaning and painting the only work was to fit a service kit (containing all the rubber parts) to the master cylinder.

And here it is installed in the nice shiny engine bay! Along with a cleaned up De-Gas bottle. That I put through the dish washer (but please don't tell my wife!).

In the first picture you can also see that I have stripped the protective covering from the wiring harness, this is because on close inspection I found a few places with rather worrying damage, so I wanted to give it all a very careful checkover and and clean up before making the necessary repairs. 
And so that's another instalment, I hope you have found it interesting.
Next time I will run through the restoration and assembly of the rest of the engine bay parts, and the front suspension work. 

Here's a teezer of what's to come...
Thanks for your time!
6 Comments

205 GTI Engine Restoration In All It's Glory

1/8/2013

8 Comments

 
Hi again. Here is the story of my Peugeot 1.9 205 GTI "XU9JA" engine restoration. In the previous blog entries I have taken you through the engine removal and the first part of the engine bay restoration. Now for the meet of the job, the engine work.
Having stripped the whole engine to basic components, the first job is always to clean and inspect everything, some of this is done visually, as with the bearings, and some is done by measurement, the rings, thrust washers and crank journals etc.
What I found was the engine was in basically very good condition for it's age (approx 90,000 miles), but the various components that are designed to wear over time were all at least half way through their usefull life, and so, for this to be a comprehensive re-build, to last the car for another lifetime, those parts needed to be replaced.
So the crank, pistons, rods, piston liners, block, head, valves and the drive sprockets were all perfectly capable of being reused. The bearing liners (big end and mains), rings, every seal and gasket and the drive belts, along with most of the external hoses, and other servicable items, water-pump, thermostat etc all had to be replaced.
While carrying out the process of finding the most cost effective sources for all the parts, I degreased all the Aluminium parts and sent them away for Aqua Blasting, the results of which i have to say surpassed my expectation.
Here's the Cylinder Block "Before" and "After" Pictures
And here's the cleaned Cylinder Head, note the Cam Journals haven't been Aqua-Blasted, I protected these by clamping a piece of rubber hose into them before sending the head away, I wanted to be sure they weren't damaged as the cam runs in the head parent metal. As it turns out the blasting process is so gentle that I could have probably not worried. Look into the clean exhaust port and you can clearly see the original casting joint split line, it really did bring everything up just link new. 

Well almost, it also uncovered a little bit of corrosion on the head flame face - if you click on the 2nd pick to enlarg it, you can see what i mean - some of the damage was very close to the gasket sealing beads, so I decided to take the cautious approach and have the head skimmed. I only had a minimum amount of metal removed (0.2mm) so as not to increase the compression ratio significantly. 

A compression ratio increase allows the engine to run with a more advance spark for increased power, but this goes hand in hand with the need to run higher octane fuel. My plan is to have the car as a daily driver, so I didn't wish to go down the "tuned" route at the expense of having to fill the car with Super all the time.
Also while the block was away being cleaned I got on with the job of re-honeing the cylinder liners, in the 'before' picture on the left you can clearly see the vertical lines of bore wear, I used a "Flexi-Hone' tool to re-hone the bores and give then a nice nutral finish with the marks at approximately 45 degrees to the line of the piston stroke, this type of finish is designed to hold a film of oil on the bore surface when the engine is operating, to lubricate the rings as they slide up and down.
Picture
Here's the "Flexi-Hone" Tool, which simply mounts into a hand drill chuck, and a liner gently held in the vice ready for work to begin.

Once the Ally parts returned from cleaning, it was time for re-assembly to begin in ernest.

One part that has a bad reputation on 205 GTI ("XU") engines (both 1.6 and 1.9), is the very small section 'o' rings that seal the bottom of the liner into the block. These are very critical as a failure will see all the coolant leaking from the block water jacket into the oil sump, and the first time you will know it's happened will either be when the engine overheats through lack of coolant or when the bearings destroy themselves because they are being lubricated by an emulsified mess of mixed oil and coolant. They are notorious for leaking after major engine work, but that's almost always because the work has been done while trying not to disturb the liners or the seals, once disturbed it's impossible to know if the o'rings have broken or if some dirt has gone across the seal. So I would have to advise that it's much better to bite the bullet and remove the liners, do a very thorough job of cleaning everything, and ALWAYS build with new 'o' rings. I help the initial seal, and help hold them in place on the liner with a light smear of LM grease. Using these rules and this method I have not had a problem.

In the Pictures below you can also see the process of checking the gap dimension on the new piston rings, if they are too tight they can be adjusted by carefully filing the ends with a needle file, fortunately for me all the new parts were inside the spec limits.

With the bottom end comming together, next up was the head re-assembly, which basically means lapping and then fitting the valves, springs and collets. I had checked the valve stems and seats for wear and although not in as-new condition, they were not worn enough the justify the expense of replacing them.

Valve lapping is simply the process for 're-seating' the valves into the head to make sure they seal the combustion chamber perfectly. A grinding paste is added between the valve and the seat and the valve is rotated to grind the seat and valve into a matched pair.

In the right hand picture below you can also see the head face after the skimming process, there is still some evidence of corrosion damage but now it's nowhere near the gasket sealing bead paths.
With the top and bottom ends build, the next step was to fit them together, not forgetting the little in-line oil filter that sits in the lubrication feed to the head. It's job is important if somewhat short lived, it's simply there to catch any dirt that's trapped in the block oil galleries during the engine build process and it mainly protects the cam bearings, which as mentioned before run the the parent metal of the head and have a very close running clearance. Once the engine has run for a few cycles, the normal Oil Filter does the job of ensuring only clean oil enters the lubrication system, and the little in-line filter is relegated to the role of passenger!
Now the job becomes a little less serious, but just as satisfying, dressing the engine with the Oil Pump, Primary Drive, Mounting Brackets, Covers, Manifolds and then then Fuel System and Throttle Body and even the Air Filter. 
Having had such a great result with the Aluminimum Aqua Blasting, I went down the road of having all the steel parts shot-blasted and powder-coated, which set them off a treat too. 
This is a nice little detail before and after pair, showing how far I have come, sometimes it's very satisfying to look back! (I took this to make sure I got the coolant sensors back in the right place (I'm glad I did because I clearly got it wrong at the first attempt!)
And there we have it, the fully restored engine, ready for installation. But before that can happen there is some more work to do, preparing the body and a little gearbox make over to be completed too. But that will have to wait until next time.

Thanks as always for you time!
Picture
8 Comments

205 Engine Comes Out.....

1/7/2013

1 Comment

 
Hi, and first an apology for the far too long time without an update, call this a New Year's resolution if you will, but I have promised myself to get back in the habit of sharing my projects and their progress, not only the 205 project but also all the other work that i have been up to over the last few months.

So where to begin? Well, I will start at the point where I left the 205 "Bulkhead Forwards" restoration, and that was at the point of stripping it apart and removing the engine.
Once that ratchet is set to un-do it really doesn't take long to pull a car apart. I had the engine out and in pieces in just one weekend, and when I say in pieces, that's exactly what I ended up with! 
Once out and with the head removed it was clear that the cylinder liners could do with re-honing, and the main and big end bearings, although not totally worn, were definitely showing signs of wear. 
In the head the valves all looked to be ok, but in need of de-coaking and lapping, and the stem seals were very crunchy.
So the strip was all the way to a component level, and I was now facing the prospect of checking the crank and liner dimensions, to make sure they were serviceable. Before making a concerted effort to source all the right replacement parts.
On the body side of things, after a close inspection and a poke with a screwdriver it really wasn't looking too bad, there was a fair amount of superficial rust, but only the chassis leg, that I already knew about and the right hand head light panel were badly rotted, and there was another small hole through the bulkhead just where the right chassis leg attaches to it (where there is a little recess that was full of damp dirt, so not surprising it had rotted really).
The pictures below show before and after removal of the offending headlight panel. It's quite a complicated shaped part which needed careful removal so as not to damage the other panels, and their flanges that would provide locations for puddle welding on the new part.
I sourced a new panel, from E-Bay, which was a good match and then by sub assembling the bolt on slam panel and the bonnet made sure I had it in exactly the right position before welding it in place.
By this time I had also stripped the rest of the engine bay of all it's parts, and cleaned it all down with thinners, then a wire brush and finally a good rub with a scotch bright pad to 'key' the remaining paint ready for primer, and then the top coat. The end result being a nice shiny white engine bay, which was then just waiting for a nicely restored engine to fit into it (and a nicely restored pedal-box and servo, and a nicely restored wiring loom, and new break lines, and restored brackets etc etc! It's never quite as straight forwards as you hope it might be is it?). But it is all very enjoyable and to see the body starting to really improve was motivation enough to push me down the long road of engine restoration! Which I will cover in my next blog entry (I promise it won't be such a long gap this time either!).
As a little teaser for my next blog. I decided to experiment with the 'new to me' component cleaning method of "Aqua Blasting" for all the Ally engine components. It's a process that blasts using a soft grit impregnated water jet, and is said to be gentle enough to only clean and not leave a surface finish of it's own (like you get with normal grit blasting). The only area that I protected was the cam bearing journals in the head, as the cam run's in the parent metal of the head and I really didn't want any damage or dimension change on that surface, but looking at the end result, I'm not sure i needed to bother. Anyway, more on that next time...

Thank-you for your time.
Rob.
Picture
Before
Picture
After
1 Comment

The Devil Is In The Detail

5/22/2012

1 Comment

 
Hi, well i have taken a good look round the 205 GTI and the extent of the work required is roughly what I was expecting for the body / chassis, however ALL the suspension, braking and steering components are looking VERY tired.
Here are some pictures looking round the front end of the car.
So the next operation is to set the ratchet firmly to "un-do" and get going with taking it to pieces.
The Anti-Roll bar drop links prove to be the only real sticking points, these I have cut off to save messing about (they needed to be replaced with new anyway), I can then deal with the offending seized nuts at a later date.
(click on the smaller pictures for additional comments)
Picture
And that's basically how it stands at the moment. 
The dismantling will carry on, next up is engine removal, I'll share that story in my next update!
Thanks for your time and interest.
1 Comment

A New Project... there's a 205 GTI in the building!

5/18/2012

1 Comment

 
Picture
So, I have another project underway, a rather selfish one, as it's being carried out on my 'new-to-me' "daily drive'.
It's a car that I have always promised myself, ever since i was a lad! A Peugeot 1.9 205 GTI. Ever since I rode in one as a young rally mechanic, when the 205 GTI was at the height of it's powers it's been on my "must own one day' list, back in February I achieved that goal!

The car was bought knowing full well that it would need some fettling. The intension being to take on "bite sized chunks" and spread the work over a period of time.

Having driven the car 240 miles home after buying it in Bury near Manchester I identified the first "chunk" would be the front suspension, including a makeover of the bodywork under each front corner, this and a simple swap of the rear dampers, to keep things balanced.

Well, that was the intension! Now.... have you ever heard of the term "project creep"? You know, when circumstances cause some changes to your plans, and things take on a more, errr, substantial stance! Well, see if you can follow my logic.....

Once the wheels were off, It was clear the car was "very original", a nice fact but at 22 years old the other term i could use would be "very tired"! Including the discovery of some reasonably extensive rot on the right chassis leg (see pic below), that would need to be welded, certainly before the next MOT, but really as part of the "front corner" restoration. Now, this is where things start to creep.... 

Picture
Picture
As you can see the engine sits very close to the area that needs welding and it will clearly be a serious restriction for any grinding / cleaning up etc, so...... with the agreement of my very understanding wife "we" have decided the engine needs to be removed and....... the engine clearly had a few leak issues, mainly from perished hoses but also from various gaskets and seals as well so...... having made the decision to remove the engine, clearly there is no point putting it back without fixing the leaks, whick will require the purchase of a gasket set and..... if stripping the engine to fit new gaskets, clearly it makes sense to check over the rest of the engine mechanicals too, so..... the engine might as well be stripped and checked "properly" and...... (finally), it clearly would not make sense to put a nice shiny rebuilt engine back into a dirty engine bay, so...... the concept of "Bulkhead Forwards" restoration has been born. I plan to take you through my journey in the next few blog entries! 

Please watch this space! (and follow me on twitter if you would like notification of my next blogs)
Picture
1 Comment

    Author

    To learn more about me 'Rob Russell' click here.

    Archives

    February 2014
    January 2014
    January 2013
    May 2012

    Categories

    All

    Follow me on Twitter

    RSS Feed

Powered by Create your own unique website with customizable templates.