Ok, so here is another instalment of the Peugeot 205 GTI "Bulkhead Forwards" restoration that I'm carrying out.
Having taken the decision to carry out a thorough restoration job on the front suspension, front bodywork, engine bay and engine I have been busy with the strip down, body repair and a major engine restoration. (Which are all covered in the last few blog entries). Now it's time to get on with cleaning and restoring some more components.
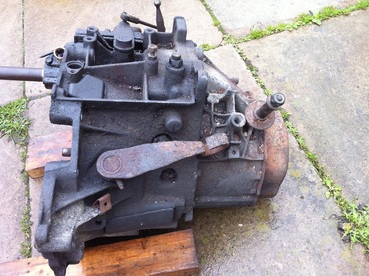
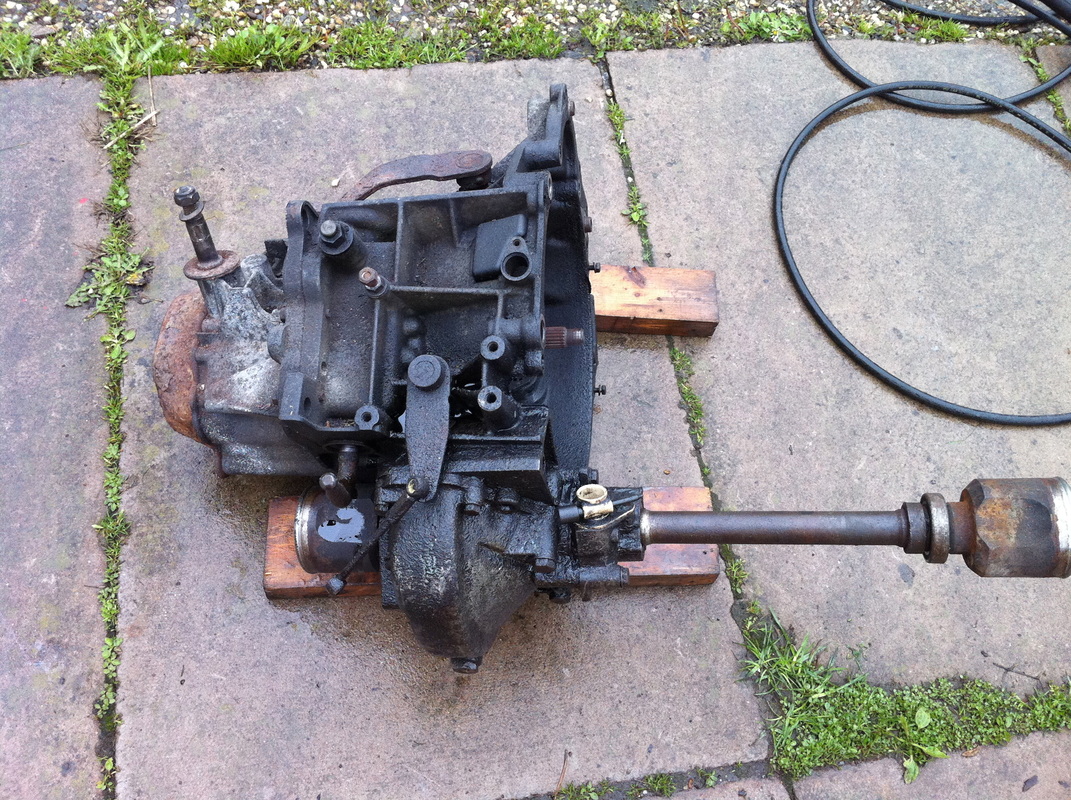
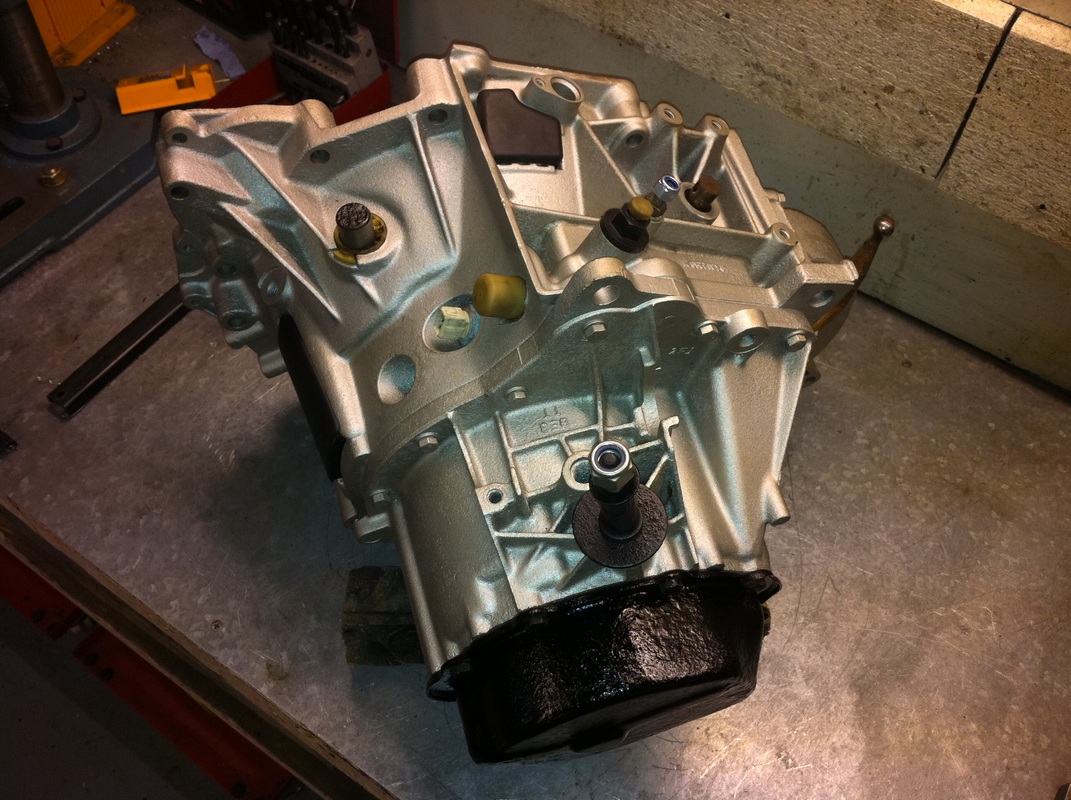
First up is the Gearbox, as you can see in this picture and the ones below cosmetically it's in quite a state. However when I drove the car about 250 miles home after buying it, there were no untoward signs of any major issues. It was quite and all the gears selected easily without any baulking etc. It clearly has a few oil weeps, but the majority of the oily grime has come from the various failed breather hoses and a failed rear crank seal on the engine, which have all been addressed by fitting new parts during the engine work.
So I took the decision not to carry out a major gearbox overhaul, instead I limited myself to giving it a thorough clean and paint, and some new seals, namely the input shaft seal, the two driveshaft seals and the gear selector seals, all of which could be carried out without splitting the casing.
Having taken the decision to carry out a thorough restoration job on the front suspension, front bodywork, engine bay and engine I have been busy with the strip down, body repair and a major engine restoration. (Which are all covered in the last few blog entries). Now it's time to get on with cleaning and restoring some more components.
First up is the Gearbox, as you can see in this picture and the ones below cosmetically it's in quite a state. However when I drove the car about 250 miles home after buying it, there were no untoward signs of any major issues. It was quite and all the gears selected easily without any baulking etc. It clearly has a few oil weeps, but the majority of the oily grime has come from the various failed breather hoses and a failed rear crank seal on the engine, which have all been addressed by fitting new parts during the engine work.
So I took the decision not to carry out a major gearbox overhaul, instead I limited myself to giving it a thorough clean and paint, and some new seals, namely the input shaft seal, the two driveshaft seals and the gear selector seals, all of which could be carried out without splitting the casing.
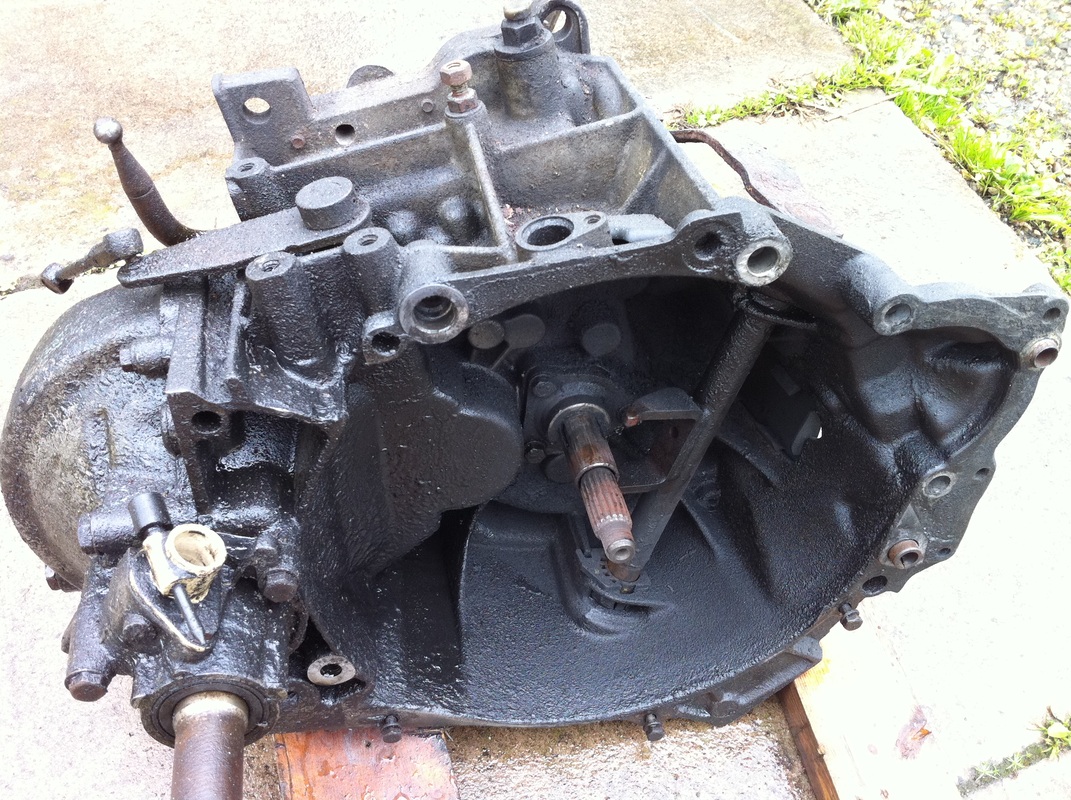

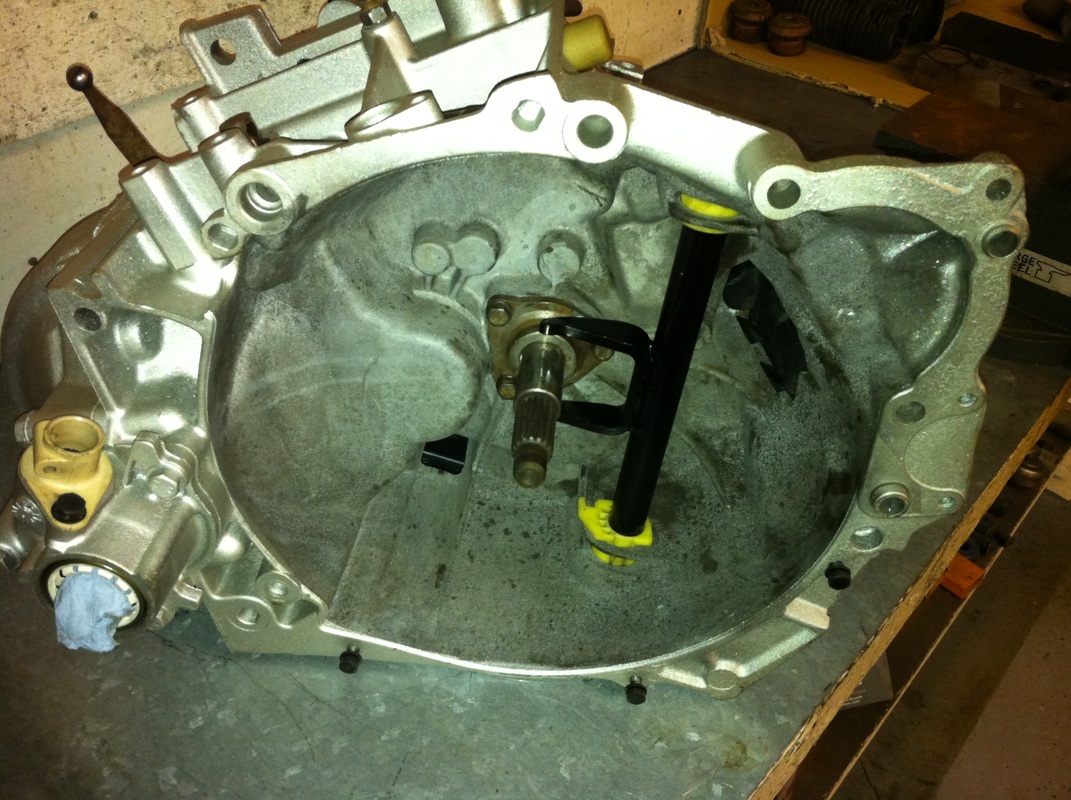
After cleaning I stripped off the 5th Gear end cover and the mounting plates for blasting and painting.
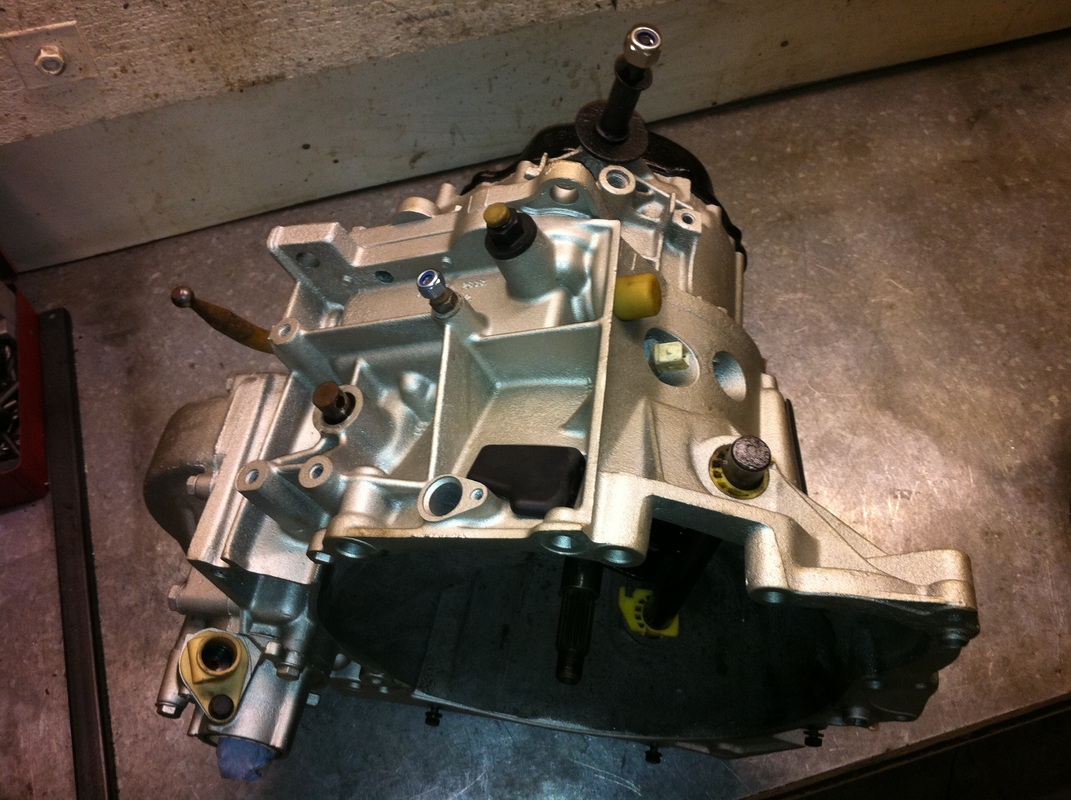
I gave the outer surface of the casing a coat of Eastwoods "Aluma Blast" paint, which I have to say was very easy to apply evenly and gave a real "As Cast" finish. I will report on it's durability once the car has done some miles. But on a different project I did use it on a friends differential casing. He then found the fill plug was completely seized so applied heat to the painted casing around the plug using a blow-torch. The plug was freed and to my amazement the paint didn't blemish at all! So it's already passed the heat test.
Here's the finished Gearbox, if you click on the pictures to enlarge them, you will be able to compare the painted outer surface with the unpainted surface on the inside of the clutch housing.
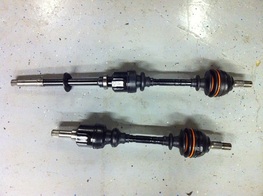
I also restored the drive shafts with new gaiters and grease, and a new link-shaft bearing (which was very tired, to the extent that I'm surprised it wasn't making a noise).
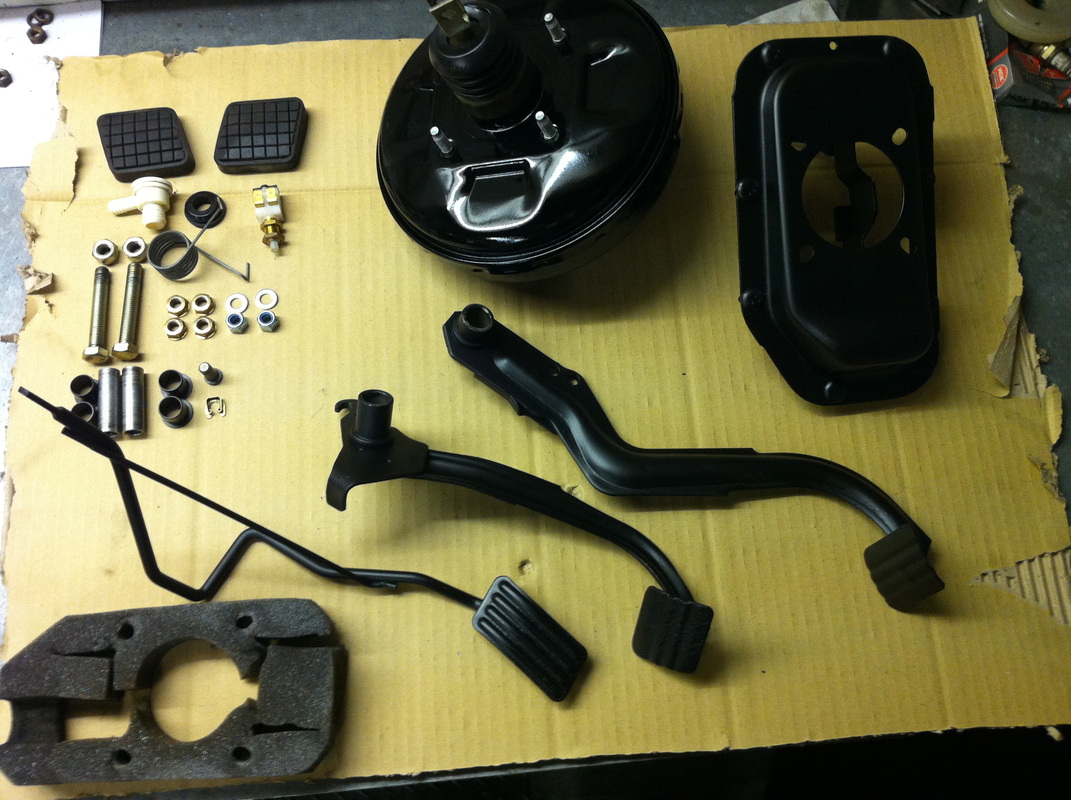
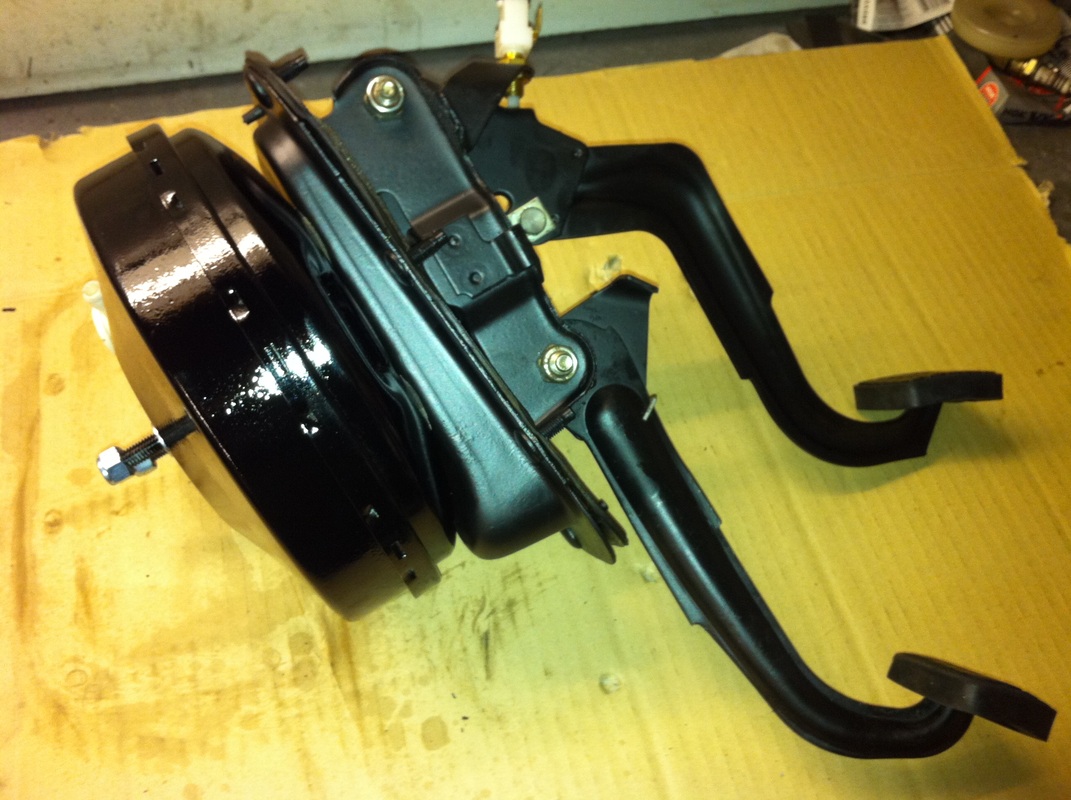
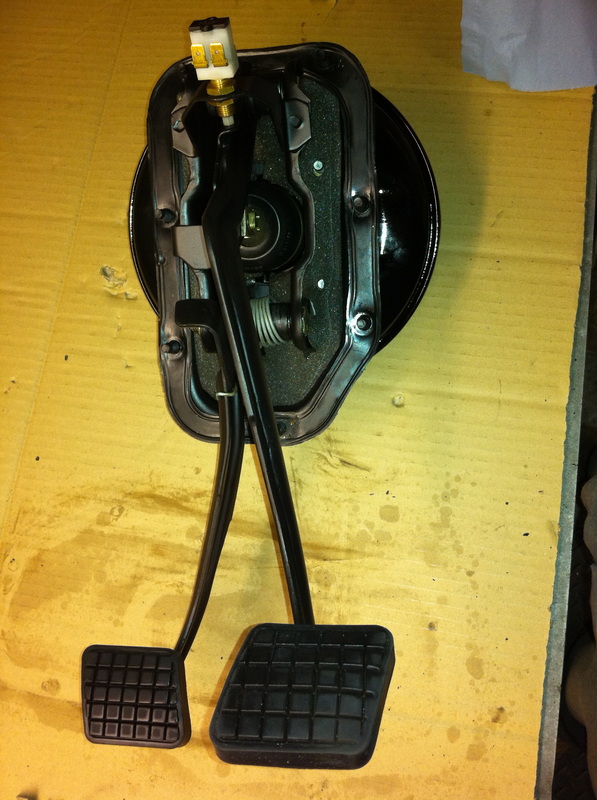
My next port of call was to start working to restore the other components within the engine compartment. one of those being the pedal box, brake master cylinder and servo assembly. I'm afraid my camera has corrupted the 'before' pictures, so I can only show you the end result, before and after re-assembly.
Other than cleaning and painting the only work was to fit a service kit (containing all the rubber parts) to the master cylinder.

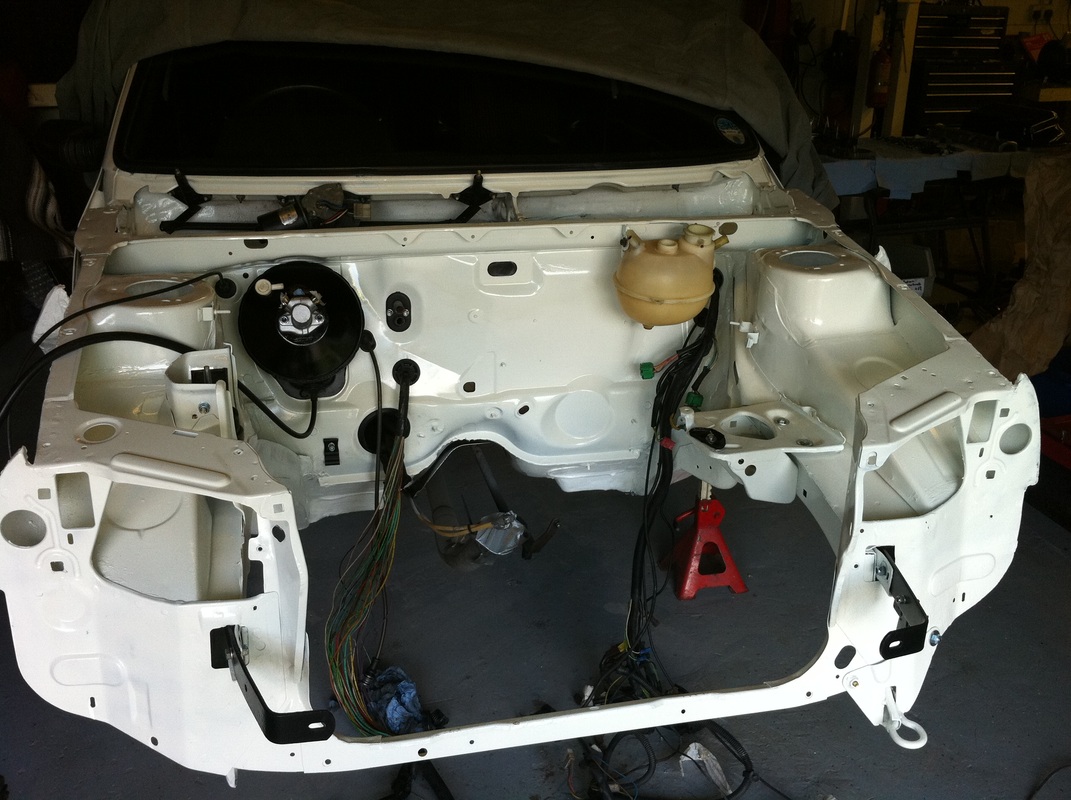
And here it is installed in the nice shiny engine bay! Along with a cleaned up De-Gas bottle. That I put through the dish washer (but please don't tell my wife!).
In the first picture you can also see that I have stripped the protective covering from the wiring harness, this is because on close inspection I found a few places with rather worrying damage, so I wanted to give it all a very careful checkover and and clean up before making the necessary repairs.
In the first picture you can also see that I have stripped the protective covering from the wiring harness, this is because on close inspection I found a few places with rather worrying damage, so I wanted to give it all a very careful checkover and and clean up before making the necessary repairs.


And so that's another instalment, I hope you have found it interesting.
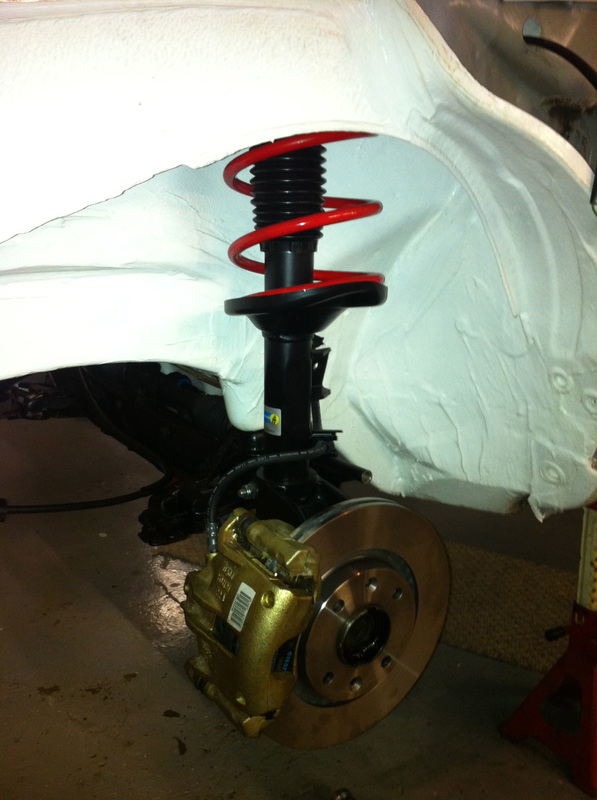
Next time I will run through the restoration and assembly of the rest of the engine bay parts, and the front suspension work.
Here's a teezer of what's to come...
Next time I will run through the restoration and assembly of the rest of the engine bay parts, and the front suspension work.
Here's a teezer of what's to come...

Thanks for your time!
 RSS Feed
